August 26, 2015
How to Build a Floating Shelf
Home Interior
How to build a floating shelf under the television or anywhere you need one.
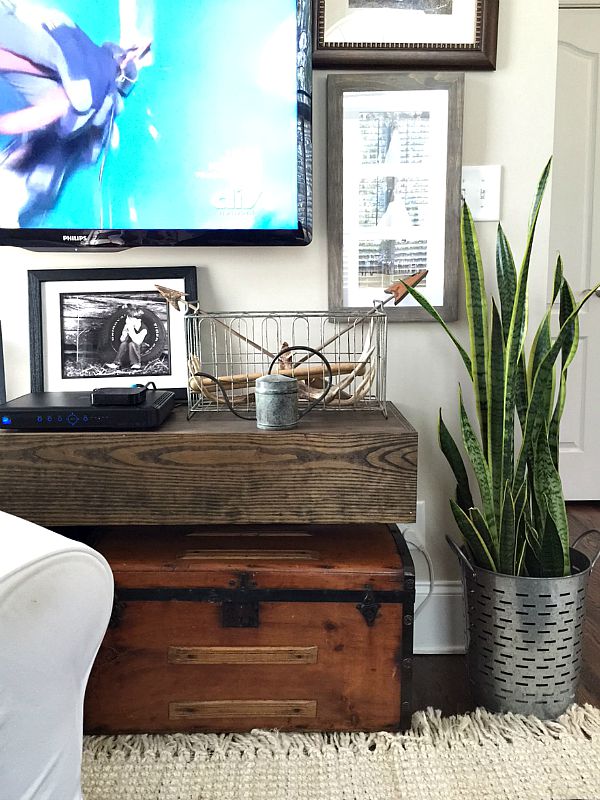
These shelves look way more expensive than they are. You can make them any size, they are easy to custom build for your space. This is a budget friendly idea for how to build a floating shelf DIY that anyone can do. Our family room is a cozy spot, I guess you would say it’s pretty small…in order to have as much seating as possible and to accommodate the tv components, we built a custom shelf. This wasn’t our first option, we started out with a couple different pieces of furniture, none of which really worked for the space. I wanted something compact but efficient. After looking at several tutorials for shelves we came up with one that we were happy with. I wanted a shelf that looked substantial but didn’t weigh a ton. You can use these basic instructions to create a custom shelf for your space. Here’s what we did. Supply and Cut List for the frame
- 1 - 2” x 3” 48 1/2” long
- 3 - 2’ x 3” 13 1/4” long
- level
- drill and drill bits
- lag screws
- 6 - 3” wood screws
- stud finder
for the shelf
- 1 - 1”x12” board cut at 48” long
- 1- 1”x4” board cut at 48” long
- 1 - 1” x 8” board cut at 50” long
- 2 - 1”x8” board cut at 15” long
- finishing nails or nail gun
- stain or paint
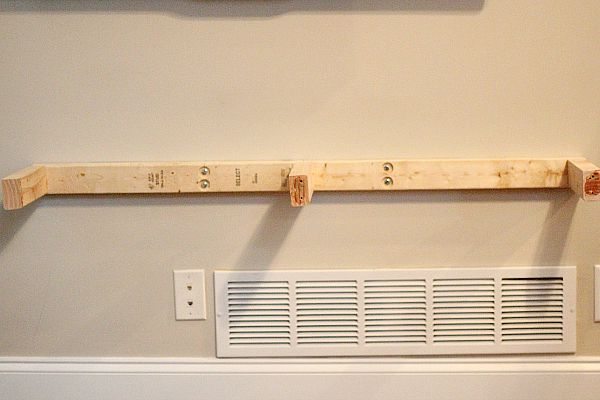 Use the 3” wood screws to attach the 3 arms to the 48 1/2” frame, do this from the back before it’s attached to the wall, are you saying DUH ;). One arm on each end and one in the middle. Decide where you want your shelf, use a level to mark your wall. Use the stud finder to find the studs. Pre-drill your frame and attach to the wall with lag screws, these guys hold a lot of weight really well.
 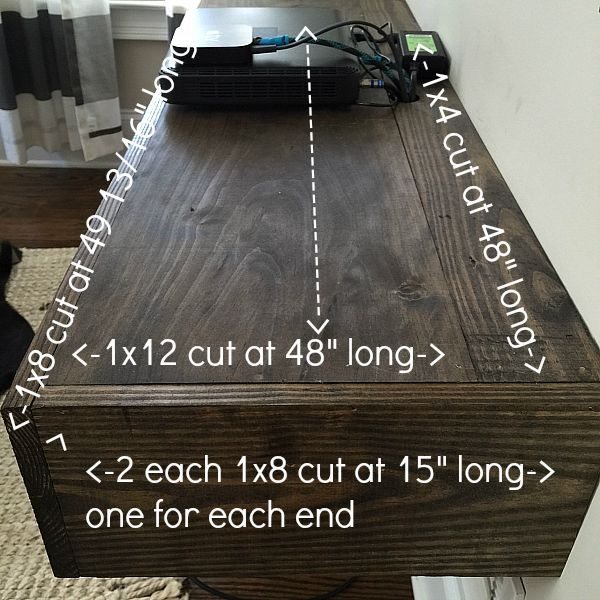 Cuts as listed above for the floating shelf. I stained my boards before they were attached, you can paint or stain them to coordinate with your home.
 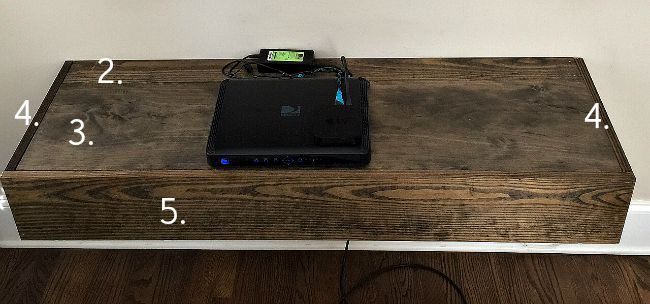 Attaching the shelf to the frame. 2. Attach the 1” x 4” with finishing nails or nail gun to the top of frame. We also drill a hole for the cord in this piece above the outlet below. 3. Attach the 1”x 12” to the frame by nailing it to the left, right and center with nails. Position next to the 1” x 4” above, to create a seamless look. 4. Attach both of the ends - 1” x 8” cut at 15” with nails on the side to the 1” x 15 1/2” top (you can use glue here too) we didn’t and it looks just like it did when we built it months ago. 5. Attach the front 1” x 8” cut at 49 13/16” with nails along the top and sides.
 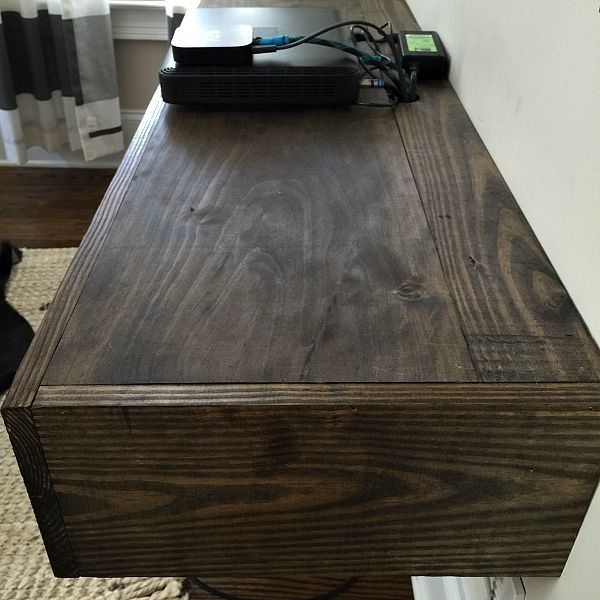 In this photo you can see where we drilled the hole for the cords. This easy DIY for floating shelves makes it easy to customize for any space.
 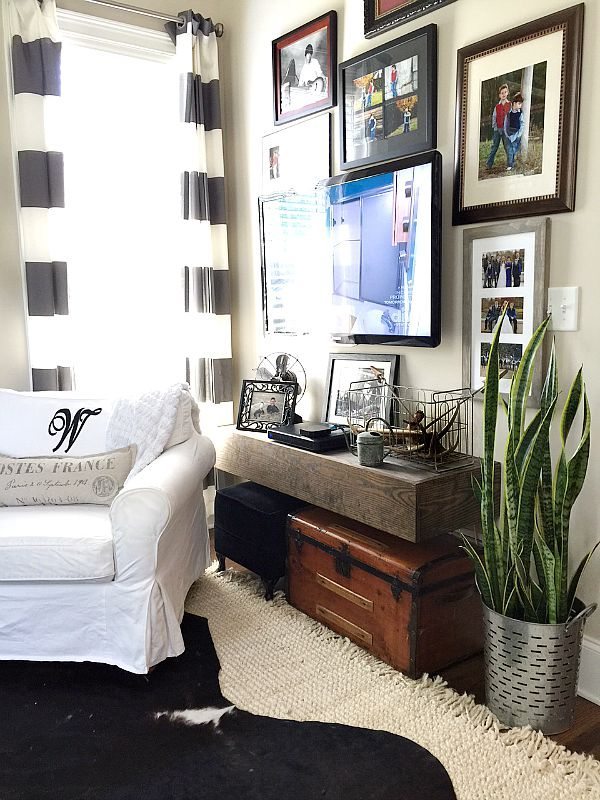 Overall dimensions for this shelf: 50” w x 15” d x 7 1/4” h and it’s 18” off the floor. The addition of the wide board makes this floating shelf look very substantial. But we know better! Pin it for later:
 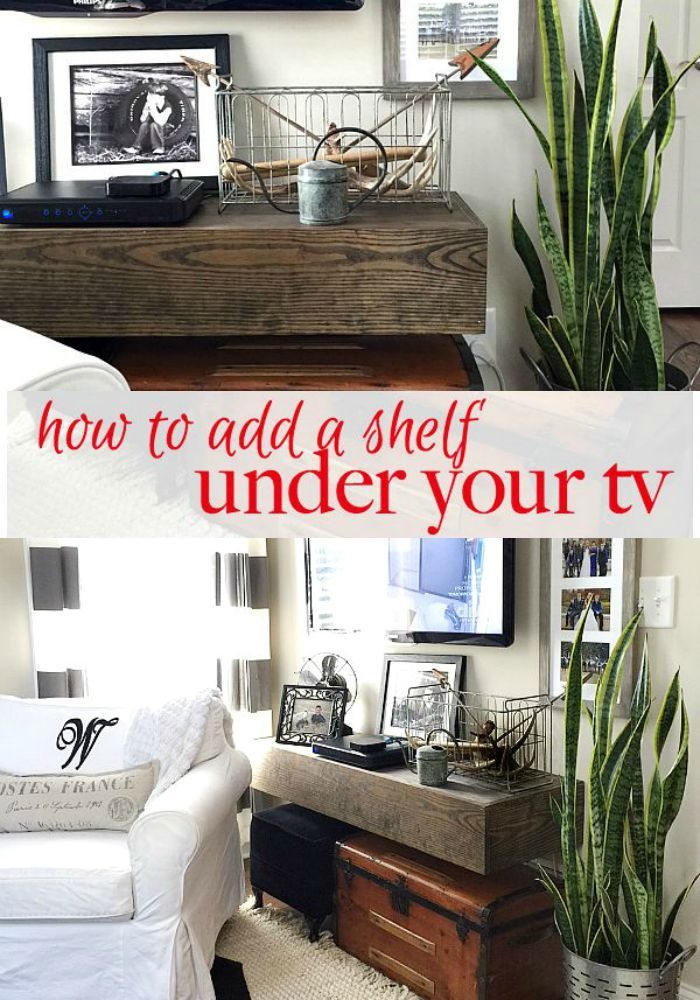 Do you have a spot for a floating shelf? Please let me know if you have any questions! Thanks, Debbie
12 Comments
ArchiveVery cool idea!
Supply list for frame calls for 2 – 2′ x 3″ 13 1/4″ long. Should this be 3 - 2" (not ') x 3"?
Wow this post is perfect timing. I was chatting with my friend about this so I just sent her the link. So cool and seriously perfect timing!
Love it, looks great and pinned it. (Although to the wrong board so I have to go back in and fix that).
Thank you Bliss!! I appreciate it :)
That is brilliant Debbie! Looks great and I love the color of the wood too. :)
Happy Weekend to ya!!
xo
Nancy
Thanks so much Nancy!
Oh my goodness Debbi, I love this shelf!
Featuring you this week... xo
Shoot! I'm not sure what happened to the "e" in your name... Sorry Debbie!
Thanks so much Desiree! I really appreciate it!
xo,
Debbie
Love the shelf and my husband is getting ready to build it! He's curious as to why the 1 back frame board (2″ x 3″ x 48 1/2″ long frame) is cut to 48 1/2, but the two top boards (1″x12″ board cut at 48″ long and 1″x4″ board cut at 48″ long) are cut to 48". Shouldn't the frame board be cut to 48" as well? Thank you for your advice.
If you look at the photo you can see that the side boards come up to the top of the and surround the 1"x12" and the 1"x4" boards. It's make more of a snug fit.