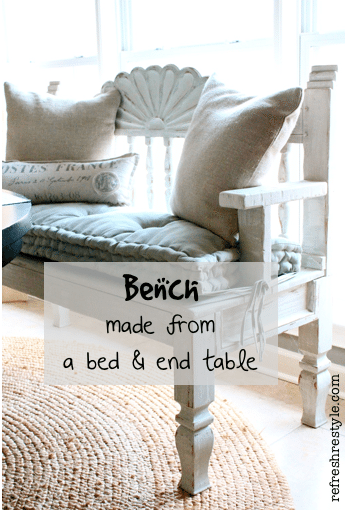
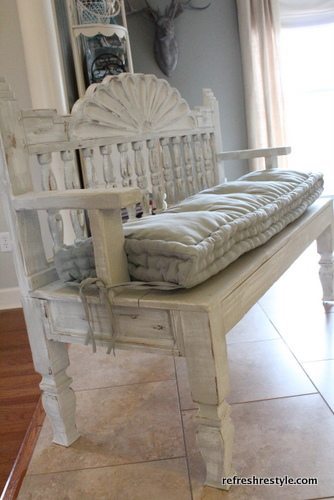
How to Make a Bench The refreshed bench is finally in the house.
It’s a long story and it goes like this,
Justin called and said he was coming home for the weekend. He loves to work on projects with us. He wanted to know if we had something in the works.
ok let us show you how to make a bench from these goodies:
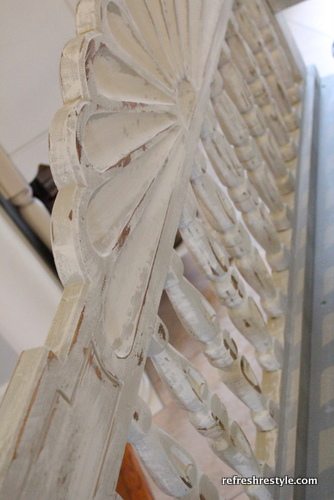
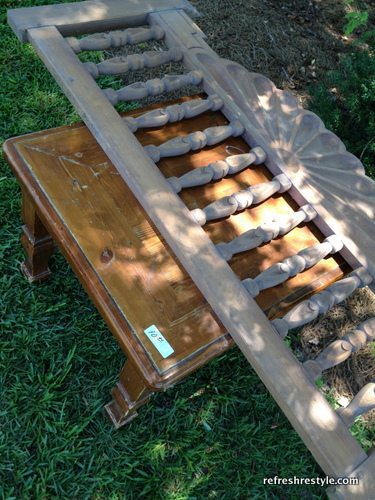 As a matter of fact we do. From the very first time that I saw this $19 headboard.
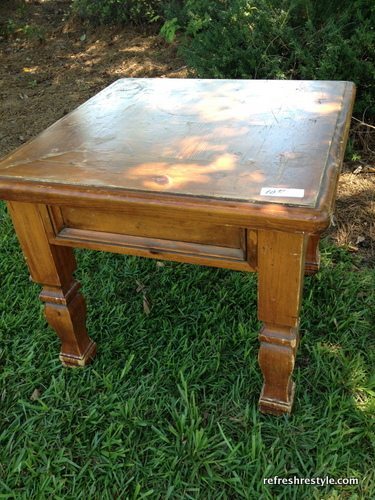 I knew what I wanted to do with it. When I spied this end table at the Habitat Restore, I knew I had found my legs!
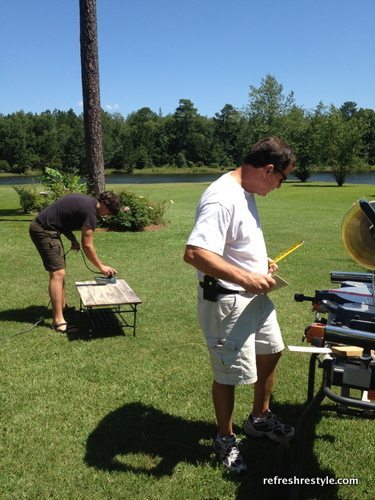
This is what I like to see in the back yard, two handsome dudes with power tools!
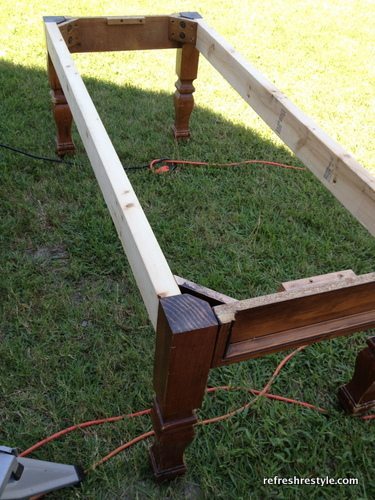 We removed the table top, used 2×4’s to create the seat area, leaving the sides of the end table in tact.
Affiliate links included.
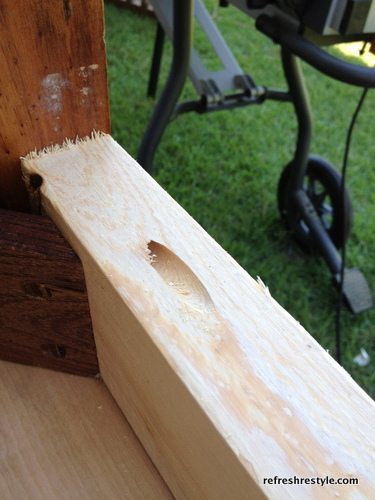
Using the Kreg jig, glue and screws to secure it all.

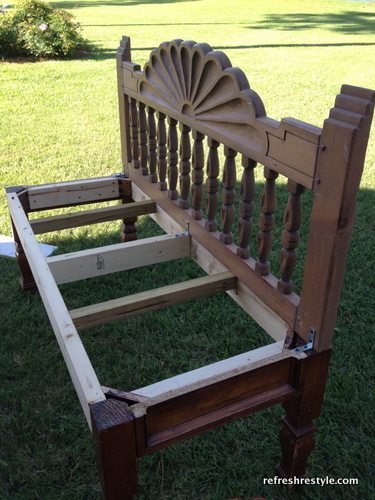
Screws and L brackets were used for added security to hold the headboard in place.
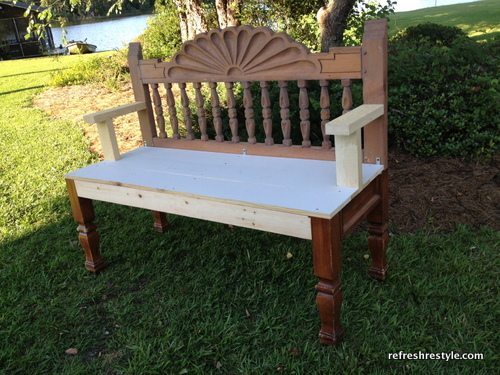
More 2×4’s for armrests 🙂
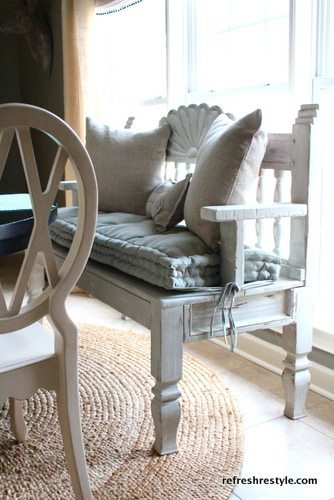
And this is how she sat for months and months in the garage. Barry kept saying that the new wood just looked too new and the legs made the seat too tall. I said don’t worry about that new wood, I can take care of that. I just need you to cut those legs off a little! One day I drug it out and said, its time to finish this! With a grinder to put some gouges in the new wood, a sander to round the edges and a saw to cut the legs off, Barry got busy 😉
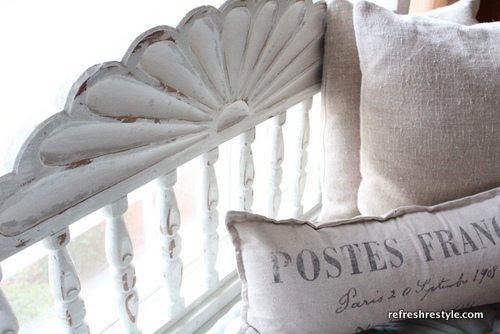
I painted with two different colors and distressed the whole thing.
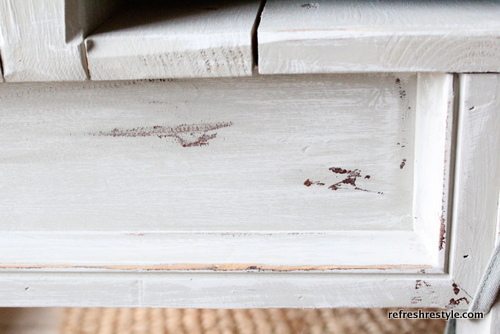
The grinder created some marks on the armrest similar to the headboard. Now that its painted, there’s no difference in the wood.
I didn’t bother to fill the holes, it’s rustic and distressed.
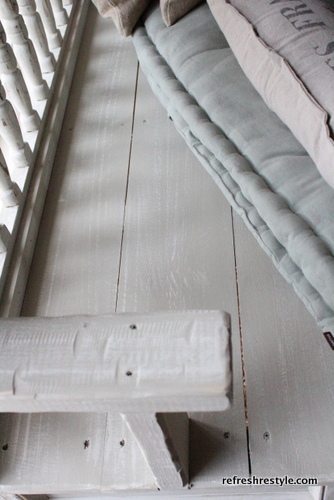
I ordered the cushion from Ballard Designs and I love it.

The color is Spa.
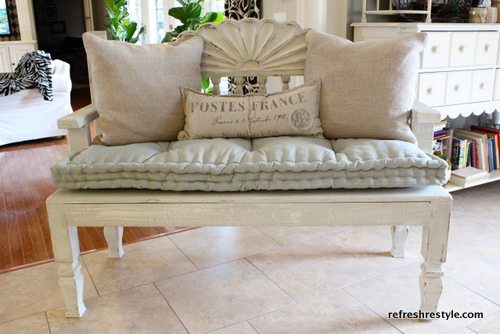
I love her.
Here’s where she lives now, out of that dirty garage for good 😉
Thanks Barry and Justin!
ps. Justin, time to come home again 😉
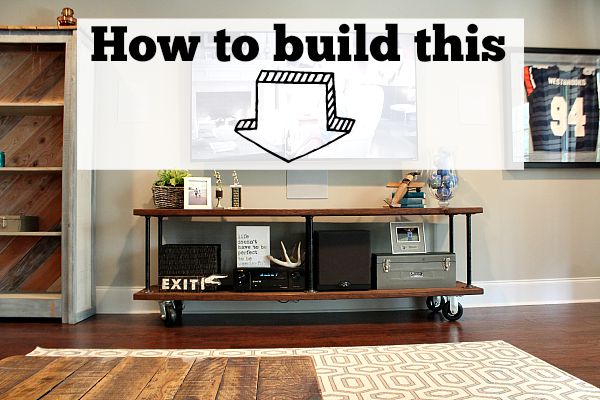
See how we built this entertainment center:
see more: DIY furniture ideas.
Su-weet!! I really love that bench. Great vision on the small parts.
Oh your bench turned out beautiful! Yall did a wonderful job on it, and the paint job is great. Love how it turned out!
I wouldn’t lean back in it!
Oh this turned out amazing! I love it! Now if I could only find what I need to make me one! Thanks for sharing.
Hi Debbie,
Loved this creation of bench from a bedhead and an end table – truly inspiring!
The idea has made me think that maybe I could do something similar but with a wooden double bed that has built in side tables BUT to shorten it so as to make a couch?
The bed cost a small fortune and has proved too big for any of the places we have lived since buying it
Am wondering where to begin?
Thanks for any input.
I love this bench! I have a Queen headboard I wanted to turn into a bench but wasn’t sure how to start but this is an awesome tutorial. I’m totally going to find a table at the Restore for my legs as well. Are those L brackets really all you need to keep the headboard in place?
Thank Heidi,
The L brackets are just one point of support. After the L-brackets are put on you lay your board across them and attach and the arm also supports the back. So there are 3 areas of support for the back. I hope this helps 🙂
Debbie
Debbie, this bench is beautiful! Looks like you have two very handy and skilled craftsman using those power tools. I love the details of that headboard. I’m making a trip to Habit for Humanity resale store. I know one might have to keep going back week after week because the turnover of stuff coming in is amazing. I need some type of a bench at end of DH’s bed so he can sit down to put on his shoes/socks. He sits on the edge of the bed and I’m petrified he will slide off and fall and break a hip. He’s so imbobile now; that’s all I need is for him to break a hip. I need a bench that would have a bench where he can also put his shoes under it when they are not being worn. I get tired of picking 3 pr. of shoes plus his bedroom slippers up so he or I don’t trip over them. He was always so neat and picked up after himself but with the lack of mobility, it is difficult for him to do a lot of things he always did before.
Good luck with your bench for DH 🙂
Your bench is lovely- loved that you combined the legs from the little table and sides- and this looks doable, even if I have no men with power tools helping me?! Congrats on such a creative project and thank you so much for sharing 🙂
I love, love, love this bench……gonna start looking around for my headboard…..lol
Thanks Terre!
L.O.V.E. ! What an amazing piece!! I love everything about it, from the shell headboard to the painted finish. You knocked this one out of the park! ~Deborah
I am very impressed !!! Great job on the bench. I am wondering if you are satisfied with the stability of the back the way it is attached with the L bracket. Does it have any wiggle to it at all ?
Thanks for asking Karen, the piece is very stable, we added a piece of wood on the back and attaching the arms added even more stability!
Debbie
Can you please post a photo of the back side of the bench, as I don’t see one here. I get all of the process except the area where the headboard sits on the 2 X 4 piece that runs the length of the bench.. Are they flush where they meet up on the back side or does the 2 X 4 extend on the 2 inch part more than the thickness of the headboard ? Hoping you have a photo from the back, either finished or unfinished. Thanks dear….again, this is such an awesome bench with beautiful design and creativity. Great job !
I love this – especially the fan back! Sometimes ya just gotta let something sit until it hits you and you know exactly what to do next. Very creative!
Can ii have it?? <3
Isn’t it cool when your kids want to be part of the action…I love that! and what skills you are teaching him…to reuse and restyle – the bench turned out amazing – I love the colors you chose and the fact that you didn’t fill in the nail holes…gives it extra character! Thanks for sharing…I’ll be sure to be on the lookout for a pretty headboard…something like that would look great in my entryway!
I love this project, I have my husbands very old headboard and footboard stored in a closet taking up useless space, now it has a purpose!!! I have already transformed about 5 pieces of furniture that needed lots of love and can’t wait to do this!! Thank you for sharing!!
It is gorgeous! I love it!!
Wow what a gorgeous bench! Love the finish. I am definitely going to pin this onto my BENCH LOVE boards on pinterest! And will be on the lookout for headboards to repurpose!
http://pinterest.com/patinaparadise/bench-love/
It looks like you purchased the bench. So, amazing! You have a great eye for building wonderful pieces of furniture.
This is really cute. I have seen iy done with the head and foot board but not with the table. Opens up a whole new train of thought. Thank you, Cheryl
I LOVE it! It turned out so good! The finish is beautiful! I love repurposing things, super fun!
Brilliant idea! I love its distressed look! This is such gorgeous bench! Thanks for sharing 🙂
That is one of the most amazing “headboard” bench transformations I have seen! Really!
What a perfect headboard to make a bench out of ..and how incredibly creative to use an end table as the base! Love it!!!
What a spectacular headboard and end table to work with and you definitely made it work out to be even more awesome!
Found you on Hometalk, this is amazing!!! I’m a big fan of repurposing furniture myself , and you really hit the nail on the head with this one! Love it:)
XO, Christy
Stunning.!!!!!
I love the bench, I saw something similar to this in a magazine a few years back, but it wasn’t this pretty. Great job.
Jeannie
This is fantastic! I love how it went from a little frankenstein-ish to white fantastic! Nice job!
Beautiful bench. I want one.
Totally awesome! And what wonderful helpers you have there!
This is incredible! I love it! I am featuring this at somedaycrafts.blogspot.com
That bench is stunning! So happy to have found your blog. I will be back on a regular basis! Thank you for sharing!
Wow, Debbie – that is just an amazing transformation – I love it!
Absolutely fabulous job! Love the pieces you put together to make this, so inspiring!!
this bench is gorgeous! i’m sharing your post with all my facebook friends ~ i just know they will LOVE it too!
xo ~ kristi
This is stunning! I love, love, love it so much that it is on it’s way to my Pin! Thanks for sharing your awesome talent. Patti
Wow, that is just gorgeous! What an amazing job you all did…I love it!
I absolutely love this Debbie!!!
Great idea Debbie – that is definitely one for the ugly thrift store update record books! Pinning this – and then looking for my own ugly table!
Kelly
Thanks so much Pamela! I am including in my features today. Starts at 2:00 PST. -K
Wow! This is a amazing transformation, who would think that one could make such a wonderful bench from old furniture pieces. Nice Work!
Debbie
I LOVE a great headboard bench! It’s been way too long since I’ve made one (bum shoulder)
Y’all did a fabulous job marrying those two pieces together!! I love how you finished it off too. sooo sweet!
gail
Oh my goodness. I can’t describe how much I love the final product. Perfect -and pinning 🙂
I absolutely love the old and the new together to create a beautiful and original piece!! you guys did well!!
It turned out great! Looks like you are keeping this one huh? It seems awfully content in your home… You should keep it! Your guys built it with you!
I will be so proud if my sons grow up to be like yours! LOL Man, it would be nice to have some extra hands around here!
I LOVE this bench. It is amazing!! Now, of course, I want one!
That really turned out fantastic Debbie. You can work some furniture like magic I tell ya.
Debbie this is the neatest project. I made a bench from a head board and of course, junque, but it would have been so much easier if I had seen this post first! I LOVE how it turned out. Pinning this so I can refer back to it.
Debbie!!!!!!!!!! That is just PURE AMAZINGNESS right there! Seriously, could you be any more brilliant?! I LOVE the way your combined all of this random stuff to create something so beautiful! A gal after my own heart! Absolutely love it!!!!!!!!!
Now, THAT is something, Debbie! She’s gorgeous… I’d love her, too. 🙂
xo Heidi
Oh my goodness! That is just CHARMING! I love the colors of your fabrics too. It must have been fate. This has to be one of your favorites, it is to me! Darling.
Many blessings….Brooke
[email protected]
Here is my new site for my Vintage Inspired Artwork…http://brookekroeger.blogspot.com/
And my original site that focuses on my own photography and projects, Creative Country Mom… My home and gardening site, where I share tutorials, crafts, decor and lots of gardening ideas.
http://creativecountrymom.blogspot.com/
This week I am starting a new link up party called “Sunday Open House”. I hope you will link up this lovely post to share with my readers.
Debbie, you always have the best ideas! Today, I’m loving your bench and your soup recipe! That bench is beyond fabulous…love your vision!
Gotta love men with power tools; especially, when they do such fabulous work.
Thanks,
Helen
Looks fantastic. I love the two colors and the distress look.
very very cool!!! i love it! 🙂
Turned out awesome. In the middle of January here in MN the only thing I want to add is that is I like to see two handsome dudes AND green grass under their feet. Just something not as handsome when the men are outside in 20 below zero.
Bliss
Okay, the project is awesome, but the two handsome dudes with power tools is the best part of the post.
How fun that they dive in and help.
The bench and cushion are so beautiful.
Great job as always!
Deb@Lake Girl Paints
You’ve created such a stunning piece, Debbie! Those chunky legs totally make it, great vision and kudos to the guys, too!
I love it! I have a headboard that I just painted and I have nothing to do with it…I see a bench in my future!!!
I can’t wait to see your bench!
Debbie
Brilliant!
seriously…that is AWESOME….Oh Debbie….I want to make one so bad now…along with about 50 other things..:)
You have just been a busy little beaver over there!…
Its gorgeous!!
Hugs
Karin
http://www.artisbeauty.net
Oh my goodness, this is gorgeous! So impressed with the creativity and beauty. So glad to have found your blog through Pinterest.
melinda
That is so CLEVER! Cute too, but CLEVER!
I love it! I’ve seen benches made from a headboard before, but your steps made it seem not so intimidating. I just wish Justin and Barry were here with their power tools!
Oh my goodness Debbie that is brilliant!! I love it!! Have a great night!!
Debbie that is so cute. Well, that is tired isn’t it? So cute. Not good enough. It’s so SUPER cute. LOL.
No really. It’s lovely. Sweet, Charming. What a wonderful project. I love it and it looks fantastic in it’s new home!!!!
Thank you! This bench was so much fun to make with my guys!
Just beautiful!!!! I always love your creations!