The Barn Wood Wall in the basement is complete!
Time for the first look! Slow and steady, that’s how we’re working to put our personality in to the basement. I hope you’ll follow along with us as I share every little or big detail. We created a focal point with this barn wood wall for the basement kitchen, it was easy with this peel and stick barn wood.
You know that time when you think you know what you want but you’re a little nervous because you don’t know if it will turn out like you think it will? Well, it turned out more amazing than I thought that it could. And it was fast and fabulous!
Here’s the before:
and here’s the before, before:
It’s seems like such a long time ago but it’s only been a few months. Even before we started the basement makeover, I had a vision. The vision included a wood wall. I kept seeing these beautiful walls filled with barn wood, painted wood and raw wood. I suppressed the idea as long as I could. I mean there’s been a lot of work going on around here, why would I want to put something on the wall and cover up that perfect drywall. I really can’t answer that, I just know what I like and what I wanted.
Then my barn wood wall dream came true with the opportunity to partner with Stikwood. I thought that I’d choose the reclaimed weathered white wood but when the samples arrived, it was the barn wood – reclaimed weathered wood (affiliate link) that won out! The wood arrived about a week ago and I put it in the basement to acclimate to it’s new home. If you want to add beautiful warmth and personality check out Stikwood.
- Added the trim to right side of the wall.
- Checked the countertop, to make sure it was level.
- Peeled the strips off the back of the Stikwood.
- Started on the right corner at the top of the countertop.
- Moved from right to left.
- Used my Rockwell bladerunner x2 to cut the wood and the metal trim.
In this photo on the top right you can see the metal trim. Its sticks on the wall just like the wood.
I opened all the wood and spread it out so I could pick a mix of the color and sizes. After you remove the paper from the glue strips you’re ready to apply the wood to the wall.
I used a pencil to mark the wood for cutting. Make sure the electricity is off before you remove your plates and screws from your outlets. Leave enough wood behind the metal so your outlets stops here. You may need longer screws to reattach.
I continued up the wall and completed this project in a few hours. This is one of the easiest projects that I’ve done in a while! Real wood, real fast!
I spent the rest of the afternoon looking at it and smiling.
Look at all the texture and warmth.
I’m going to be adding a couple of metal shelves over the coffee pot and something over the sink.
I can honestly say, you’ve come a long way baby!
I can’t wait to share what we built to go under the tv!
It’s finally done:
See more of the before and afters of the basement here:
House basement says
March 13, 2018 at 3:12 amIt’s is really beautiful.
Tasha says
May 8, 2017 at 10:01 amWhat color did you use from Stickwood? I love the look and want to attempt to do something similar.
Chrasanthamem says
July 19, 2016 at 8:05 pmHi Debbie, where did you purchase the wood or was it just scraps?
Debbie says
July 19, 2016 at 8:46 pmHi Hannah, all the links to the Stikwood are in the post above. They are red, just click on them. Thanks!!
Jenne Lueker says
October 25, 2015 at 9:40 pmI love this idea! I’m going to try something similar in our new kitchen. Where is the rug from? I absolutely love it!
Debbie says
October 25, 2015 at 9:50 pmHi Jenne,
The rug is from the Ballard Designs Outlet, but I think they still sell it!
Thanks,
Debbie
funky Junk Interiors says
September 12, 2015 at 2:14 pmOh my goodness… this is so gorgeous! I want this everywhere! Featuring you on FB Sunday. Thanks for linking up to Party Junk! 🙂
Debbie says
September 16, 2015 at 10:42 amThanks so much Donna!
Jennifer says
September 9, 2015 at 11:26 amWar Eagle Debbie!
I totally love the space! May I ask where the rug was purchased?
kirby says
September 4, 2015 at 5:33 amI am intrigued! Looks great!
Brandi Robertson says
September 3, 2015 at 5:59 pmWhat is your wall color if you don’t mind?
Debbie says
September 3, 2015 at 6:09 pmHi Brandi,
The wall color is SW Mindful Gray! I have it in a lot of rooms! Love it!
Debbie
Heidi @ Decor & MORe says
September 3, 2015 at 8:08 amThat looks amazing, Debbie! love it!
xo Heidi
Nancy C says
September 3, 2015 at 7:56 amSimply gorgeous!!!!
Gina says
September 3, 2015 at 7:35 amIt’s beauiful, Debbie! It has wow factor all the way!
Shirley@Housepitality Designs says
September 3, 2015 at 7:29 amOh Wow Debbie…the wall is magnificent!….and I love the fact that you did not have to use nails. I am going to browse the Stikwood site….I can see where i can use this product in several places in my home!!….Beautiful job as always Debbie!!
Debra says
September 3, 2015 at 7:10 amThe wall looks fabulous. I wouldn’t mind trying this in my house. I just need to figure out where.
Doreen @ Hymns and Verses says
September 2, 2015 at 9:28 pmWell – how cool is that!!! Looks really easy to do and is a perfect rustic accent wall! Love it!!!
Deborah Tolland says
September 2, 2015 at 8:17 pmThat looks fantastic! Definitely makes me want to try doing this too!
Wendi @ H2OBungalow says
September 2, 2015 at 7:38 pmI absolutely LOVE your wall! Bravo! I’m so glad you followed your heart and built your wood wall. I can’t wait to see what the metal shelves look like gainst all that pretty grain and texture too:)
Debbie says
September 2, 2015 at 7:54 pmThanks so much Wendi, I am loving it for sure!!!
Sue at Blu says
September 2, 2015 at 6:10 pmWowzer! That is incredible! fffaaabbbuuulous!
Debbie says
September 2, 2015 at 7:55 pmThank you Sue, it was easy and I love that it’s real wood!
Debbie
cassie @ primitive & proper says
September 2, 2015 at 3:40 pmlove it, debbie! looks amazing!
Debbie says
September 2, 2015 at 7:53 pmThanks so much Cassie and I guess you know that you have me wanting a ship lap wall now 😉
gail says
September 2, 2015 at 1:49 pmawesome job Debbie! You new barn wood wall looks fabulous!
I wish my basement looked like this. 🙂
gail
Debbie says
September 2, 2015 at 7:53 pmThanks Gail! Maybe we need to have a blogger meet up and fix up your basement!
Debbie
Elizabeth@ Rustic Maple says
September 2, 2015 at 1:16 pmThat is gorgeous and who knew it was so easy to install?! We have a basement kitchen that could use an update like that, but the Stikwood would look great in our main kitchen as well.
Debbie says
September 2, 2015 at 1:35 pmThanks Elizabeth, it was easy and we love it! Let me know if you install it in either of your kitchens 🙂
Debbie
Bliss says
September 2, 2015 at 11:21 amAbsolutely love it. Over the years we have planked so many walls and even a couple ceilings, what I wouldn’t have given to have Stickwood back then!
Debbie says
September 2, 2015 at 1:34 pmI know! It’s so easy to use and I love that it’s real wood!
Thanks,
Debbie
Natalie @ A Turtle's Life for Me says
September 2, 2015 at 10:51 amI was just reading about Stikwood last night!! I actually wrote myself a little note on my nightstand to remember to research them more today! SO excited to see a real life account of how it works and looks! I’m going to look into it some more! Thanks! Your basement is just stunning!
Debbie says
September 2, 2015 at 1:33 pmI love how easy it was to install and how beautiful the wood is! I think you’d love it Natalie!
Thanks,
Debbie
Alison Blume says
September 2, 2015 at 10:33 amThanks for sharing the installation –looks like a rewarding project. The kitchen looks beautiful. The Stikwood really gives the room character.
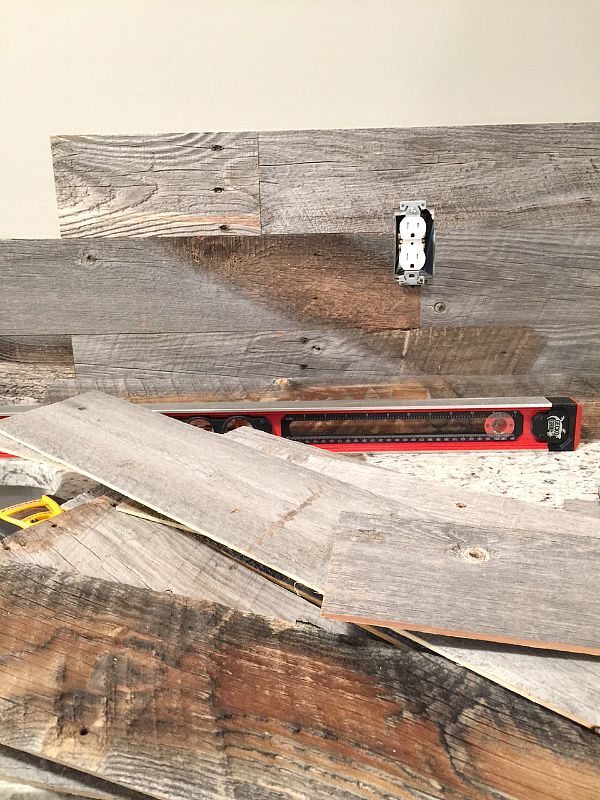
Debbie says
September 2, 2015 at 1:32 pmIt’s the first wall you see when you come down the stairs, it makes the perfect statement!
Debbie
debbiedoos says
September 2, 2015 at 9:05 amDeb it is beautiful! I agree it has come a very long way! WOW
Debbie says
September 2, 2015 at 9:25 amThanks Debbie! We are loving it, you need to come visit!!
xo
Debbie