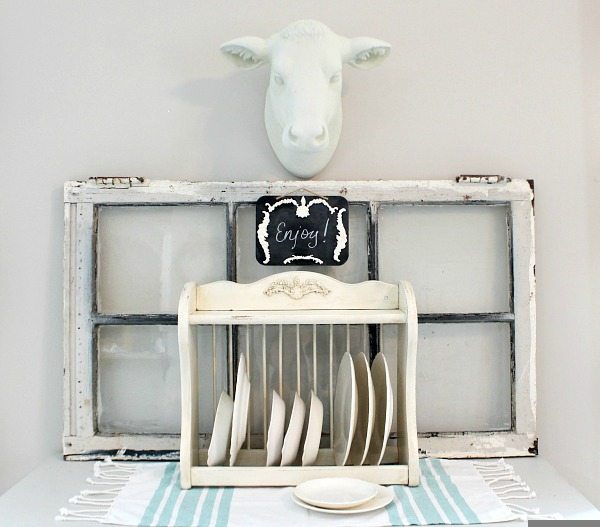
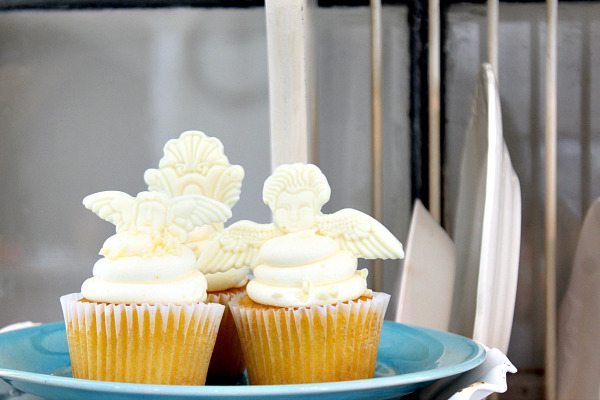
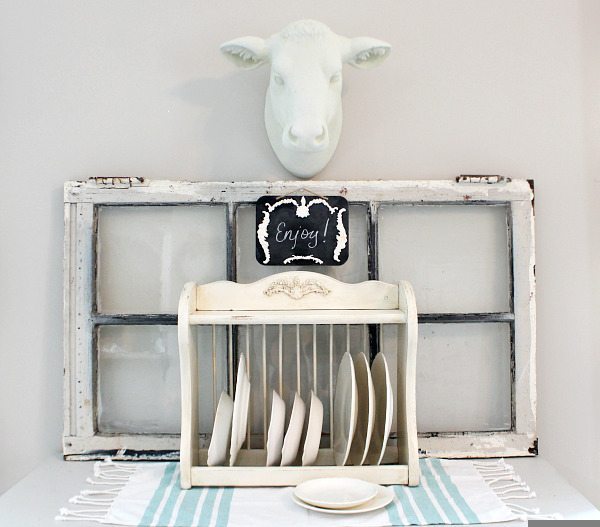
Hello! I have some fun DIY ideas for you today! One is a thrifty find, an 80’s dish rack. A $1 chalkboard from the Dollar Spot at Target and the other is a cupcake topper and all I used was a vintage art decor mould by Iron Orchid Designs, thanks to Prima Marketing and IOD for partnering with me!
Bonus – They are food safe, you can use them with chocolate melts, as I have 😉
What do all of these things have in common?
Prima Vintage Art Decor Moulds by Iron Orchid Designs
Perfect for my farmhouse look!
Be sure to enter the GIVEAWAY AT THE BOTTOM! Easy entry and you will love repurposing and creating with these! We will have 2 winners! Each winner will receive 6 moulds and 2 packages of Paper Clay!
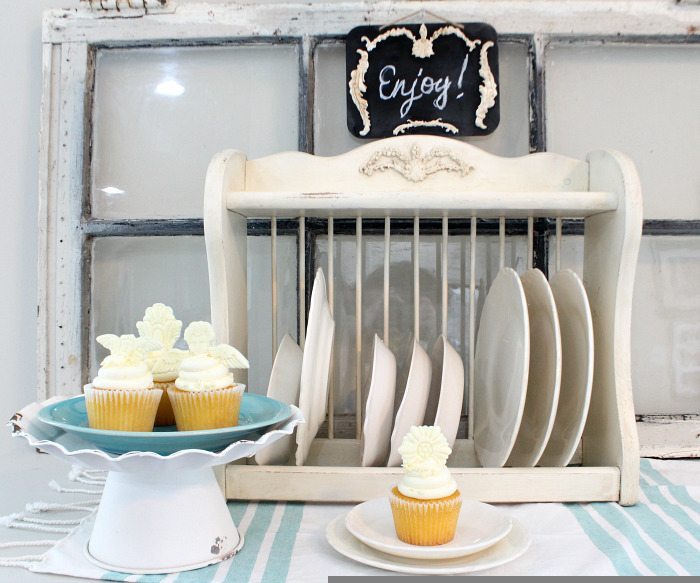
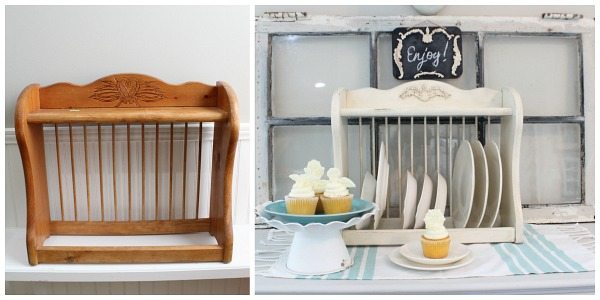
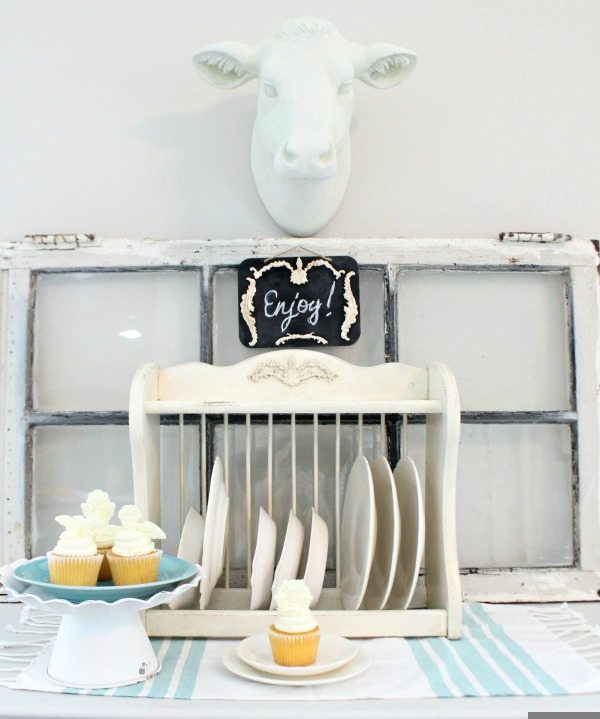
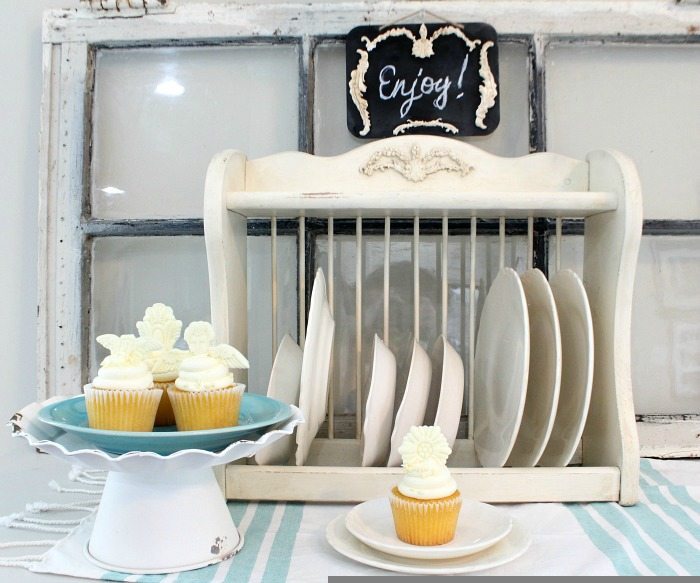
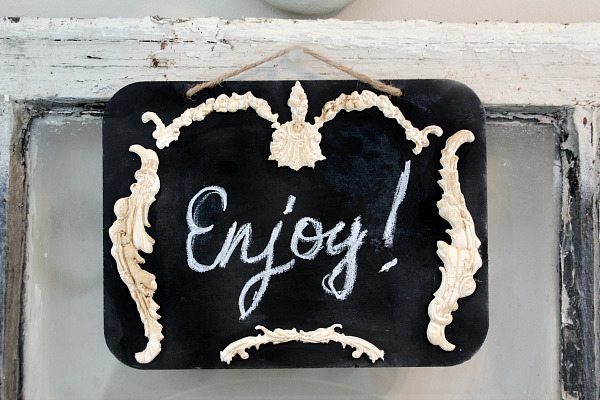
These moulds will change the face of dated thrift store finds! Or you can get really creative with new finds. I found an 80’s plate rack at Goodwill, and put a vintage spin on it. The little “enjoy” chalkboard is from the Target $1 – Bonus, the moulds are food safe! As you can see I dressed up some store bought cupcakes!
Supplies needed:
Plate rack
Prima IOD Vintage Art Decor Molds
Wood Glue
Wood putty
Rustoleum 2x Spray Paint or Paint of your choice
Dark wax or glaze
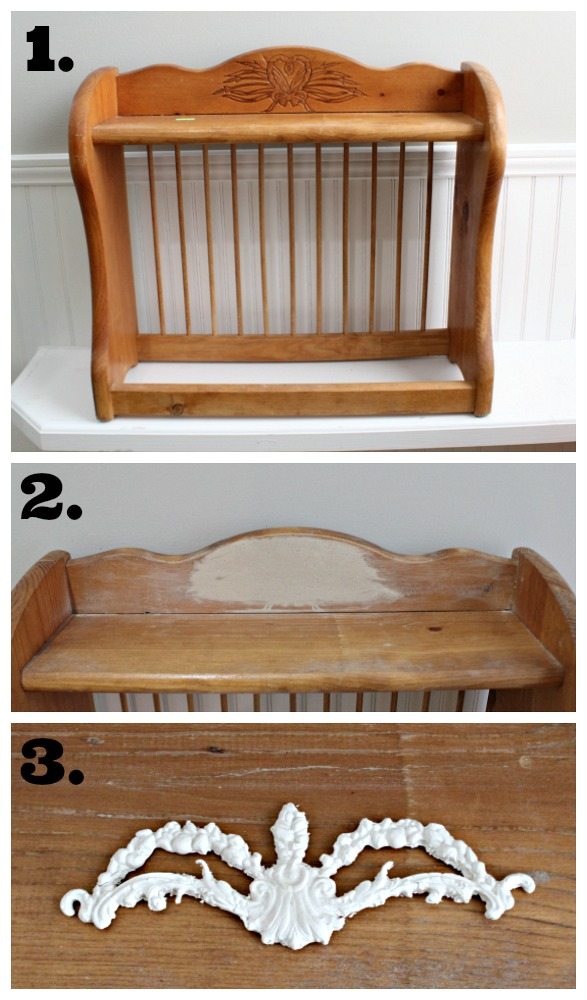
Project #1 – Plate Rack Transformation:
- Lightly sand the area.
- Add wood putty and let it dry. Sand smooth
- With wood glue attach the paper clay mould.
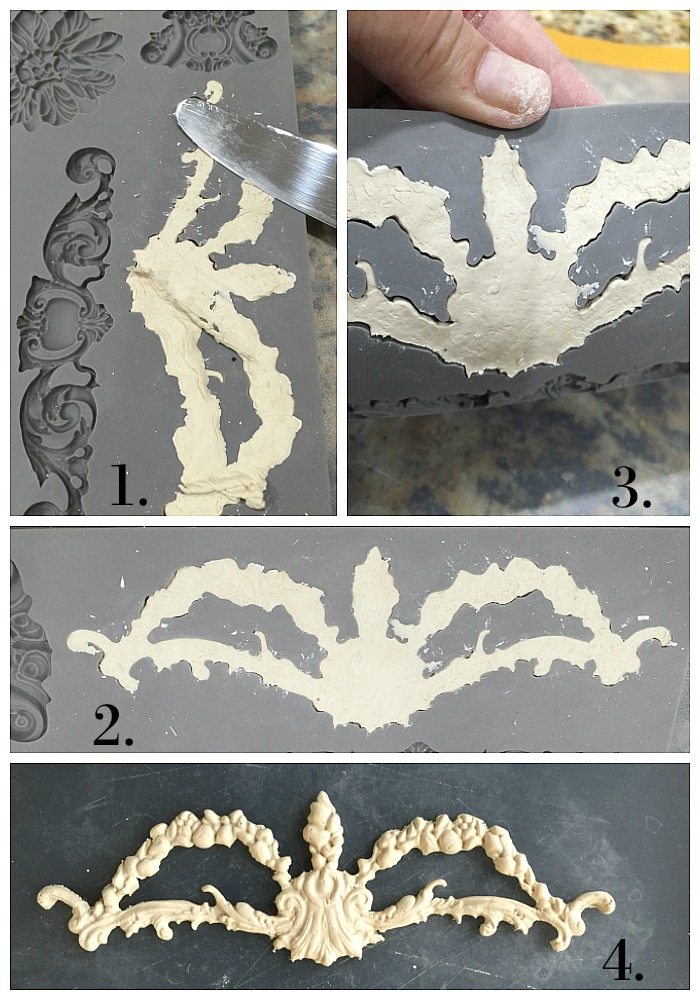
The Paper Clay is easy to use, pinch off what you need and roll around your palm or on a flat surface. Position the clay in to the mould. After pressing it in the the mould, I used a butter knife to scrape off the excess. I wanted the back to be as flat as possible. I then roll the mould over to release my design and placed it on a flat surface to dry. The cast releases easily, the moulds are flexible and are very thick. I love the old world, vintage look of the design, the details are wonderful.
After your cast is dry, use wood glue to attach to your surface of choice.
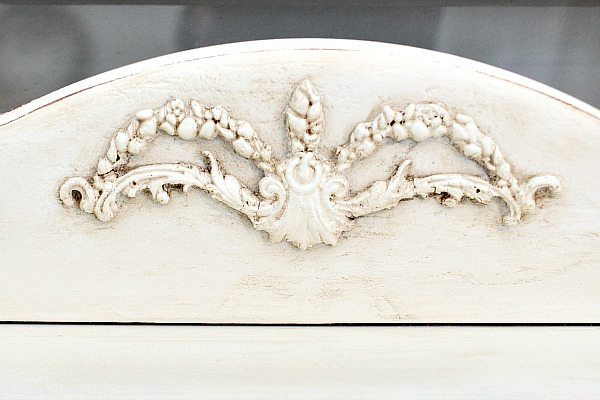
Paint as desired. I used spray paint and dark wax to finish my piece. Look how perfect it looks! The depth and detail really shows up after using the dark wax.
Project #2 – Cupcake Toppers!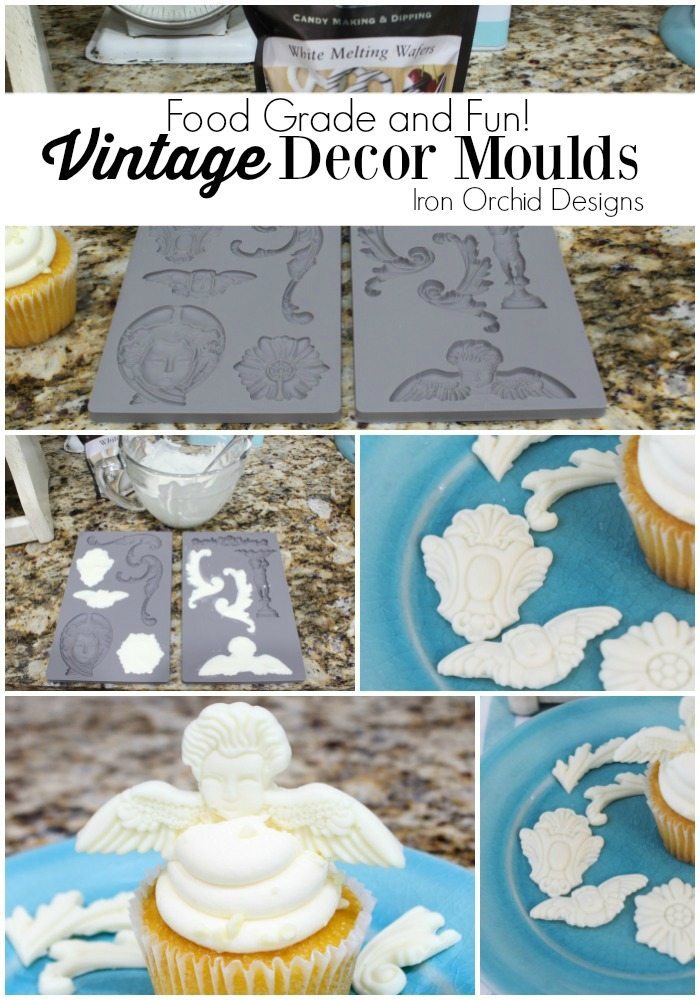
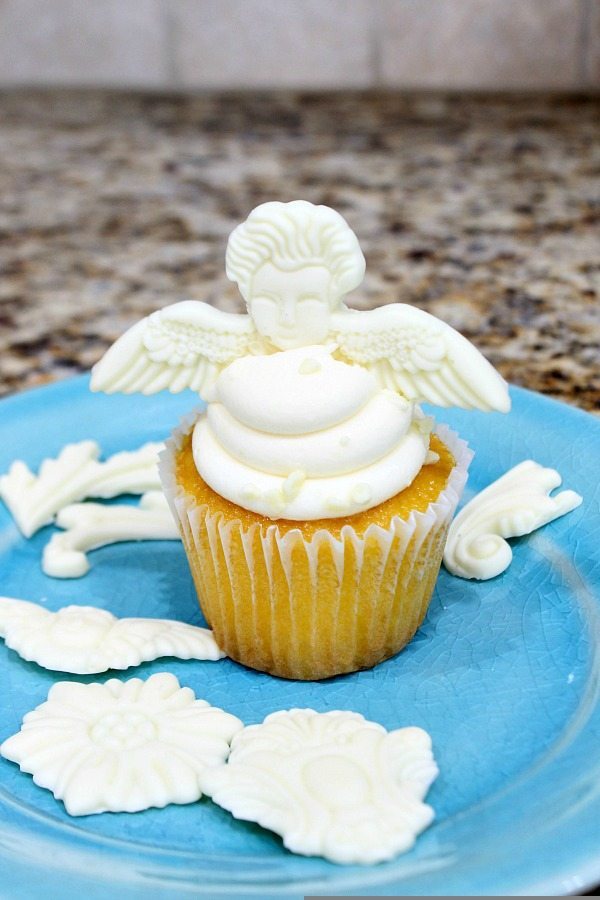
- Use your choice of (White) chocolate melts – melt according to directions.
- Pour in to the food grade mould of your choice.
- Let it harden and add to your cupcakes!
Be sure to mark you moulds – food and decor 😉
Project #3 – Update a chalkboard with IOD Paper clay vintage moulds
You could easily use this method on any frame!
Instructions:
- Create your cast as shown above for the plate rack.
- After they dry adhere with wood glue.
- Brush dark wax over the dried clay to bring out the depth in each cast.
Now it’s time for the giveaway:
We will choose 2 winners, each winner will receive a set of moulds (6 = set) and 2 packages of IOD Paper Clay. The winner must be 18 years old or older and reside in the lower USA.
a Rafflecopter giveaway
Watch this awesome video for more details and fun ideas:
Let me share a little about IOD – 15 years ago two sisters, Josie and Sally started their decor business by creating beautiful wall finishes. Time changed and so did they, which lead them to the paper crafting market. It was then that they realized the need for creative ways to incorporate their love of DIY in to home decor. They have several beautiful products coming to the market, today I am sharing their Vintage Decor Moulds and Paper Clay. Over the next few weeks/months be on the look out for giant decor stamps, for using on fabrics and furniture. In mid-May you will be seeing giant rub ons for flat surfaces and roller stamps for fabrics, walls and furniture!



I recently finished chalk painting & waxing 2 different pieces prior to finding out about IOD molds & I really want to add them to the final pieces. I’ve been searching the web to find out if the paper clay or hardening resin would adhere still to the poly wax coated pieces or would I have to recalk paint or use mineral spirits first?
I would clean the spot with mineral spirits before attaching the molded pieces just to make sure it sticks.
Congratulations to Cindy and Debbie!! Enjoy your new goodies!
Wow what a great idea for the cupcakes. Would be perfect for Mother’s Day. Would love to win.
I love what you created using these molds. What a great product!
I love how you updated that plate rack! And what a good idea to prettify some store-bought cupcakes – you’re so clever! I can’t wait to get my hands on some of those molds!
Your project came out beautiful. Did it wash off your dinner knife ok? Or were you using a spare one, How is the clean up.
Josephine, It was an extra knife, but it does wash off easily 🙂 Thanks so much!
love the designs of the molds. love that they can be used for food, also! using them totally changed your
thrift store rack!
Thanks so much!
what a fun project. i have never seen this before.
Thanks Laura!
Fun, awesome and inspirational!! I am working on redecorating my bedroom and would love to have all of these molds to help in the transformation! I have loved IOD products for a long time and they just keep getting better and better!!! Thanks for the chance to decorate with style!
Your bedroom makeover sounds fun! Best of luck to you!
Thank you! I have 2 of their big stamp sets and one of their molds but would love to have them all so I can do even more! Thanks to you and IOD for the chance to win them alll! It would be a dream come true!
When will the winner be announced? I am praying so hard to the Crafting Goddesses that it will be me that I think they have me on mute! LOL Fingers crossed and thanks for the chance to win these amazing tools!
What a fun array of projects! Love how you showcased the versatility of these amazing moulds…thanks for sharing your process.
Thanks Heather, I was over admiring your work earlier! You have talent!
Debbie
I have an 80’s plate rack almost identical. I guess I need to cross my fingers to win the giveaway.
The moulds are so pretty and they could be put on so many things for a “new” vintage look.
Your three projects are really neat.
Thank you
Thanks so much Treva! I am looking for more projects!
These are fabulous! I love the vintage style of the molds and even more that they can be used for so many different projects. These are so smart!
Thanks Wendi, I want to add them to everything!
Oh… Debbbie–I love the way your updated your plate stand. It looks sooo pretty. How awesome that the moulds can be used for chocolate too. 🙂 I too, am so happy to be working with Sally and Josie from Iron Orchid Designs.
gail
Thanks so much Gail! I think the moulds made the chocolate taste better too 😉
Oh I love the moulds! Just lovely!
Helen H
Thanks so much Helen!
Oooooh i LOVE how you popped the details on the antiqued piece with wax, and made it look authentically aged, gorgeousness!
Thanks Josie! I love the moulds and all the possibilities!