October 8, 2026 by Debbie Westbrooks
Chalk Couture Beanie Ornaments With Winter Patterns
Live Videos · Crafts · DIY
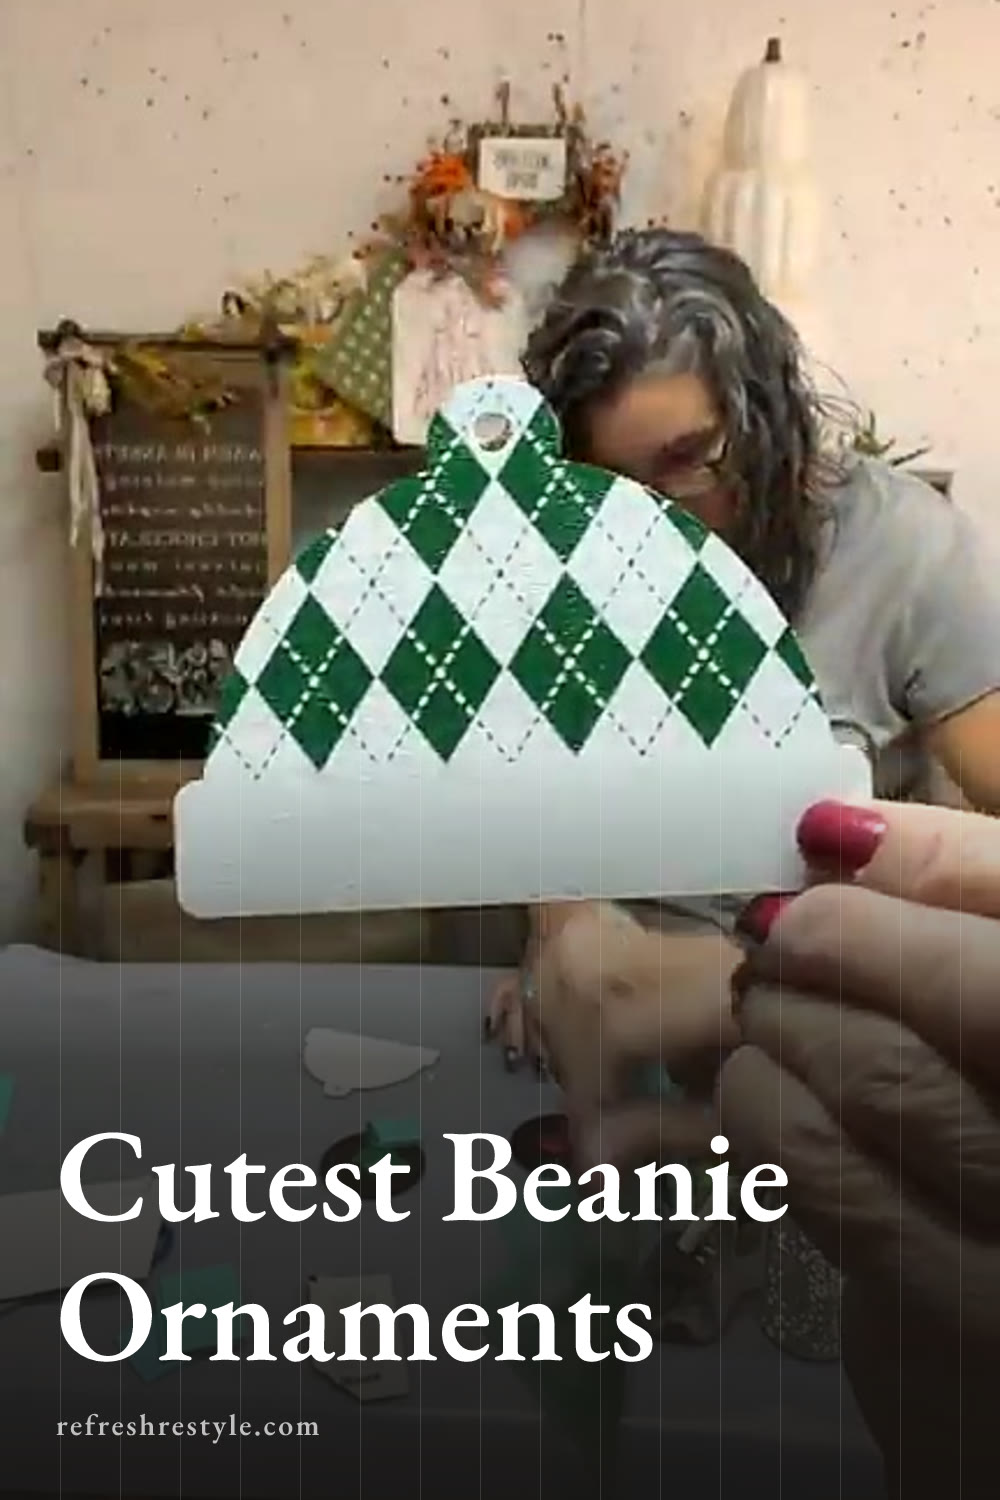
I made the sweetest Chalk Couture beanie ornaments with plaid, argyle, and cable knit patterns, and they turned out even cuter than I expected. The little beanie shapes came in the October club kit along with the transfer, twine, and three paste colors, so everything worked together beautifully.
What came in the October club kit
The club project included the beanie ornament surfaces, the pattern transfer, twine for hanging, and three Chalkology Paste colors. The colors were Bright White, Wild Acre, and Shimmer Crimson.
Wild Acre is such a good green. Green is one of my favorite colors anyway, but this shade looks especially pretty with winter patterns. Shimmer Crimson has a gorgeous sparkle that reminded me of ruby slippers, and it gave the ornaments a festive finish without adding another step.
The transfer had several patterns to choose from, including argyle, plaid, a larger plaid, and a cable knit inspired design. I love patterns, so this was a fun one for me. Each design gave the same little beanie shape a completely different look.
Painting the beanie ornaments
I started by painting the front of each beanie with Bright White Chalkology Paste. The paste goes on smoothly, and it worked well as paint for these small surfaces.
I added a second coat so the white background looked even and ready for the darker colors. After the beanies dried, I gave them a light sanding with a small sanding holder from Dollar Tree. It fit the little surfaces nicely and kept me from having to hold a loose piece of sandpaper.
Wax can be used before applying a transfer, but I chose to lightly sand these instead. The surface felt smooth, so I went ahead with the patterns.
Adding the Chalk Couture beanie patterns
Before placing each transfer, I fuzzed it on my shirt. A fuzzing towel works too, but a sweatshirt or T shirt will do the job when you have one handy. Fuzzing takes away a little of the stickiness and makes the transfer easier to lift from a freshly painted surface.
I lined up each design so the pattern covered the main part of the hat while the cuff at the bottom stayed white. You can cover the whole beanie if you prefer, but I liked having that solid white section along the bottom.
Wild Acre green patterns
I used Wild Acre on some of the beanies, and the green looked so pretty against the white background. It worked especially well with the argyle and plaid designs because the lines came out crisp and clean.
After pressing the transfer firmly against the surface, I spread the paste over the open areas of the design. I removed the extra paste and then peeled the transfer back to reveal the pattern.
That reveal is always my favorite part. Seeing those sharp little lines appear on such a small ornament was so satisfying.
Shimmer Crimson patterns
For the other beanies, I used Shimmer Crimson. The red paste has a beautiful sparkle that shows up when the light hits it, and it instantly made the ornaments feel ready for Christmas.
I used the same process with the plaid and cable knit inspired designs. I lined up the transfer, spread the paste across it, removed the excess, and lifted the transfer while the paste was still wet.
The red and green ornaments looked wonderful together, especially with the white cuffs left along the bottom.
Adding the twine hangers
Once the patterns were finished, I added the twine hangers. I wanted all four pieces to be the same length without measuring each one, so I folded one long piece in half and then folded it in half again. When I cut the folds, I had four matching lengths.
I threaded the twine through the holes from the front and tied it so each ornament could hang on the tree. The natural twine added a simple finish and let the colorful patterns stand out.
Ways to personalize beanie ornaments
These little beanies have plenty of room for extra details. The white cuff along the bottom would be a great place to add a name, especially if you want to make ornaments for children, grandchildren, or pets. They could also work as stocking markers so everyone knows which stocking belongs to them.
A pom pom or cotton ball on top would make the beanie shape even more playful. You could also add a small piece of greenery, tiny berries, feathers, glitter, or fuzzy ribbon. Resin or Mod Podge could be used for another decorative finish if you want more shine.
The beanies can also be decorated on both sides. One side could have the pattern while the other has a name or date. They would make cute gift tags too, and the ornament could become part of the gift.
I kept mine simple with the crisp red and green patterns, white cuffs, and twine hangers. The mix of argyle, plaid, and cable knit designs gave me a coordinated set where every ornament still had its own personality.
Chalk Couture supplies I used
You can shop my full Chalk Couture store here.
I am an independent Chalk Couture designer, so I earn a commission on these links. See my disclosure for more.