June 11, 2026 by Debbie Westbrooks
Chalk Couture Cherry Jam Jar Sign Tutorial
Live Videos · DIY · Crafts
I turned a large wooden jar cutout into the sweetest cherry jam sign using Chalk Couture transfers and chalk paste. The gingham lid, swirled jam color, vintage market details, and layered ribbon bow came together to make a fun piece of cherry decor for my kitchen.
Supplies I used
For this project, I used a large wooden jar cutout from our cutout shop. The jar also comes in a smaller size, and the transfer design should fit either one.
My other supplies included
- Bright White chalk paste
- Cherry paste
- Pesto paste
- The June Club transfer
- Mini Buffalo Plaid transfer
- Water based gel stain
- Paintbrush
- Squeegee
- Placement tape
- Red and green ribbon
- Sparkly ribbon
- Twine
- Hot glue
I also had resin cherries nearby because I thought I might use them, but once the painted and transferred details were in place, the jar had plenty going on without them.
Painting the wooden jam jar
Creating the white label
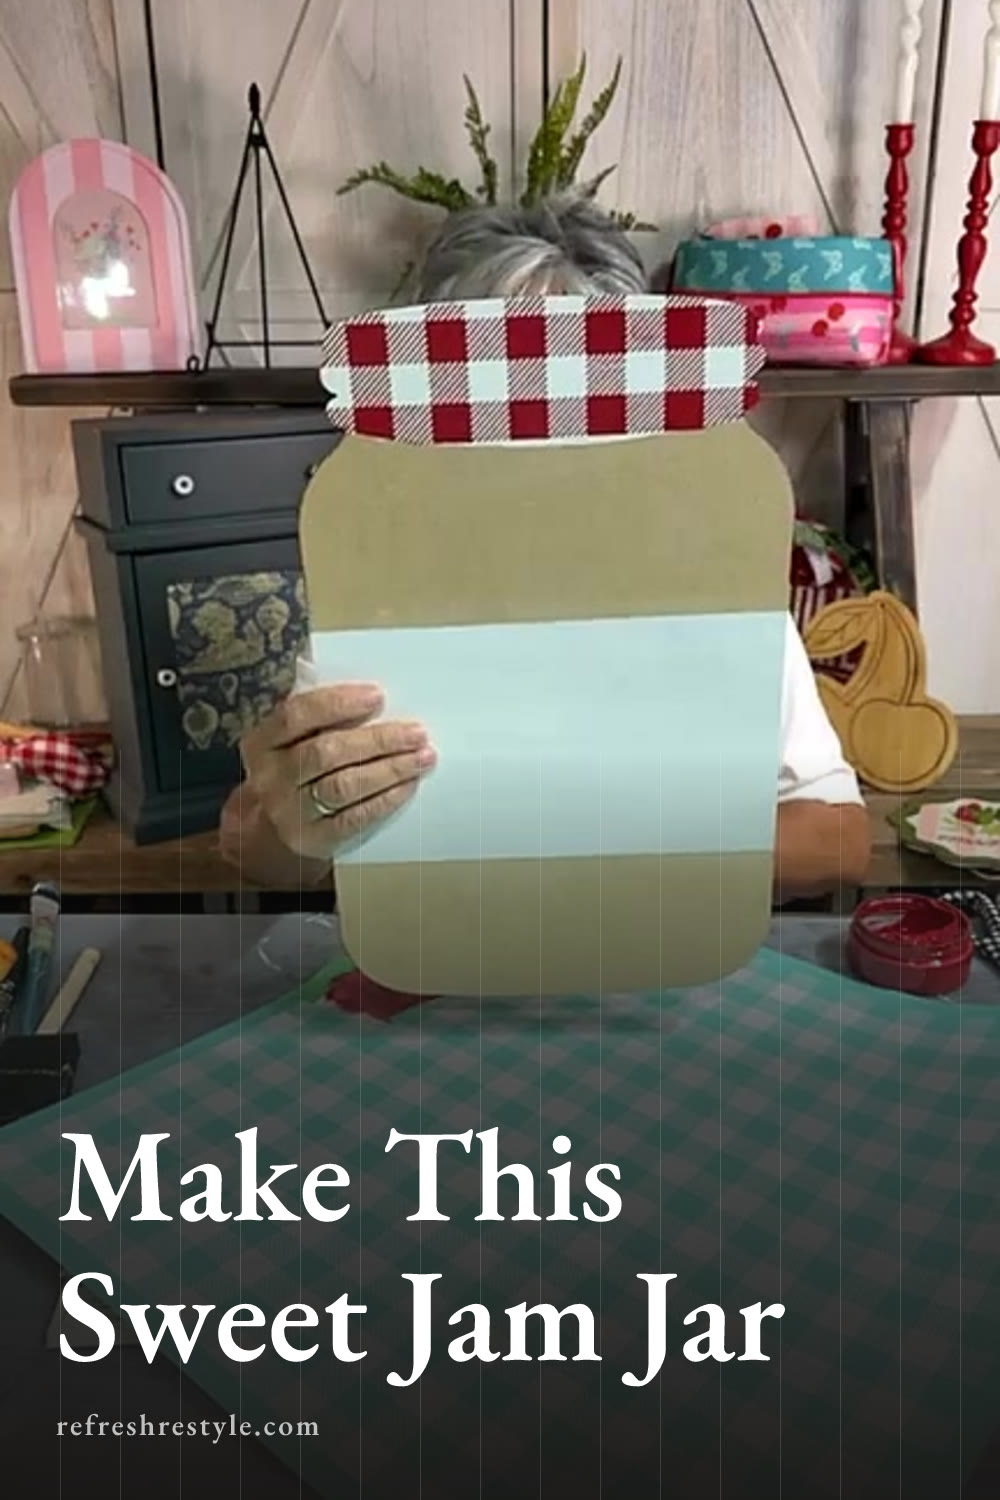
I started by painting the lid Bright White. The wooden lid has carved rings that can make it look like a real canning jar, but I painted right over those because I wanted a fabric covered lid look instead.
I gave the lid two coats and lightly sanded between them. That helped smooth the surface before I added the plaid transfer.
Next, I marked off a wide white strip through the middle of the jar. This became the label area where I added the Club design. I painted the rest of the jar red so it would look like it was filled with cherry jam.
You can paint with acrylic paint if that’s what you have. I used chalk paste for my painted areas because it was already on my table and worked well on the wood.
Adding the Chalk Couture buffalo plaid lid
The Mini Buffalo Plaid transfer has been one of my favorite background designs for a long time. It’s a large transfer, so I only needed the very top section for this jar.
I positioned the transfer over the white lid and added placement tape around the curved edges. The tape helped keep the Cherry paste from going outside the area I wanted to cover. After I spread the paste through the transfer with a squeegee, I lifted the transfer and revealed the cutest little red and white gingham lid.
Gingham fabric would also work for this part. You could cut a small piece and glue it over the lid, but the transfer gave me the look I wanted without adding any bulk.
Building the Chalk Couture cherry label
Once the white center section was dry, I placed the June Club transfer over it. This design includes a vintage scale, cherries, words, and small market inspired details.
I used Pesto paste for most of the design. The green looked pretty against the red jar and gave the label that classic cherry color combination. I added paste in sections and lifted each side of the transfer as I worked so the paste wouldn’t dry in the screen.
I used Cherry paste for selected parts of the design, including Sweeter by the Pound. You could make the entire label gray or black for a more neutral look, but I loved the red and green together.
After the main design was finished, I added more words and details from the transfer. I placed Nature’s Candy and Organic on the label, then added a cherry near the lettering. You can use as much or as little of the transfer as you like, which makes it easy to adjust the design for your surface.
Painting realistic cherry jam swirls
A flat block of red felt too much like paint, so I used my brush to create loose swirls across the jar. I wanted it to look like jam moving around inside a glass container, with lighter and darker areas instead of one solid color.
I mixed a small amount of water based gel stain with the Cherry paste to create a deeper red. It looked very dark while wet, but it gave the jar more shading and made the painted jam feel richer. I worked the darker mixture into a few areas and along one side rather than covering everything.
You can also mix paste colors together. Bark would have deepened the red in a similar way. Start with a small amount and keep adding color until you like what you see.
Finishing the jar with ribbon
I added a narrow piece of ribbon along the lower edge of the lid, which gave that section a finished look and separated the gingham top from the painted jar.
For the bow, I layered several pieces of red, green, and sparkly ribbon. I tied them together in the center, dovetailed the ends, and spread out the loops and tails so every color showed. A small dab of hot glue held the finished bow in place.
The ribbon I used was Christmas ribbon, but the colors were perfect for cherries. Looking beyond the label on your supplies can give you many more ways to use what you already have.
More ways to use this cherry design
The wooden jar cutout works with many different transfers, so you can change the fruit, colors, and label details for another season. This cherry design would also look cute on the smaller jar size, a plain piece of scrap wood, a tote bag, or a kitchen sign.
I especially like it grouped with cherry towels, a cutting board, or a handmade kitchen basket. The gingham lid and vintage label give it enough detail to stand on its own, while the red and green colors make it easy to mix with other cherry decor.
Chalk Couture supplies I used
You can shop my full Chalk Couture store here.
I am an independent Chalk Couture designer, so I earn a commission on these links. See my disclosure for more.