
Easy project for clay tags, no baking required.
I’m sure this Air Dry Clay has been around forever and I know there have been many things made with it. This is my first time using it, but not my last! (Follow directions on container) Supplies:
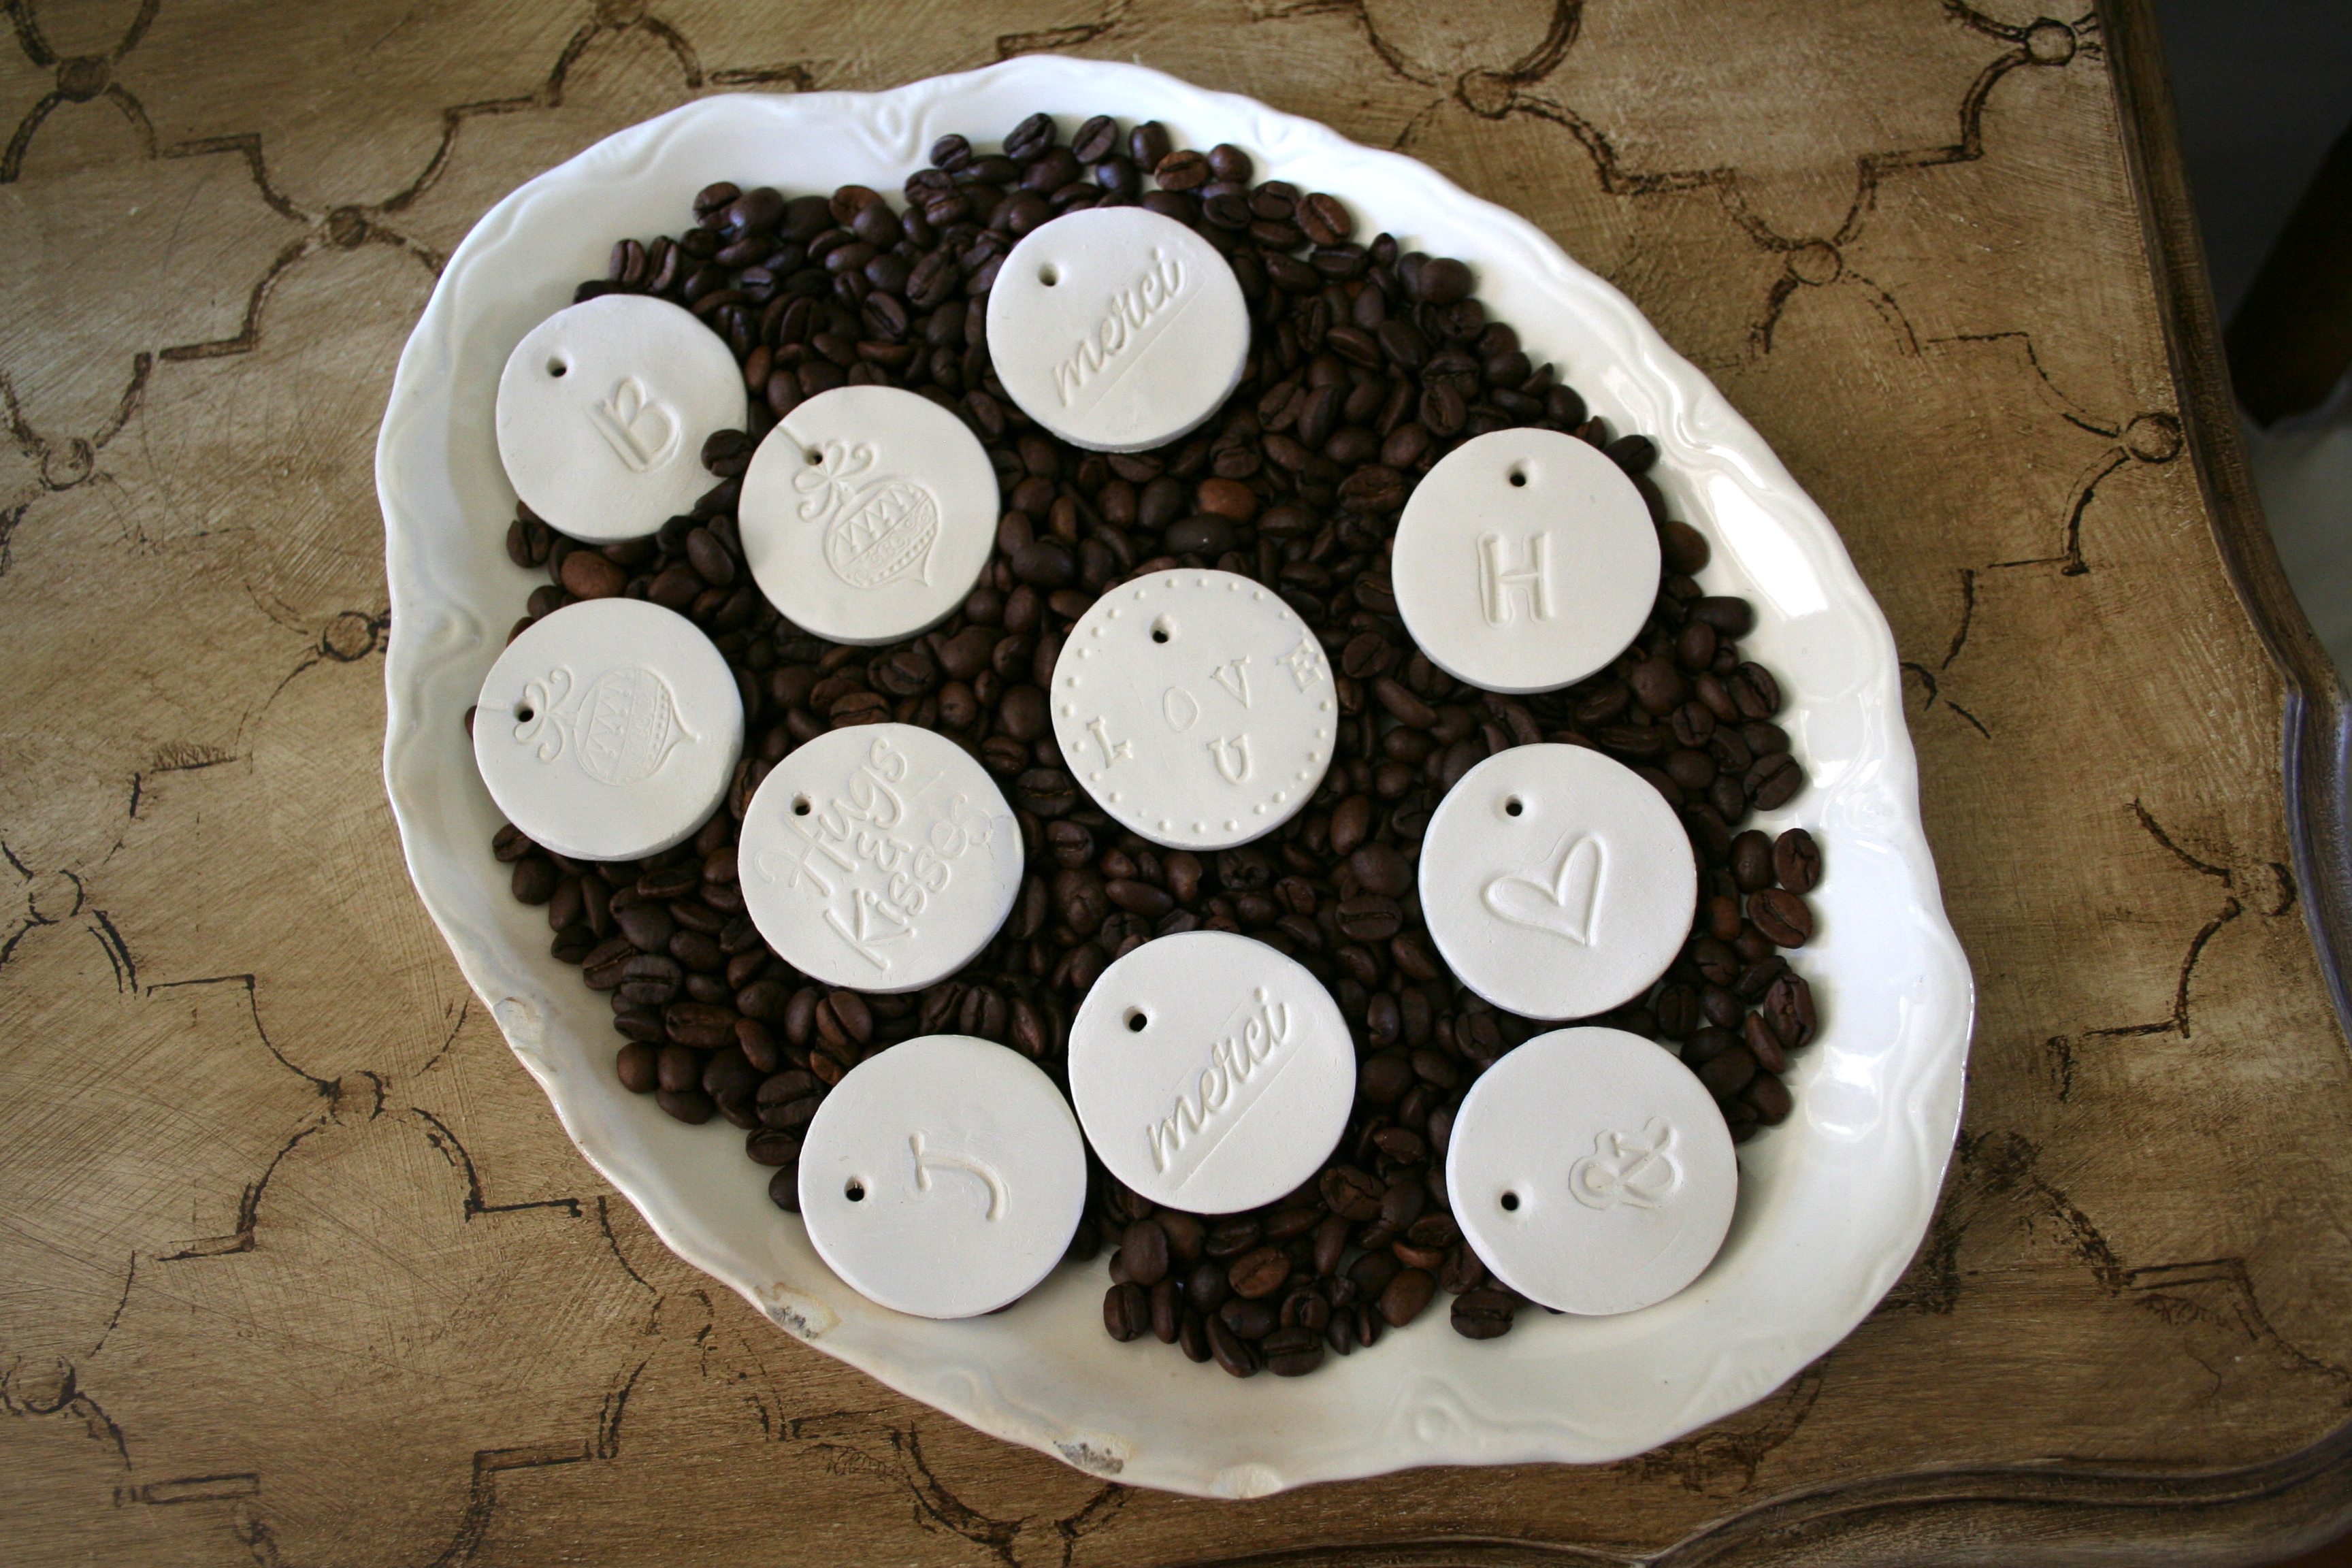
I rolled the clay in to balls, then flattened with the rolling pin. Use biscuit/cookie cutters for desired shape.
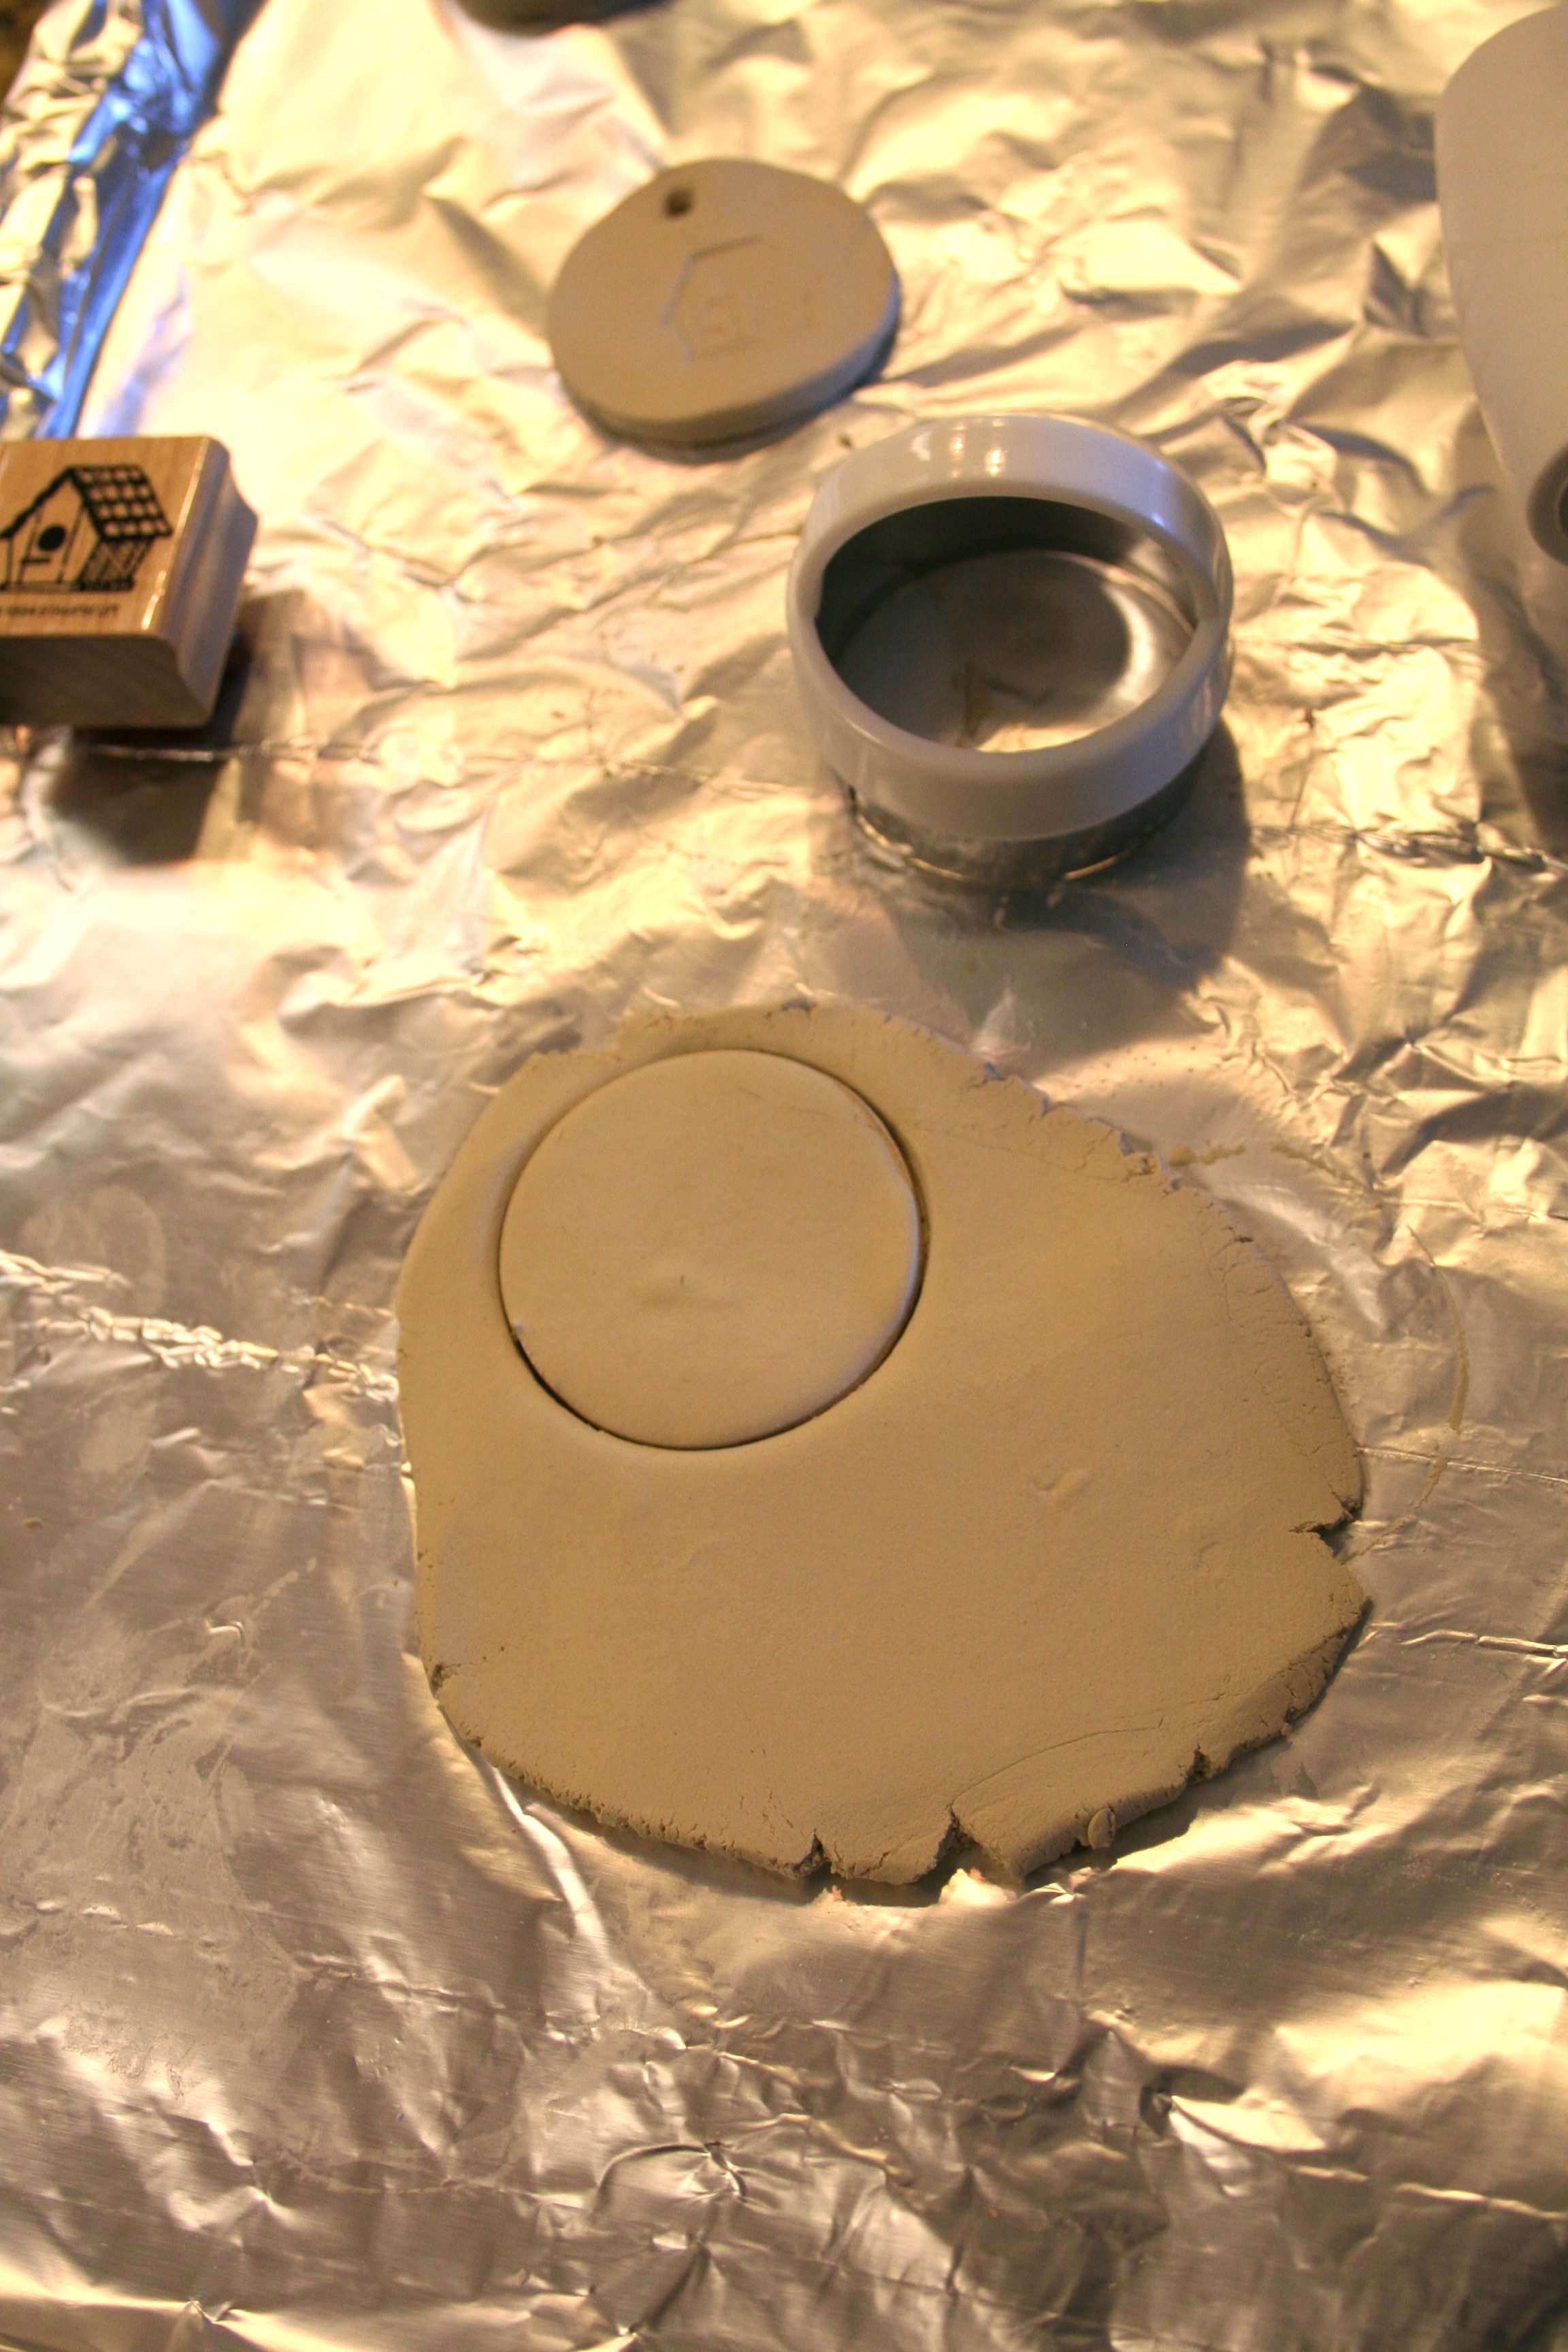
I used several different stamps, including alphabet. If you mess up, just squeeze into a ball, roll out, cut and stamp over. As many times as needed. I used a stampin up tool to put a hole in the top, use what ever you have for desired size. These have been drying for 2 days, I did not paint mine, but you can.
Look what I made and I still have a lot of clay left over!
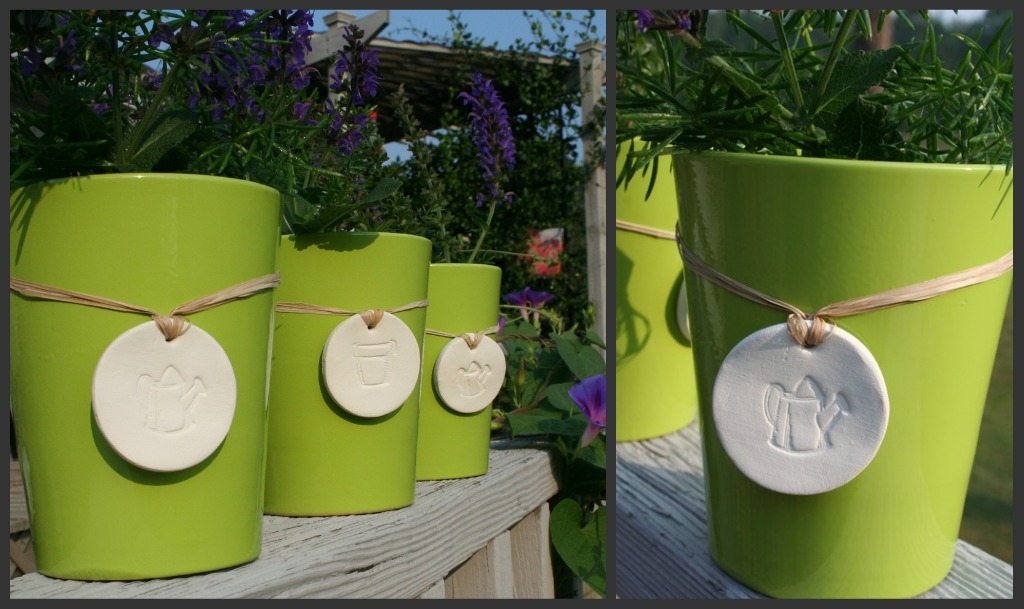
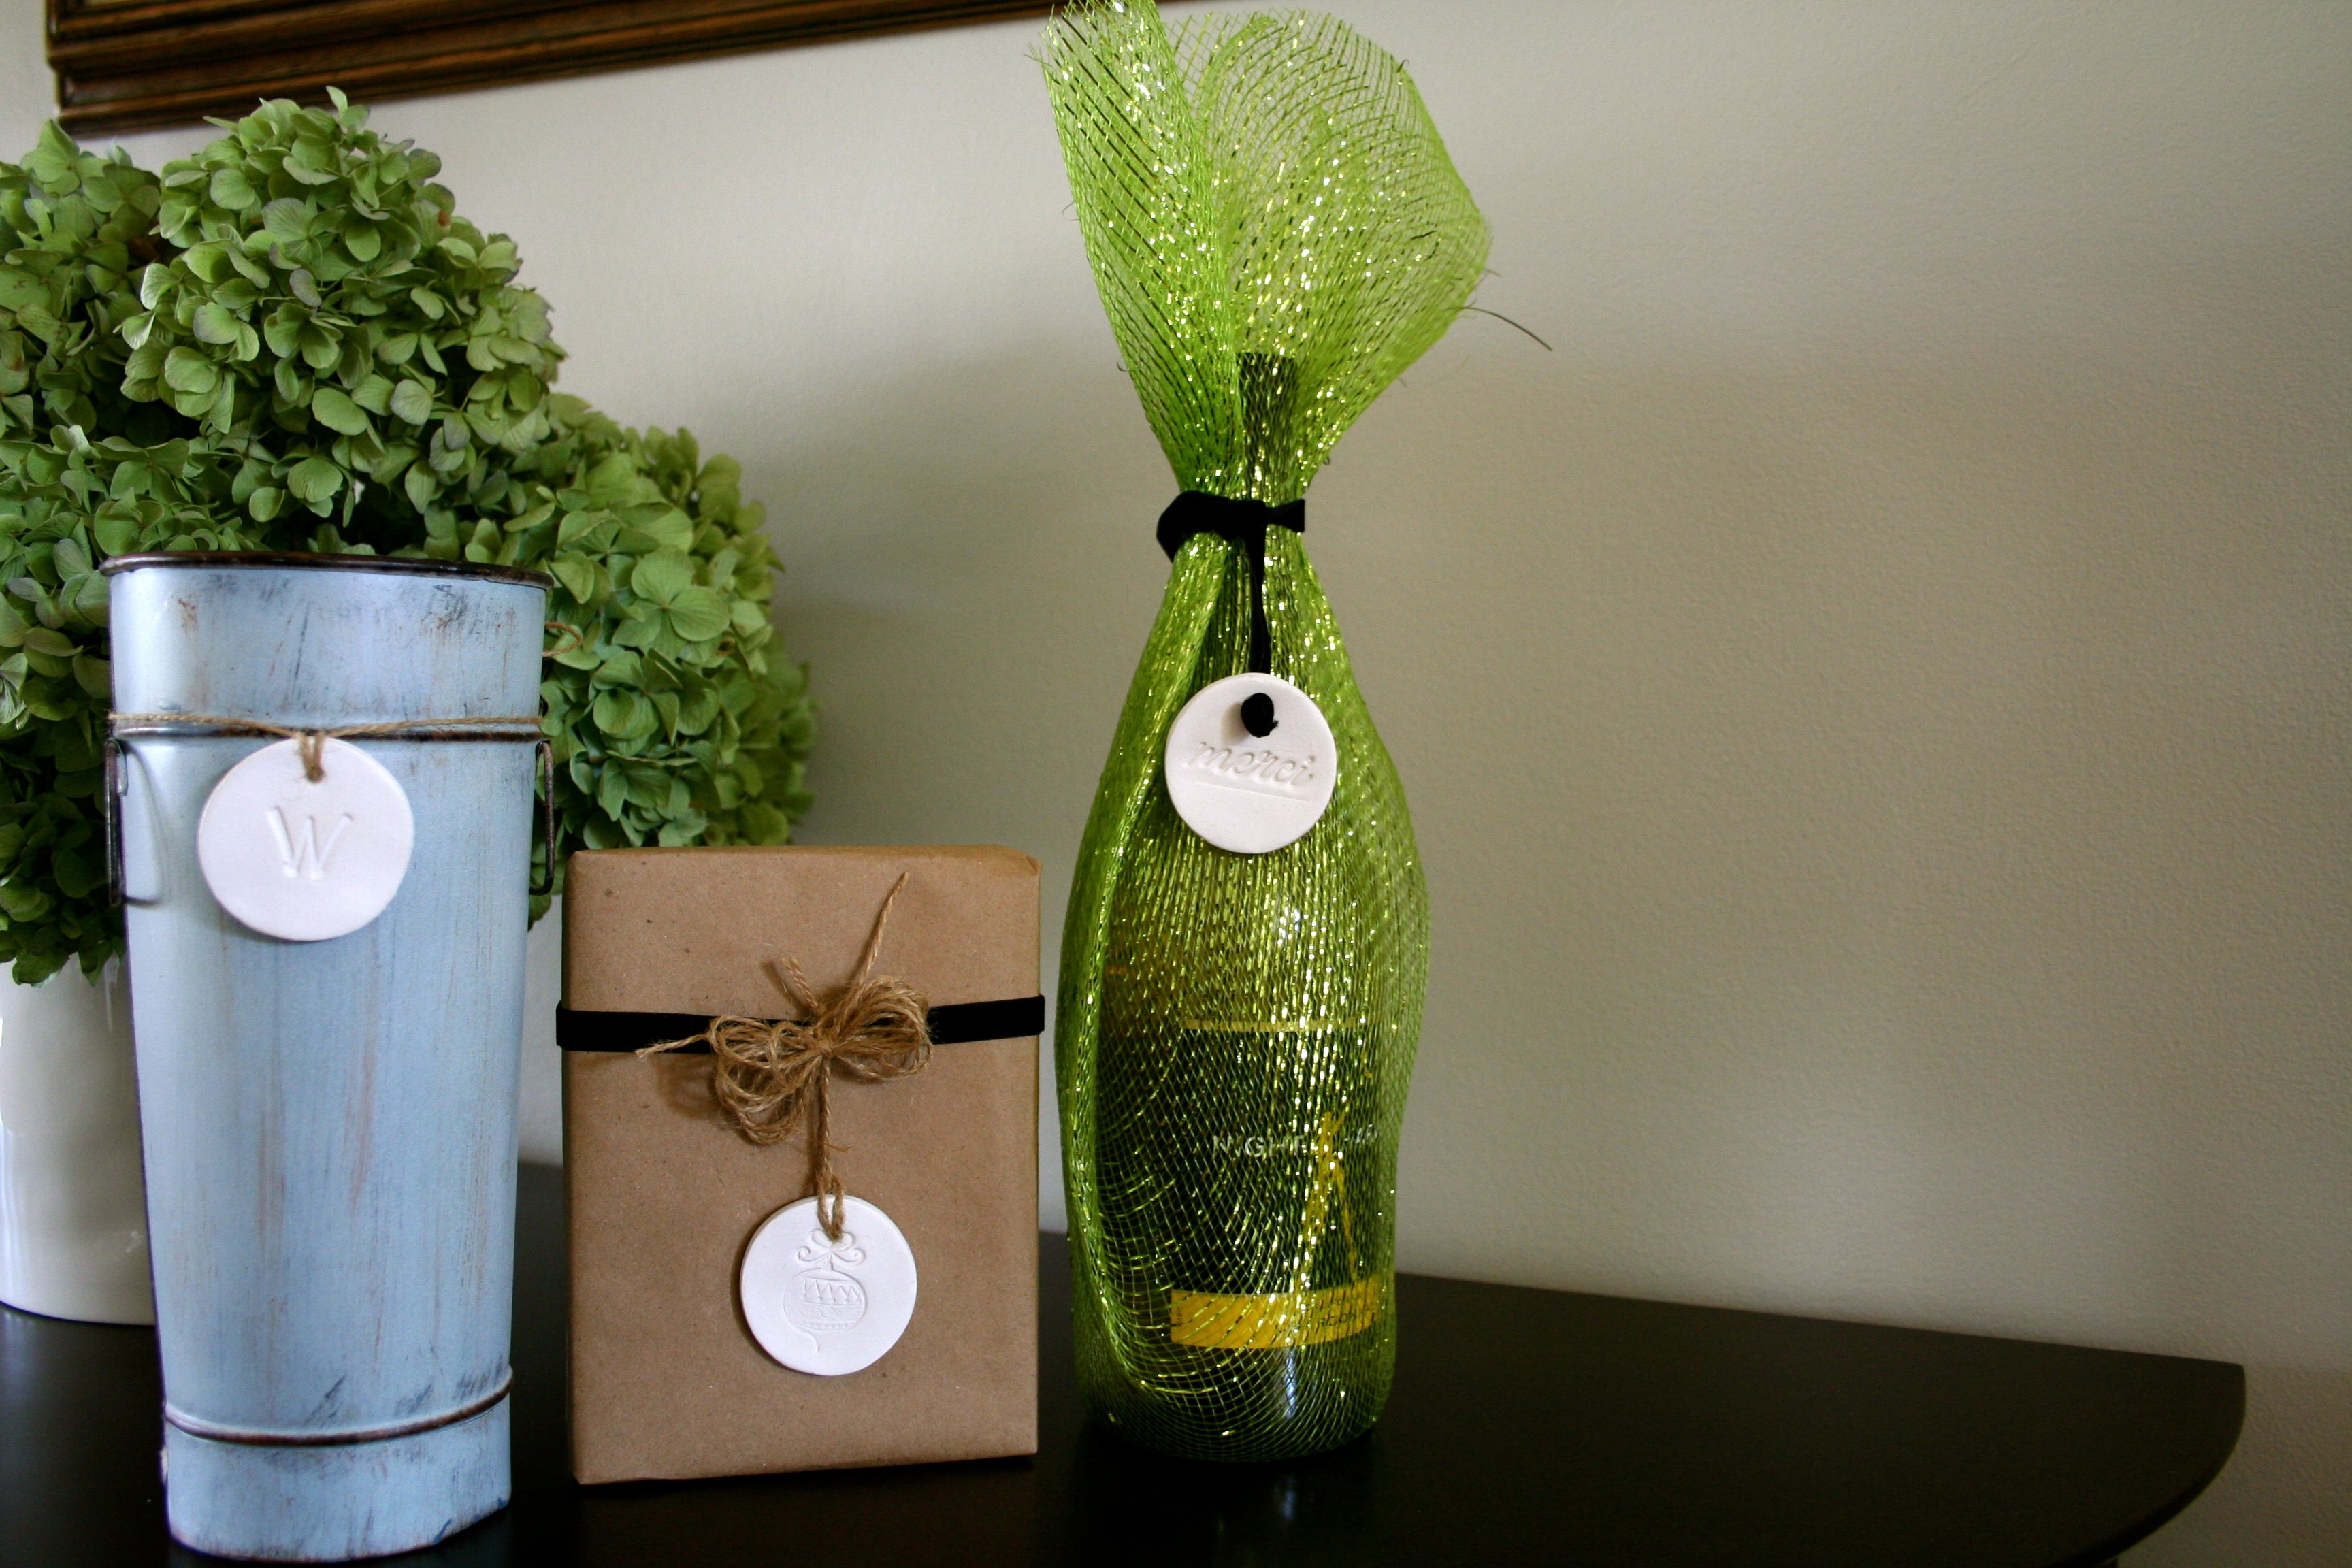
Tags for little flower pots.
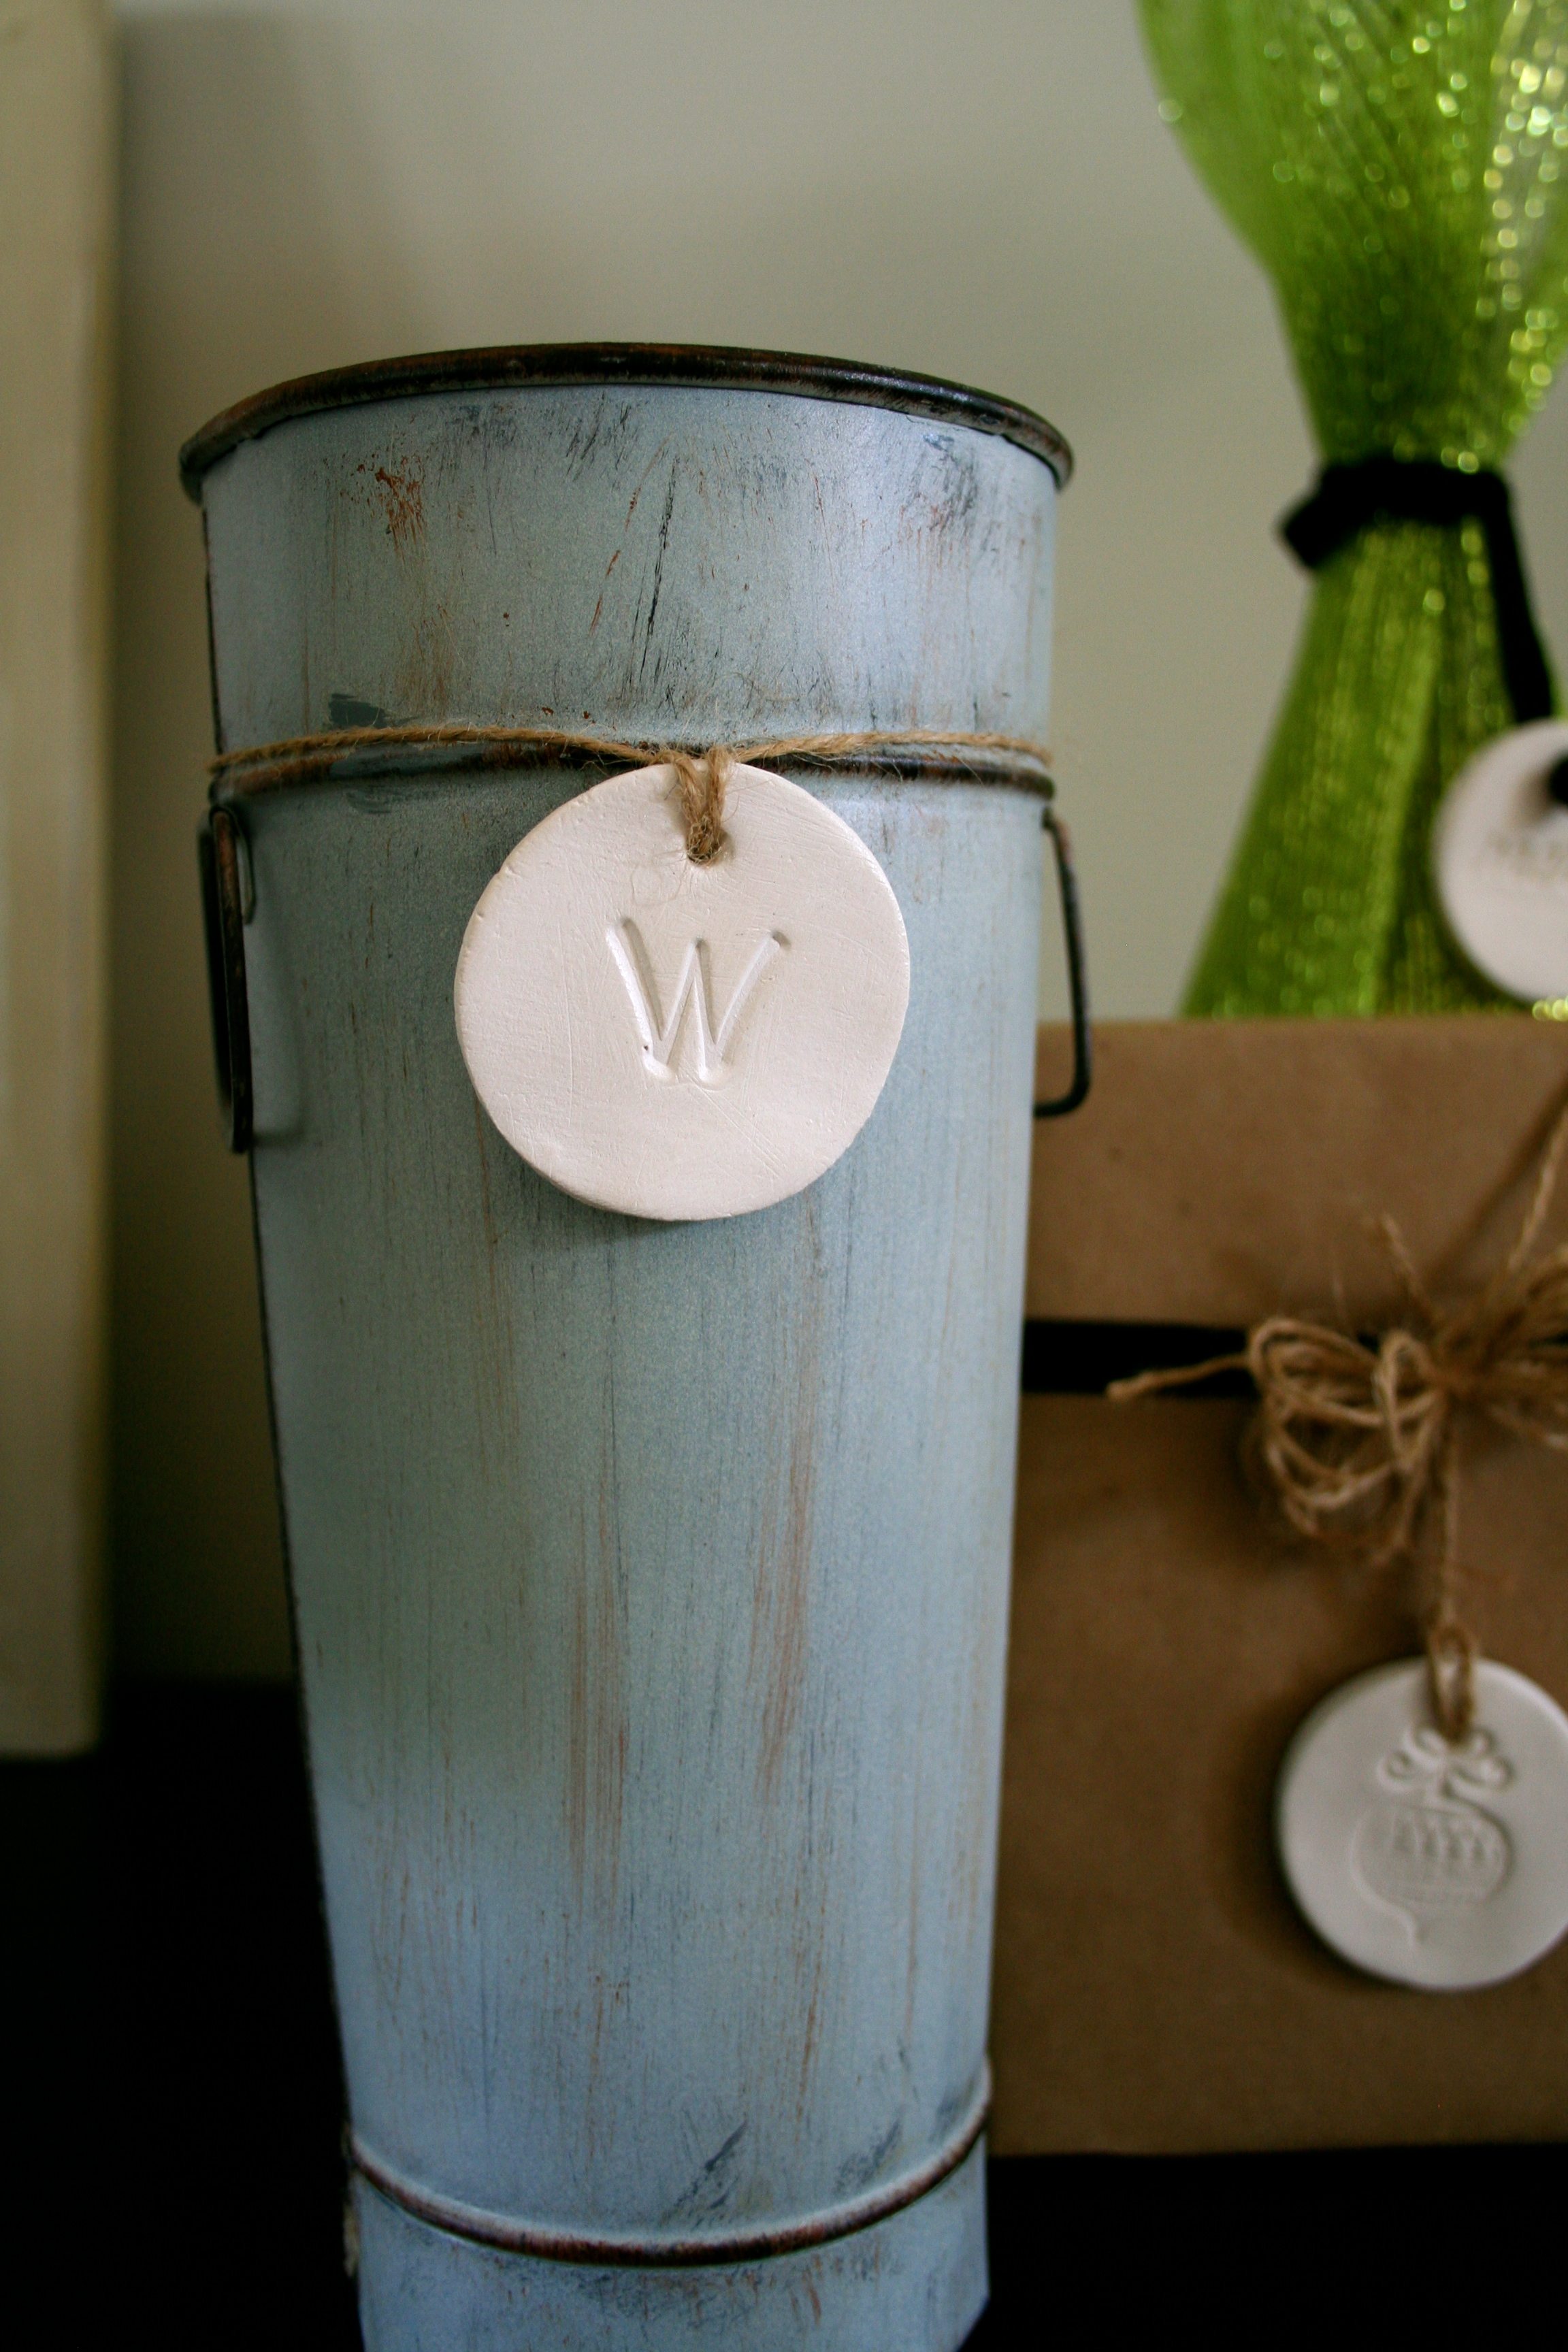
Tags to wrap around metal buckets
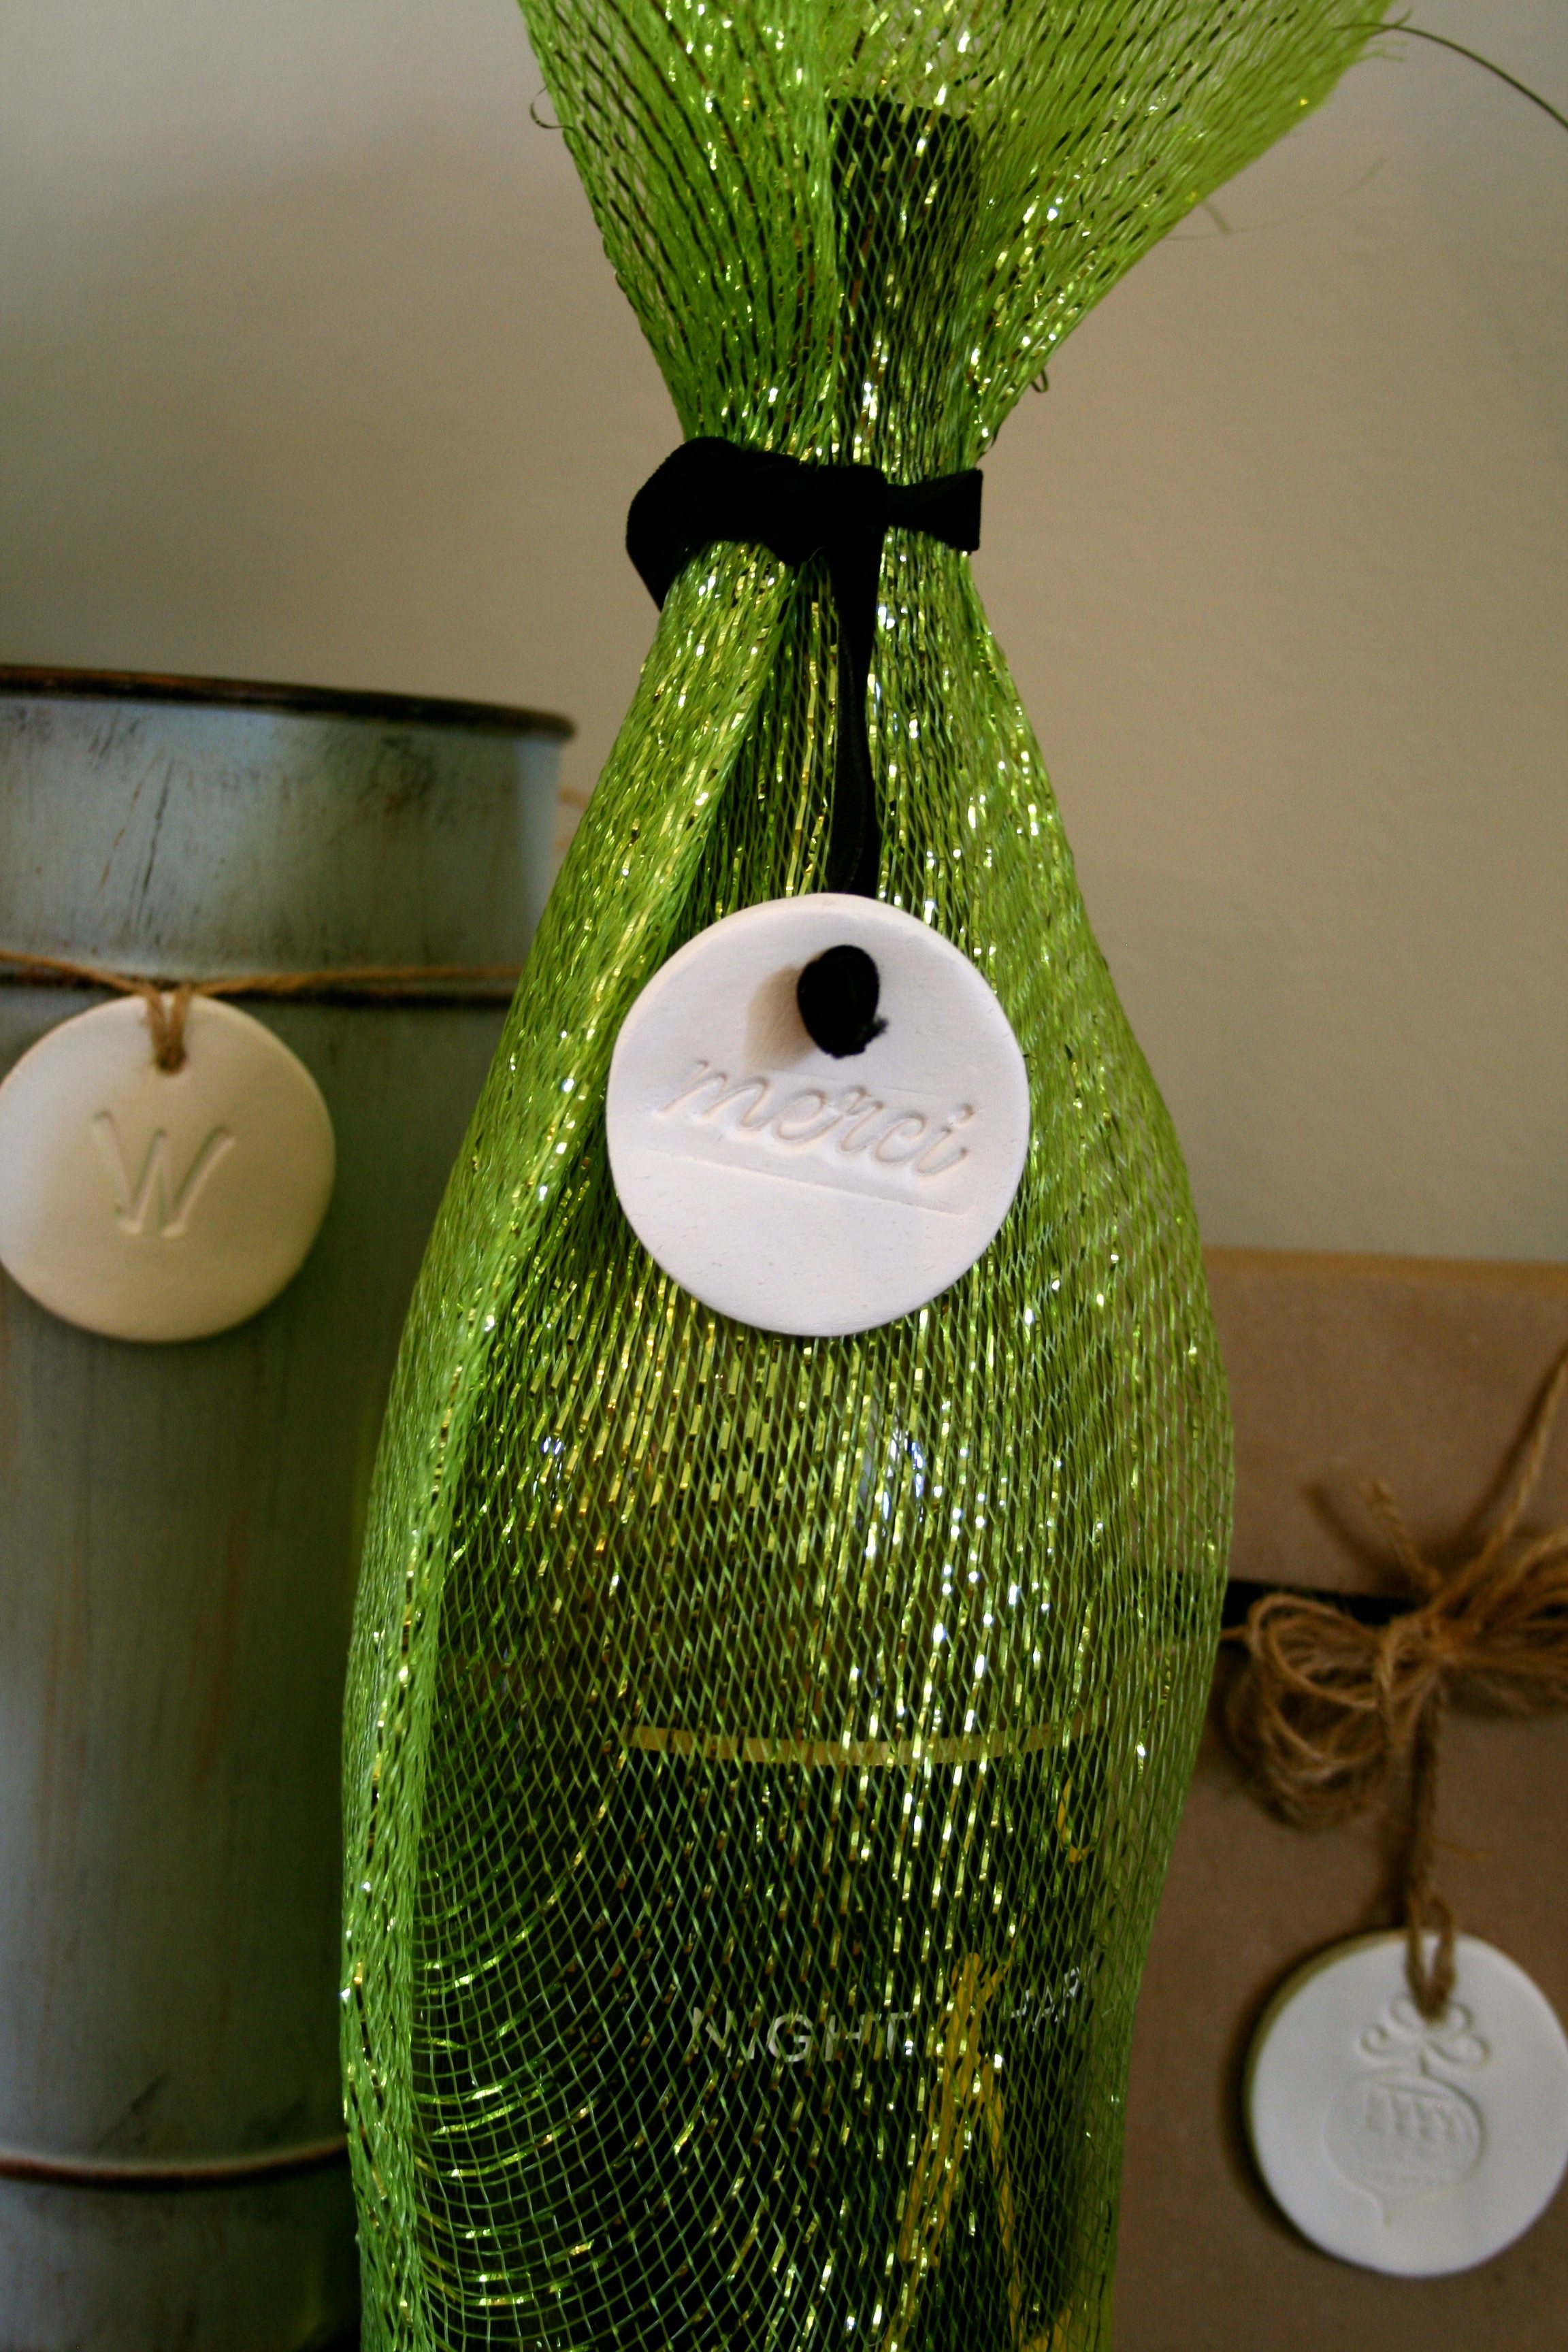
Tags for hostess gifts.
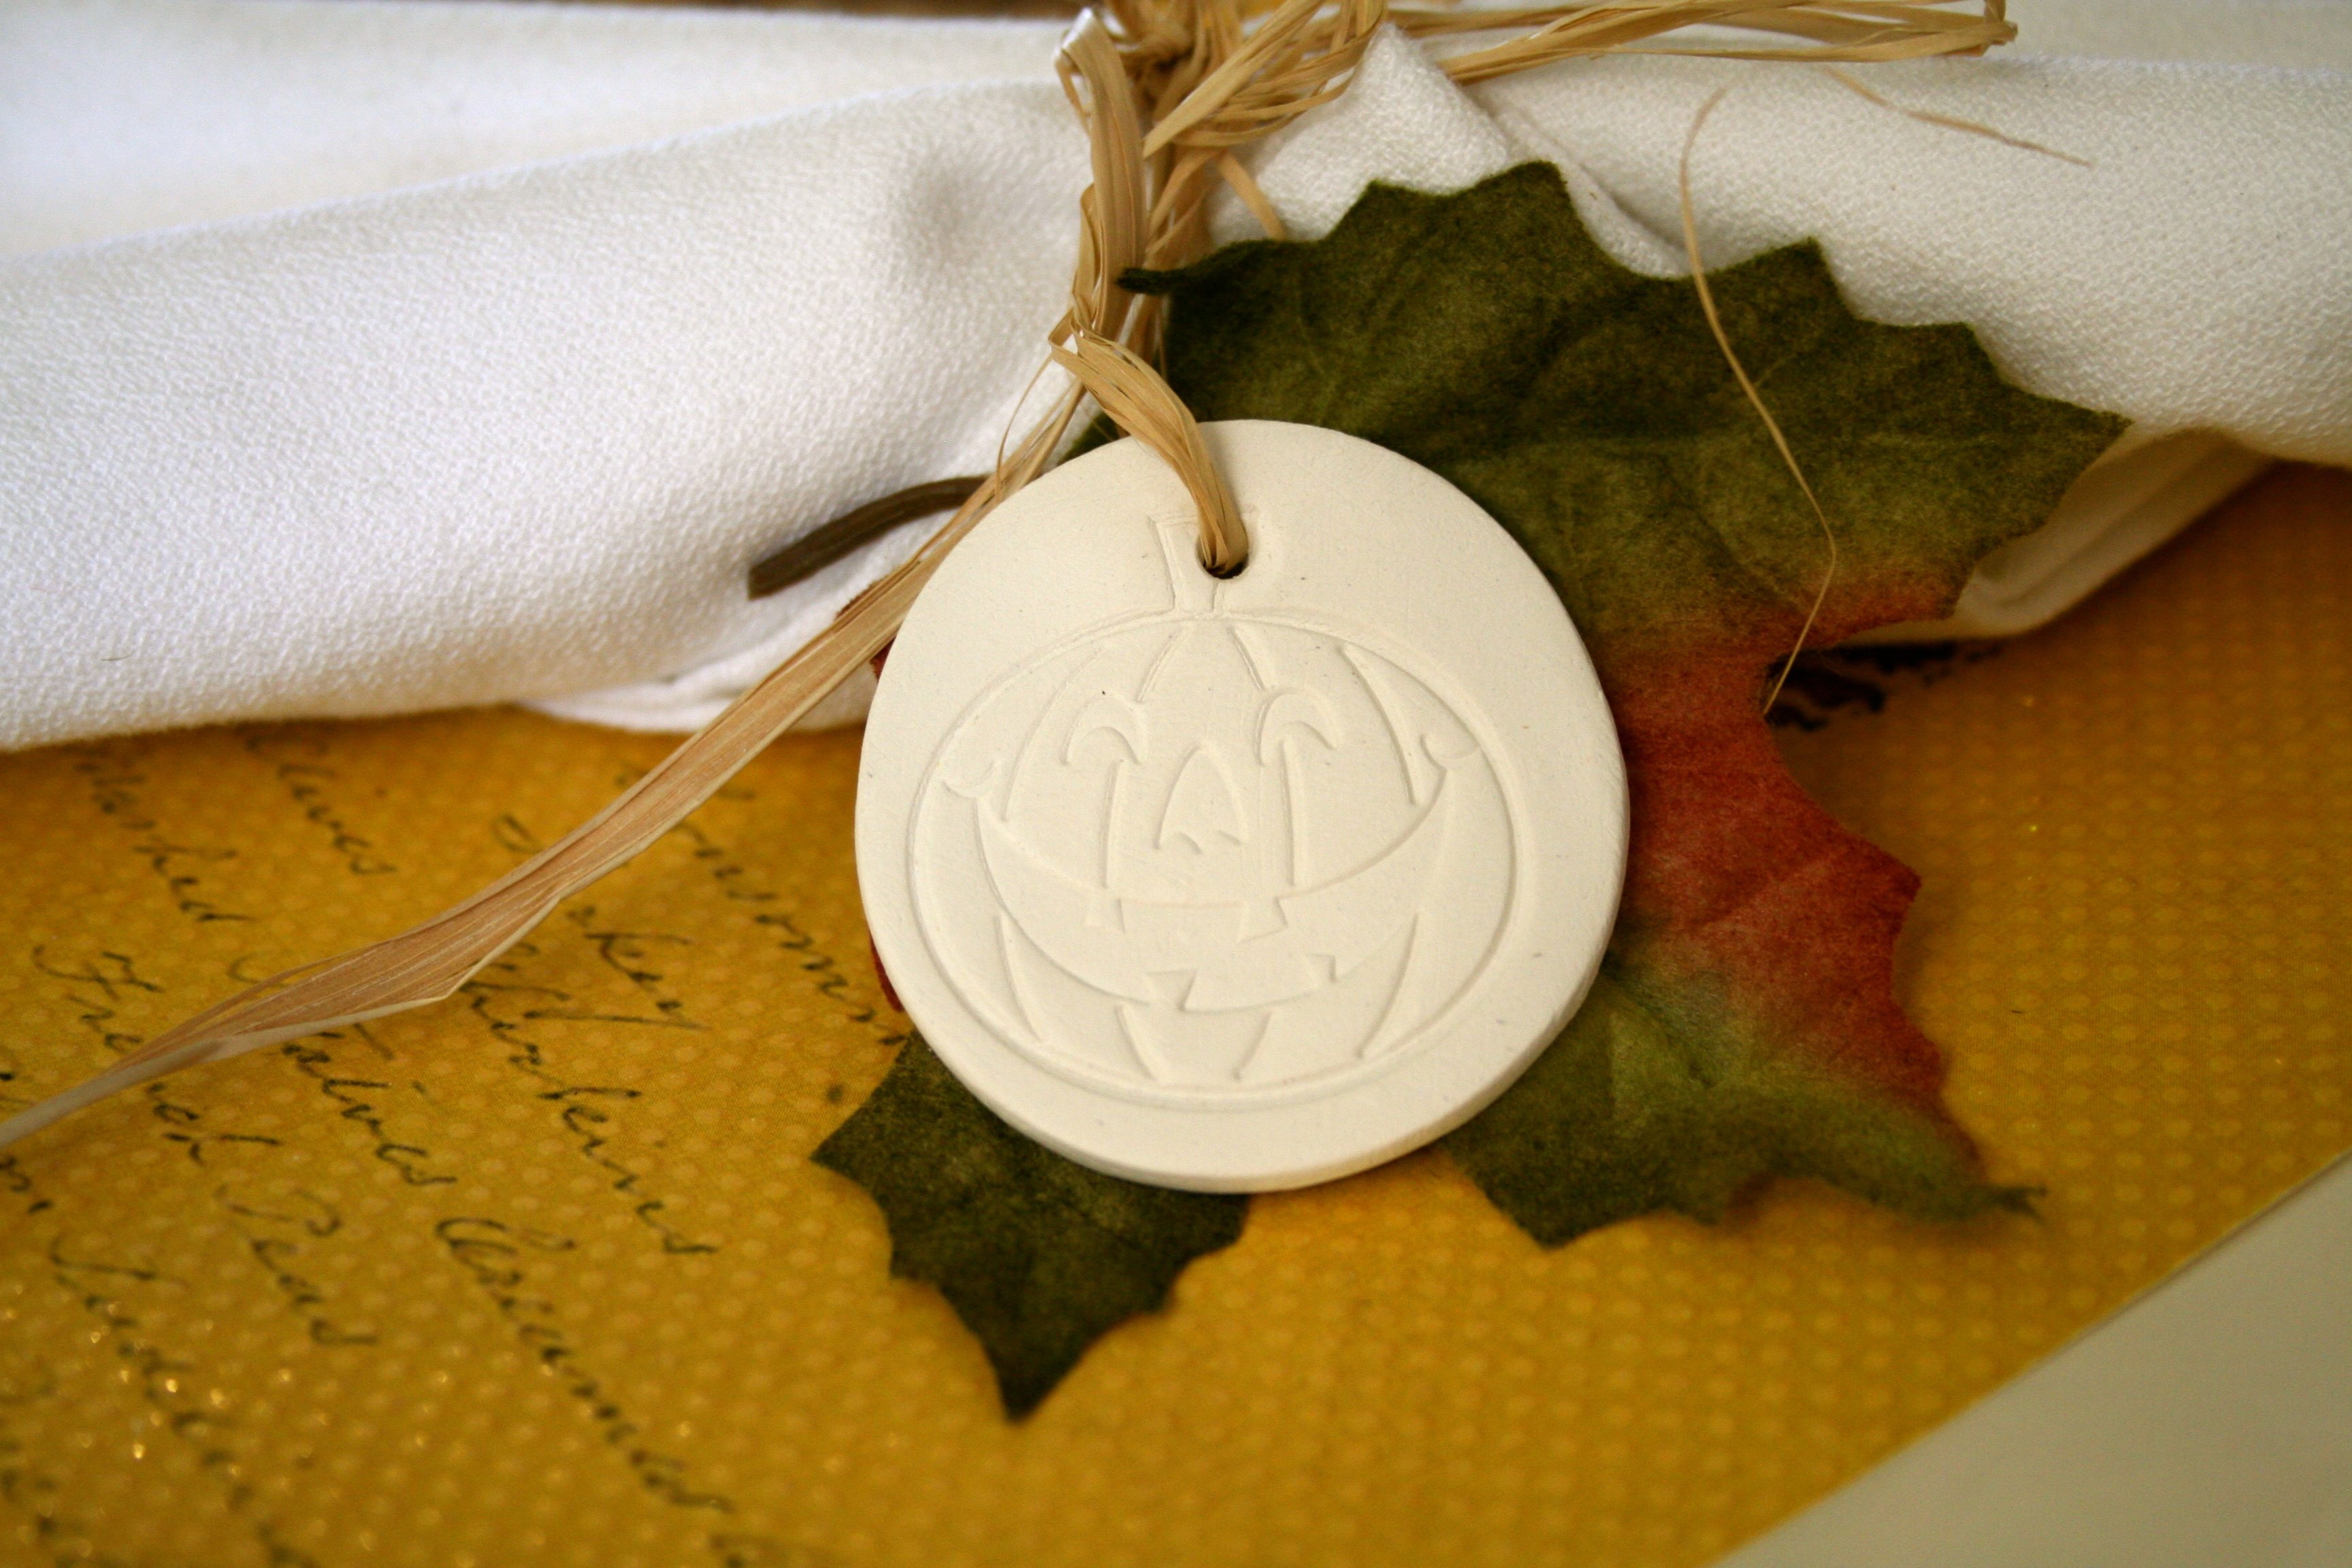
Tags for napkin rings.
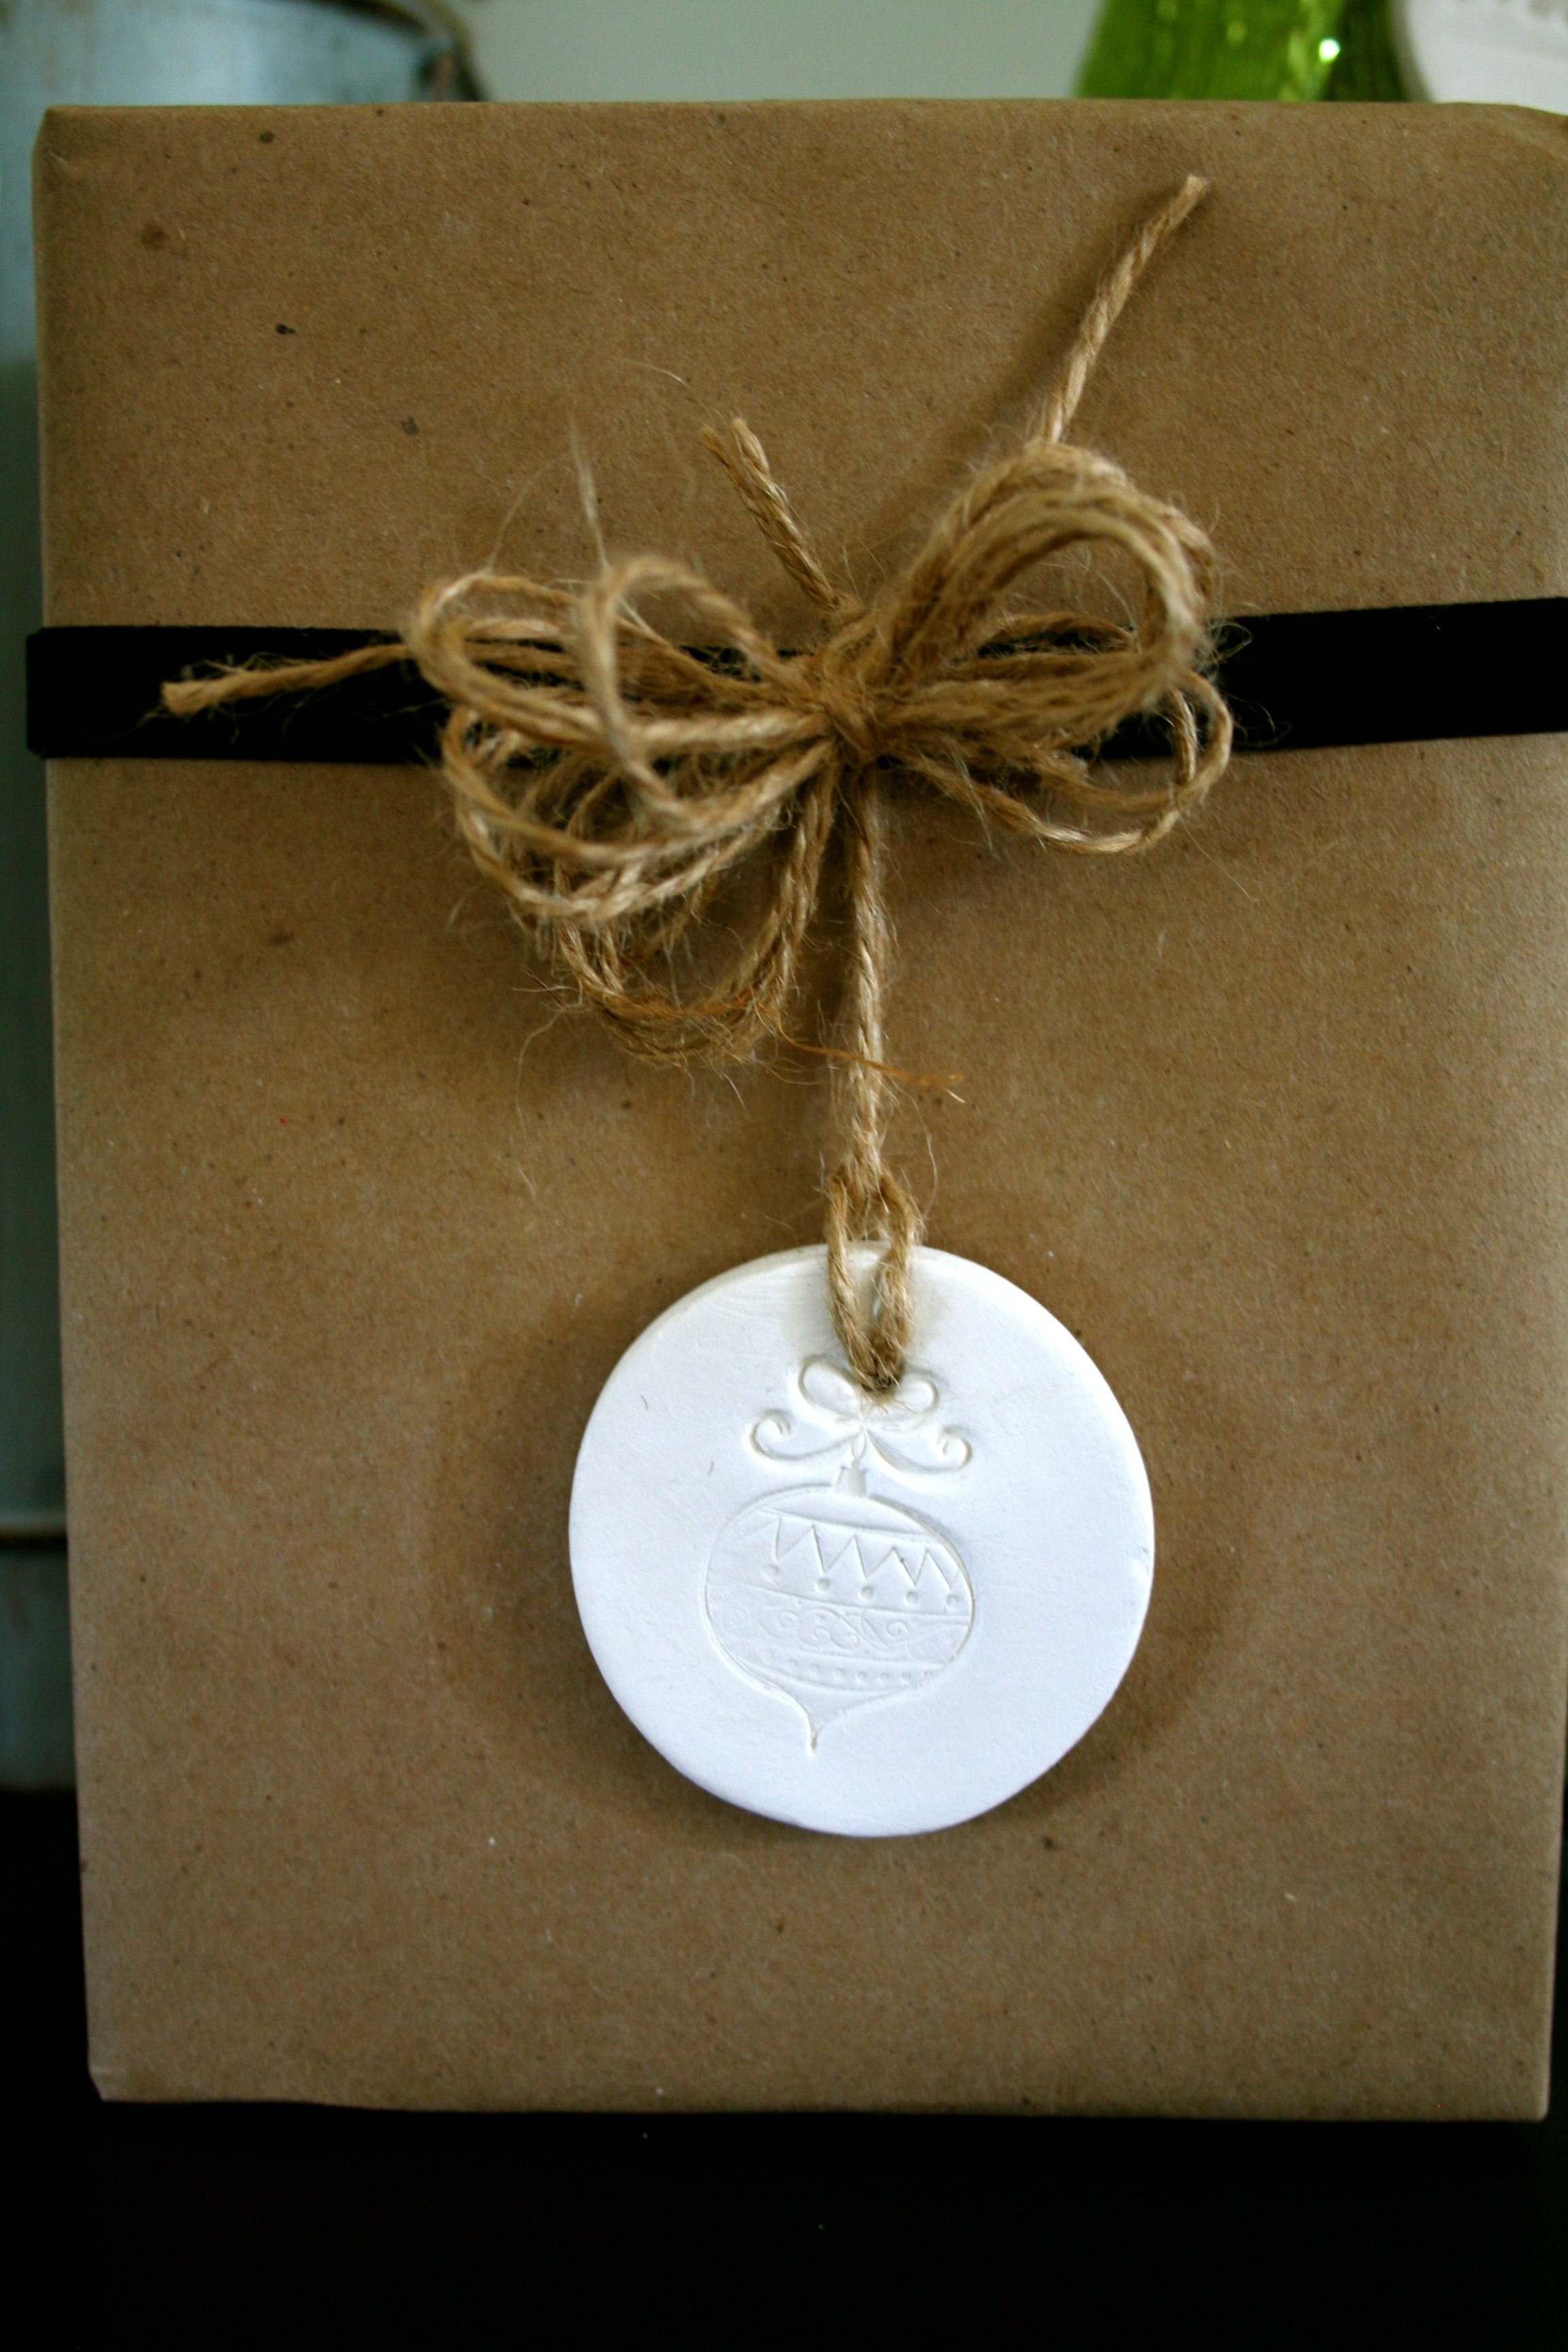
Tags for Christmas Gifts.
If you’re getting a gift from me, it may have a little clay tag on it.
Or maybe you’ll receive a clay tag as a gift!
Here are some other clay tags that I found:
I’m sure there’s more, but I’ll let you find them!
I’ll be at my grandson’s birthday party next week. I’ll be having fun with my daughter during the day and running with the boys at night. I have a couple of things that will post, and I’ll visit everyone when I get back. Thanks for all your comments! And one more shout out “Happy Birthday today to my sister Joyce”!
Sharing at these wonderful blogs: Funky Junk Faith, Trust and a Little Pixie Dust Tatertots & Jello House Stories A to Z Primp Centsational Girl
33 Comments
ArchiveI have been making some of these. Yours look great!
LOVE these!! Thanks for sharing!
Those look great. I may have to try this sometime. Cute for gift tags for Christmas.
I love these clay tags. So many uses for them. Thanks for sharing.
Barb
Very cute! We'd love for you to also try the AMACO Cloud Clay product and show us what you can do. If you'd like some samples let me know.
These are wonderful! I'm going to pick some up to play with...
Thanks for the heads-up!
-Revi
Thanks so much for sharing this! I can't wait to try it!
Thank you for this!! I just bought this product last night with the intention of making clay tags & before I could google how to proceed - there you were telling me exactly how to go about it! I love you!! :)
I just had to see what you made... and those are super cute. I guess I have been out of the crafting loop, I didn't have a clue what that product was. Learned something new today and it's only 7:24 am. I can go back to bed now then right? Enjoy your family time =)
love your clay tags. they are really adorable. they are the perfect accessory to your gifts.
Great idea. I want to try this! Love your blog. Have fun with your family!!
Gah! I love these! They turned out great, you're right, they will make nice gifts. Have fun.
What a cute idea! I may have to try and make some myself. Yours looks so cute.
Enjoy your family time,
Gail
I didn't know about this clay, thanks for the info. Your tags are really cute and I can see that they can be used in a variety of ways. Thanks also for the nice compliment you left for me on my blog.---------Shannon
I've seen these in Etsy shops but had no idea they were so easy. The secret is to get great stamps! I think I see a project in my future. Have a wonderful time with your family. How fun.
So simple but full of style! a very clever idea!
Cathy @ Room Rx
Oh I am so glad you shared this it looks SO easy ans fun for kids too. Cute blog I am your newest follower. Lindsay,
countrygirlhome
Those are great! Thanks for sharing this.
Love your tags and how you showed they can be used. I have been wanting to make some of those clay tags for a while now. I like the idea of using them on gifts. I may make some as ornaments too. Thanks for sharing.
Hi Debbie, I'm crazy about this idea & it's my pleasure to feature it in my Fab Friday Favorites post tomorrow.
Thanks so much for linking it up!
Warmly, MIchelle
love the tags something i absolutely try . i pinned this
just got the boys (well, ME) some of this clay...
I love these!! I love all the variety you did!! :)
Those are so cool! I LOVE the idea of using them as gift tags. Just lovely. :) Visiting from Centsational Girl's Fall party. Hope you'll stop by my blog post too! :)
I love these. Thanks for sharing how to make them!
Does anyone know if the clay be be "resoftened". I found some in my daughter's closet from a project she did a couple of years ago.
Thanks!
Hi! I bought this clay in hopes of doing the same thing but I had SO MUCH trouble with it. It stuck to everything and I couldn't get the cut (from a cookie cutter) shapes up without squidging the shape. I couldn't peel the clay away from the outside of the cookie cutters OR get the shape up. It really was a huge mess and a massive disaster!!!
Any tips!?
I sent you an email with a link to a video that shows the product in use. I would return your product, as it sounds like there is something wrong with it. I hope this helps.
Thanks,
Debbie
What a cool idea! Love these :)
jamie @ sewrockin.com
Good morning! I missed this post the first time around. Glad I found it this time! I am going to be doing some of these for a gift exchange and love how yours turned out. Have a great day.
Shari
Completely adorable!
I love when someone introduces me to a great product. Thanks for all the ideas; can't wait to see what else you come up with in the future. Jo @ Let's Face the Music
Wow, these turned out really well :) I used clay for some of my DIY ornamnents this year too. I prefer the finish of yours though so I think I need to find myself some of the crayons brand.