Welcome back to another power tool challenge. This month our challenge was “Summer” inside or out.
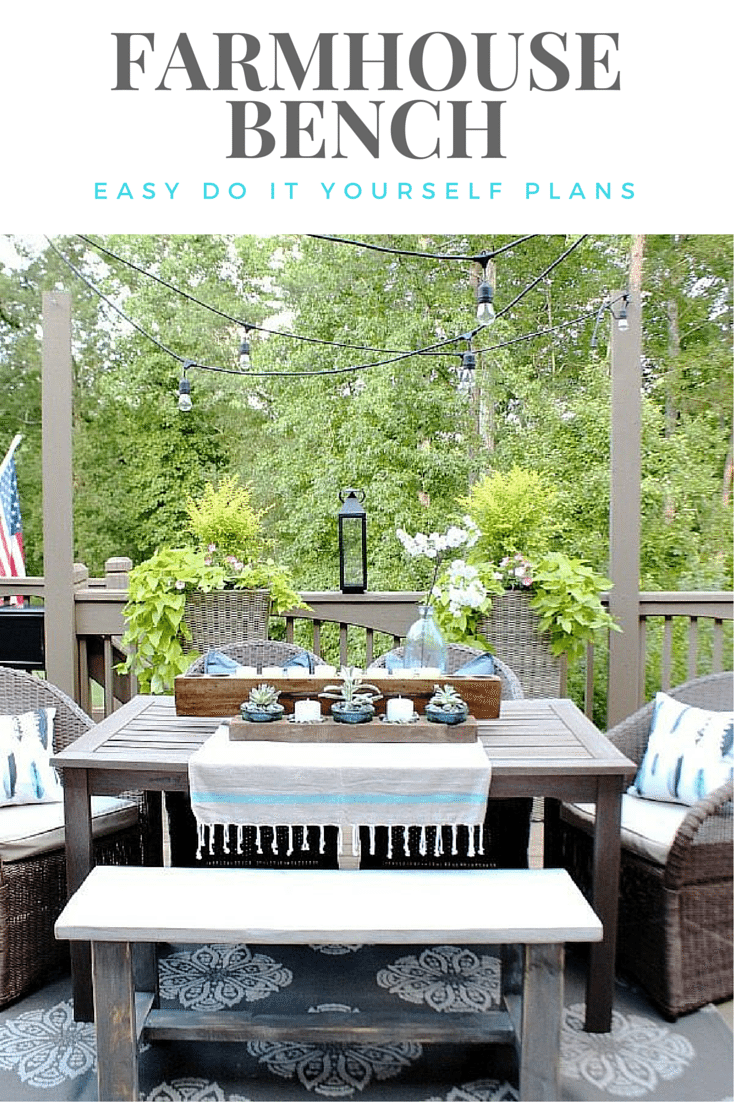
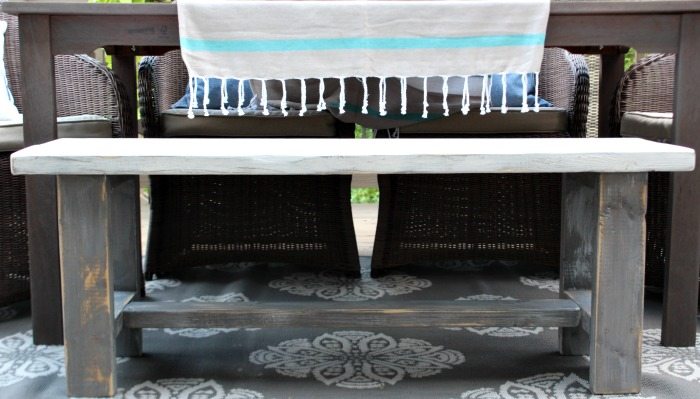
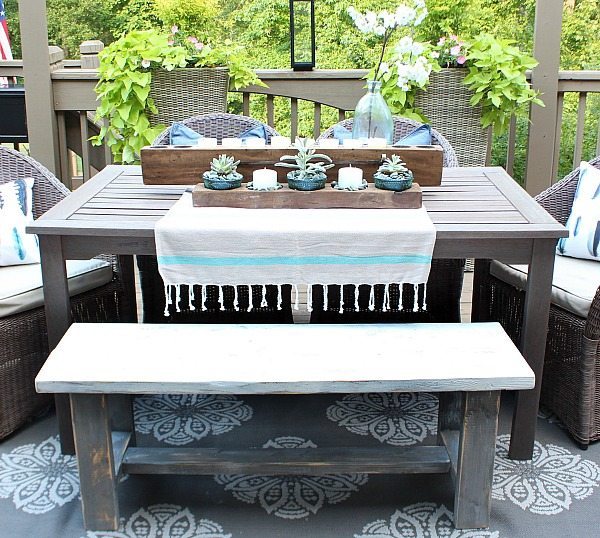
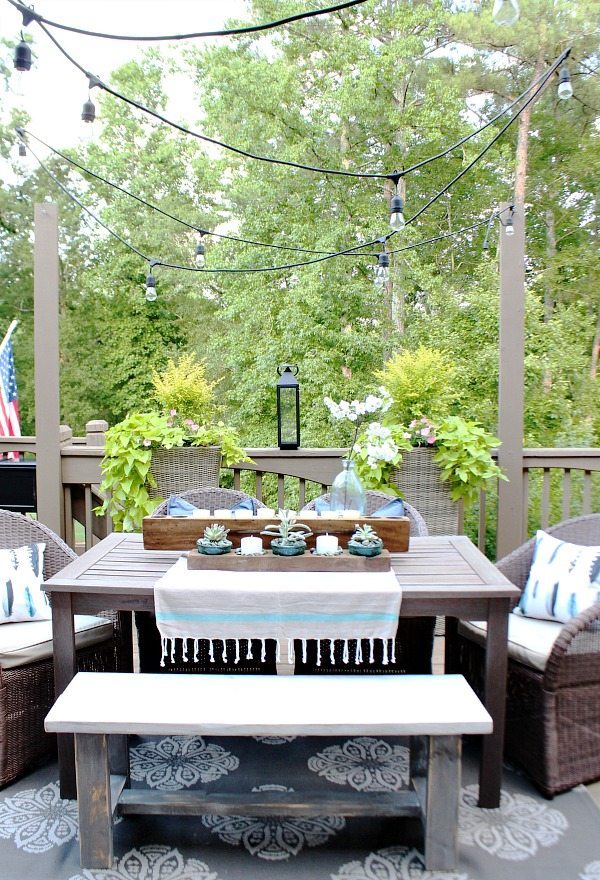
Since I’m a hoarder of all things and I have promised myself not to build or buy anything that I can’t use, I decided to build a farmhouse bench for our outdoor dining space. The plan is to use it when I need extra seating now and maybe move it to the foot of the bed in the guest room later. I stained the last few projects, which surprised a few people, because I love painting furniture. I posed the question “paint it?” or “stain it ?” on Facebook and in a newsletter and paint it won.
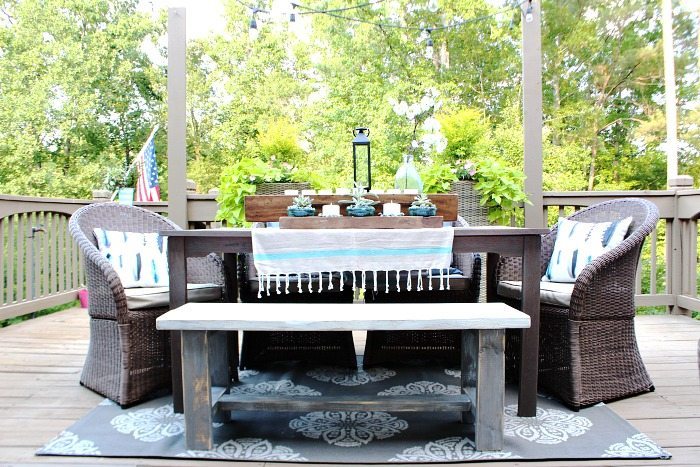
I painted the bottom dark gray and the top ivory and distressed the heck out of it. I really wanted a worn look.
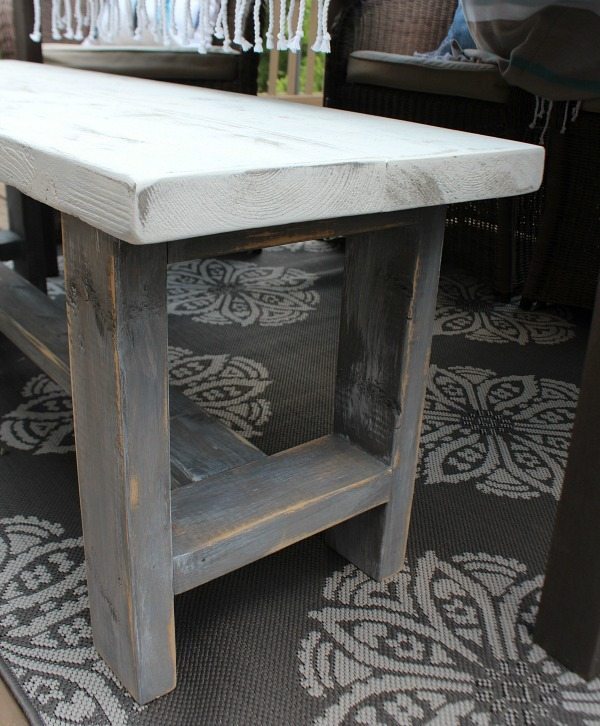
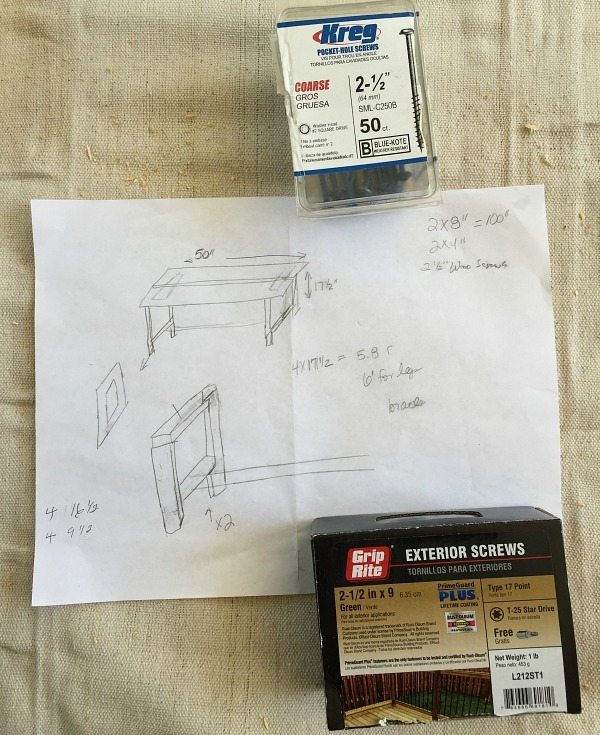
Here’s where it all started and it did change a little along the way. Originally, I was going to make it 50” wide but after calculating for lumber, I made it 48”. Why waste lumber, when and 8’ piece of 2” x 8” will work out perfectly. I also changed the height, to a total of 18” tall. You can see in the drawing the legs were going to be 17 1/2”. Hey a woman can change her mind, right!

Supplies for Farmhouse Bench
You will need:
- 1 each 8’ - 2” x 8” common board
- 1 each 12’ 2” x 4” common board
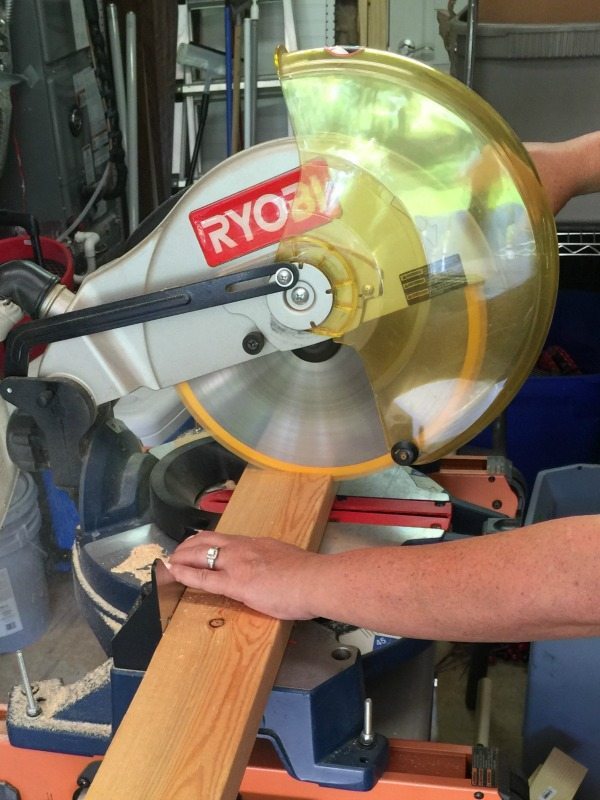
- saw (I used a miter saw)
- drill (I actually giving a Black + Decker away)
- Kreg jig
- 2 1/2” wood screws
- paint or stain of your choice
Cut the 2”x 8” in half = 48” each
Cuts for the 2” x 4”:
- 4 pieces each at 16 1/2”
- 4 pieces each at 9 1/2”
- 1 piece each at 35”
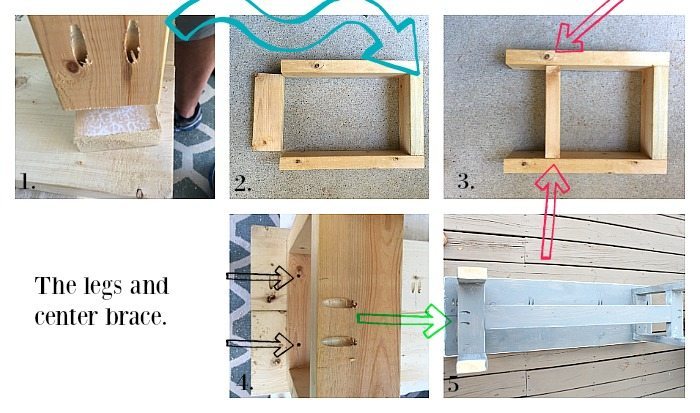
Make all your cuts. Attach the top of the bench first. See below - Build each leg, add the center brace and attach to the bottom of the bench. The legs are 3” in on each side and 1” in from front to back.
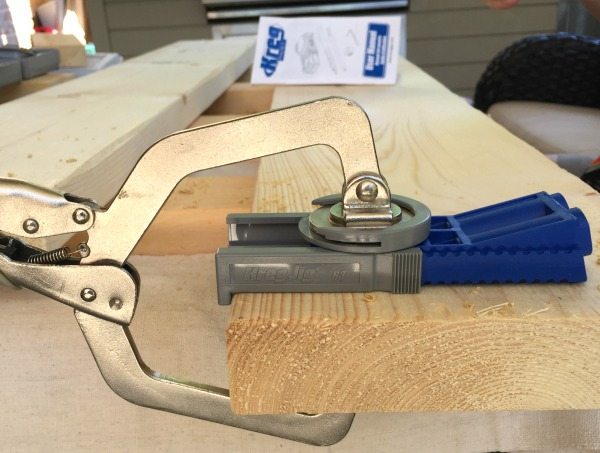
Using the Kreg jig gives a finished look to the piece of furniture. It’s very easy to use and comes with everything you need except the drill and screws. For this piece I used the Kreg Jr. It is marked for different sizes of board thickness, notice the ridges on the blue area. For this piece the wood is 1 1/2” inches thick, you simply slide the gray piece to the spot marked 1 1/2”. Clamp it, use the long drill bit that came with the kit and drill to the stop on the drill bit, see in photos below. You decide where your are going to connect the boards and attach the jig.

Once you have drilled each piece, I drilled 8 areas of the 48” - 2” x 8”, used 2 1/2” Kreg screws and attached the bench top. You can see 4 of them in the photo below:

For the legs, I used the same method, using the jig where I would be attaching the pieces of the leg. With the exception of the lower leg brace, see step 3, the red arrows, those are attached with 2 1/2” screws from the outside of the leg.
The leg parts are: 2 each of the 16 1/2” - 2” x 4” common board and the center braces are 2 each of 9 1/2” common board. You make 2 legs.
In step 4, you can see how the legs are attached to the bench top, with 2 1/2” wood screws.
Step 5 shows the attachment of the 35” center brace to the legs.
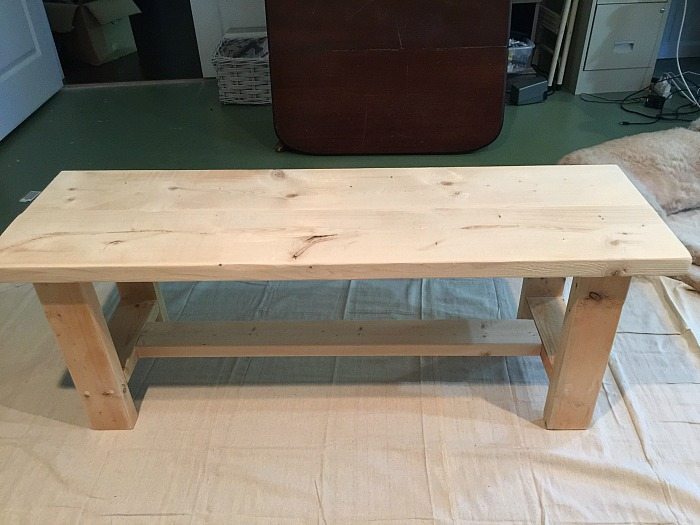
Here she is, the simple farmhouse bench, waiting to be painted:
Notice Murphy snoozing on the floor to the right. I must be working her too hard.
The bench build is very similar to the potting bench that I built a couple months ago. You can modify this plan for all kinds of ideas. In fact, I may just keep doing that ;)
I hope you’re encouraged to pick up a drill, a jig and a miter saw. You can do it! Build this simple but stylish farmhouse bench in a few hours.
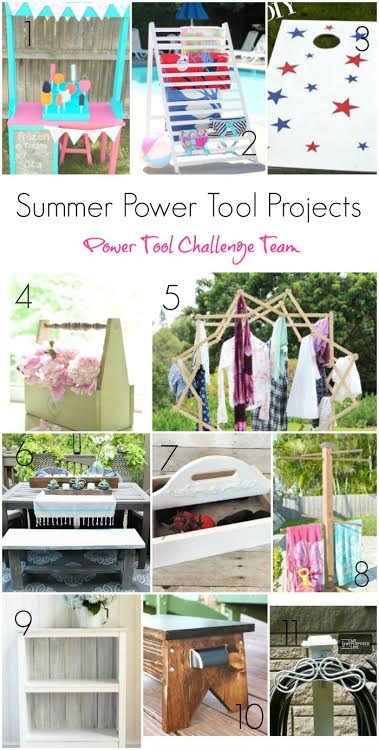
Now go check out the other Summer Projects:
Frozen Treat Stand by My Love To Create
Red White And Blue Cornhole Game by Create And Babble
Drying Rack From Old Crib rail by The Kim Six Fix
Chair Spindle Wooden Garden Caddy by Interior Frugalista
Star Clothes Drying Rack by A Piece Of Rainbow
Farmhouse Bench Building Plans by Refresh Restyle
Vegetable Gathering Basket by Designs By Studio C
DIY Standing Towel Rack Tutorial by H2OBungalow
Reclaimed Wood Bookcase by Confessions of A Serial DIY’er
DIY Footstool by Virginia Sweet Pea
DIY Hose Hanger by My Repurposed Life
11 Comments
ArchiveSo beautiful Debbie! Your outdoor farmhouse bench is simple yet perfect. Great tutorial, and this gal LOVES all of her Kreg jigs too!
pinning!
gail
Wow! Look at you go! Love this bench and it looks so sturdy too! Smart to make it for extra seating and I'm loving the idea of using it for your guest room too. Great job!
Great looking bench, Debbie and it looks so good with your table. The rustic looking paint gives it such charm. Nice work! Swooning over your lovely deck space too.
That is one fabulous bench! The plan is easy, and the project is quick and economical... Plus it looks fabulous with the table!
This is a perfect addition your gorgeous outdoor space and you make it look so simple to do! It will be gorgeous in your guest room too! I want one now!! XO
Your outdoor space is so very pretty! I am officially inviting myself over to enjoy it with you. :)
The bench that you made looks so nice with your table and I love the paint colors and distressing that you did. Great project!
I LOVE the bench!! Your space is just beautiful too, makes me want to sit, relax and visit! :)
I love the bench but also love the rug! Do you mind sharing where you got it? I have the same color scheme in my sunroom and am looking for a rug. Thanks.
Such an easy project that anyone can do! I love this, Debbie! This is a project that I may be adding to my project list. My patio makeup is coming up next! Thanks for the inspiration.
I like your work, that bench inspires me, thanks
It looks so awesome Debbie! Well done!!