June 28, 2018 by Debbie Westbrooks
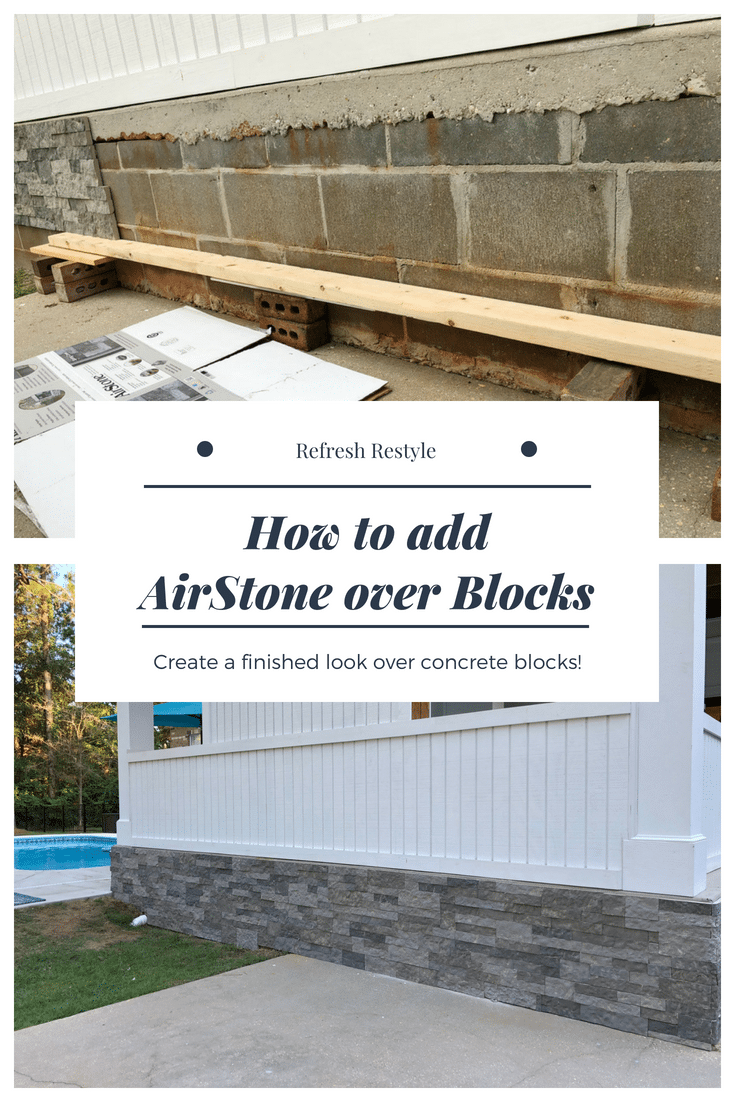
How To Add AirStone to Block Foundation
Home Interior · Outdoor Living
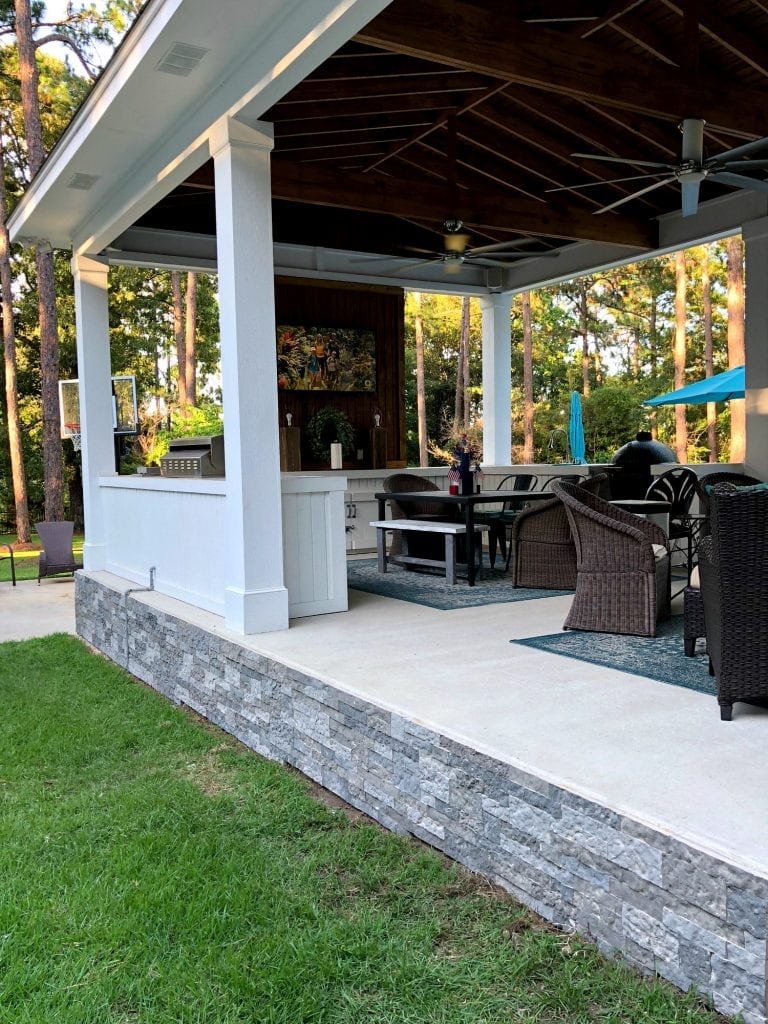
It is finished! I am so excited to share my latest outdoor project with you! The concrete blocks around our porch have been an eyesore. We started one afternoon on the corner next to the pool and then it started raining. I think it rained almost every day for three weeks. We caught a break a few times and worked on the foundation when we could.
How to Add AirStone to Block Foundation
 Thanks to AirStone and Loctite for partnering with me on this project. As you can see from the photos, the foundation looks so much better now. The before photo was taken just after the pool was put in last year, that exposed block was like a thorn in my side. I could not stop looking at it with an evil, side eye! We worked so hard building the outdoor kitchen,I just wanted the whole space to look great and now it does. We only have one more major outdoor project and that is to replace the wood on the stairs that go to the storage space about the cottage (hoping to hire that out)! Here’s a Facebook Live video that I did before we started the project: https://youtu.be/mbdE6-vGEX0
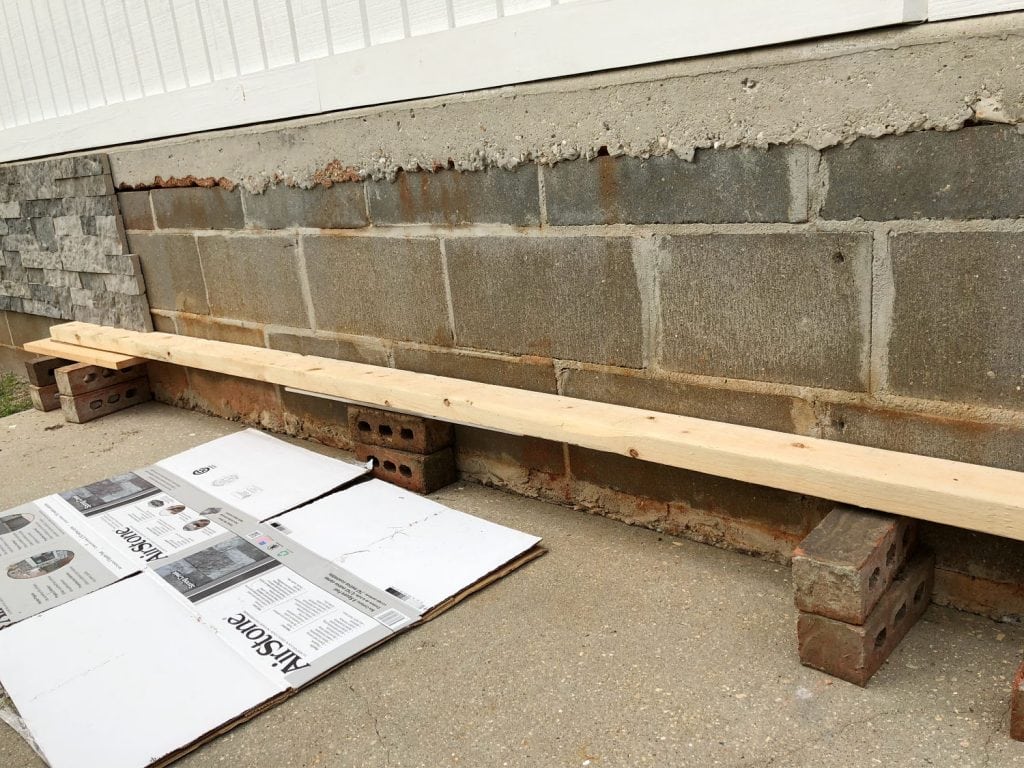
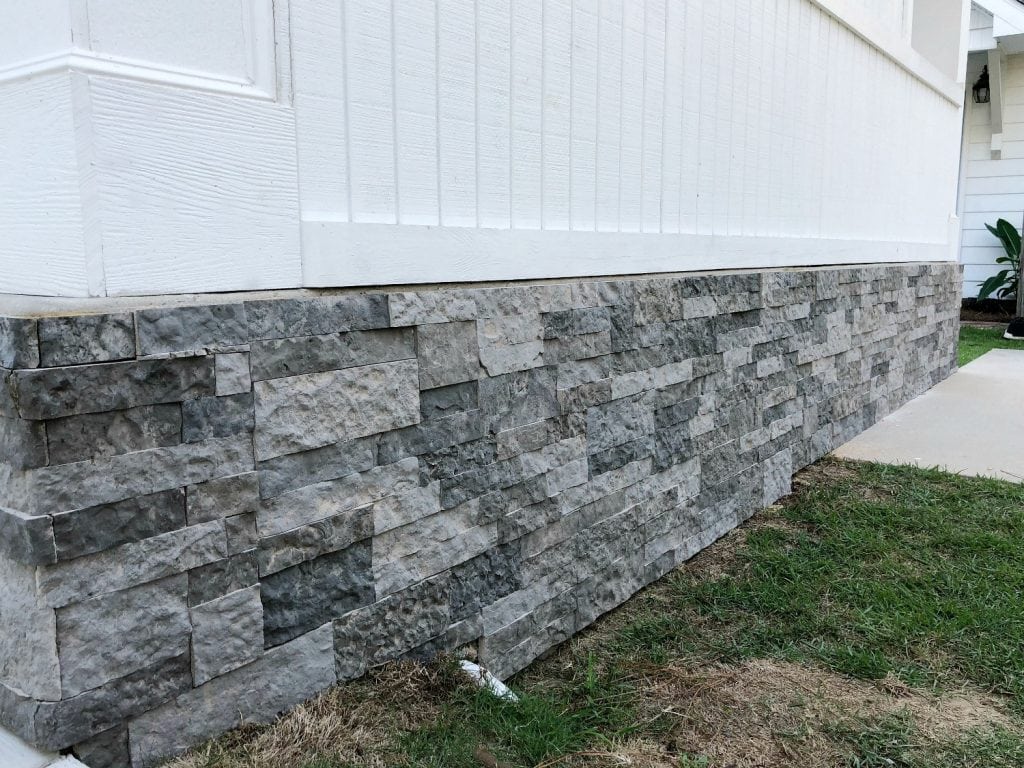
 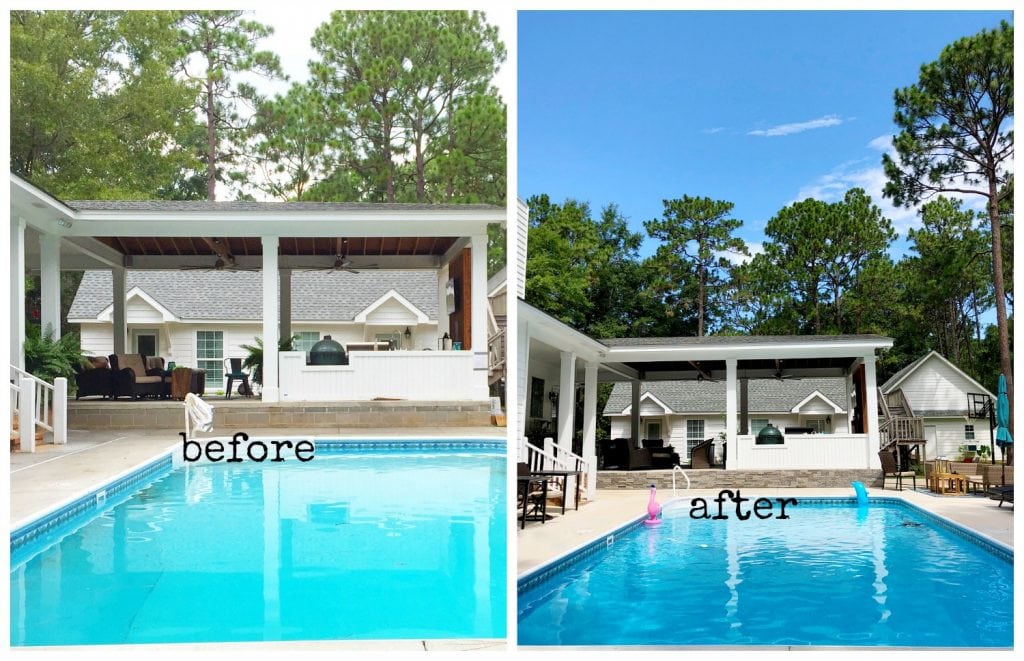 AirStone is a lightweight option for turning plain cement blocks in to a stone wall. Every carton of Airstone is made from 6 recycled wine bottles, I wonder if some were ours? Here’s what you need: AirStone Wall Stone ( I used Spring Creek) AirStone Corner/Finished End Stone 2” x 4” or other common board for creating a level line Loctite construction adhesive caulk gun saw (we used a miter saw and a table saw) folding table (for staging the stone and adding the adhesive) Here’s what we did: We had two corners for our project. We started on the outside corner near the pool. We were dealing with two different levels of ground. We used pieces of wood to level the corner.
- Started at the bottom corner, we added the corner end stones. Each corner stone is packed with it’s mate. There is a flat end and a natural end for each pair. Alternate each piece as shown here.
-
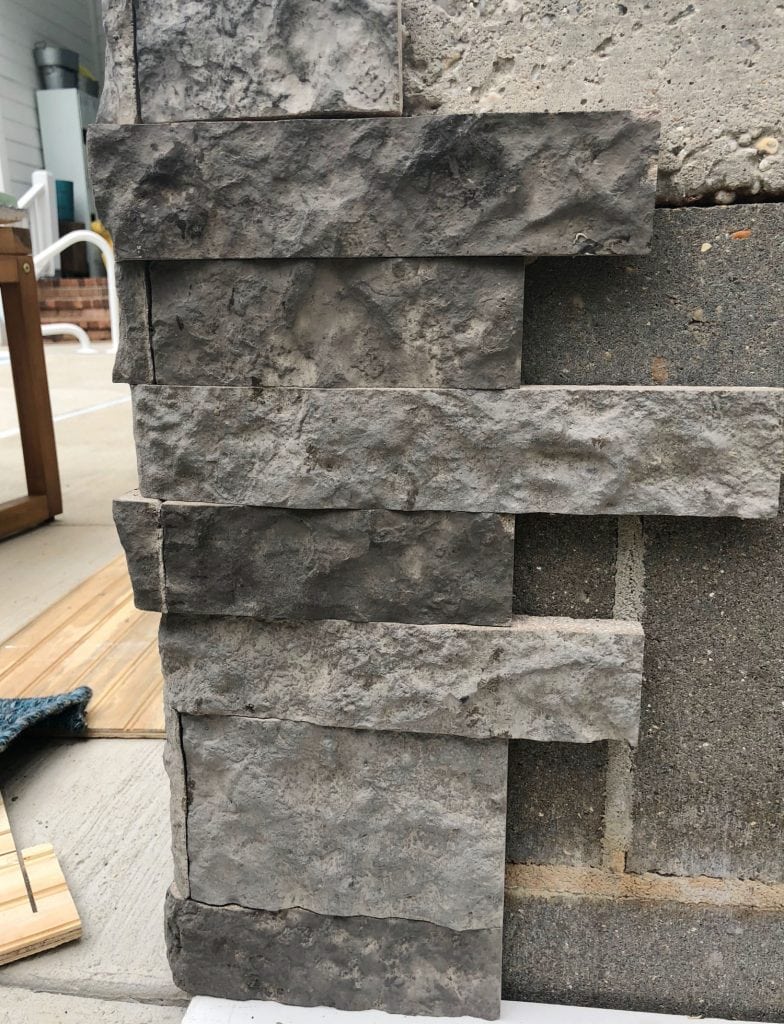
- After finishing the corner, we started at the bottom of the left side.
- We wanted a full stone at the top. Dry stack your stones and build your straight edge bottom with the 2” x 4 ” so that your top piece is a full stone.
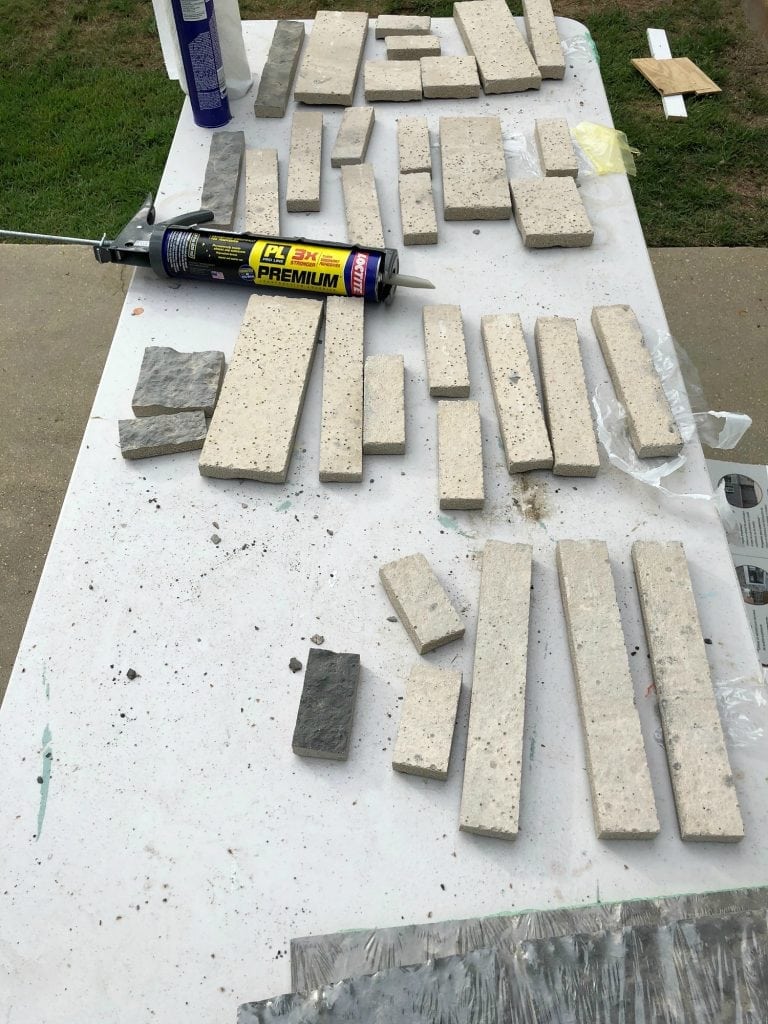
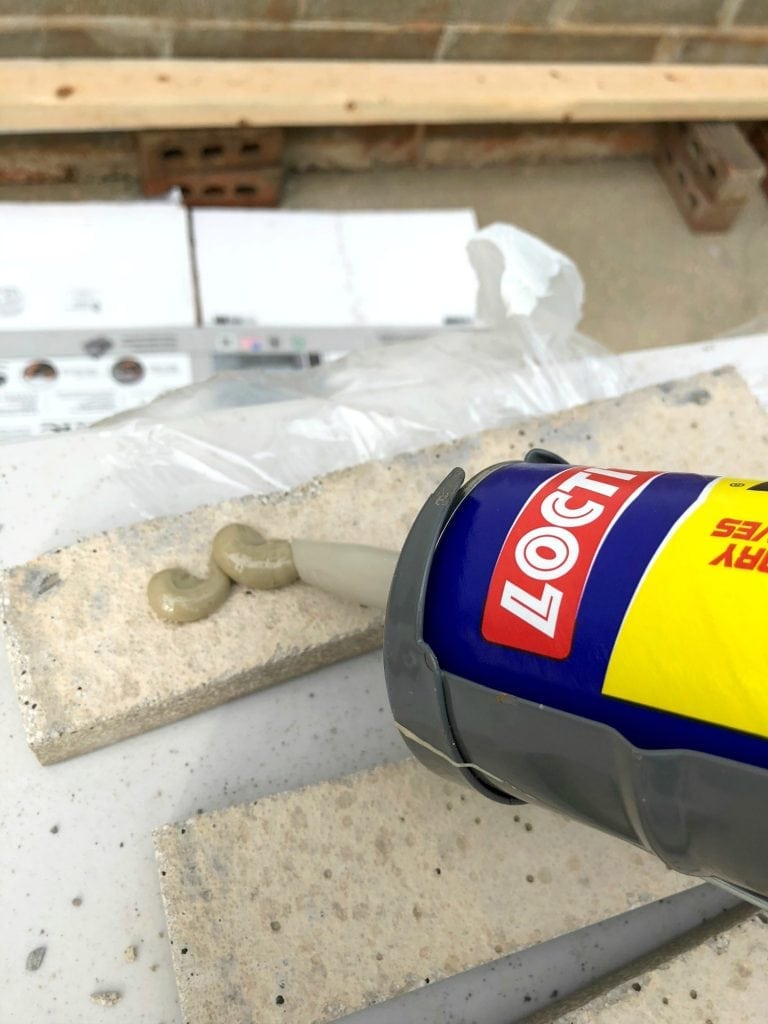
- We opened several boxes of stone, each box contained different shades and sizes. In order to create a random pattern, we staged the pieces on a table. We flipped the pieces over, added the glue and placed on the wall.
-
-
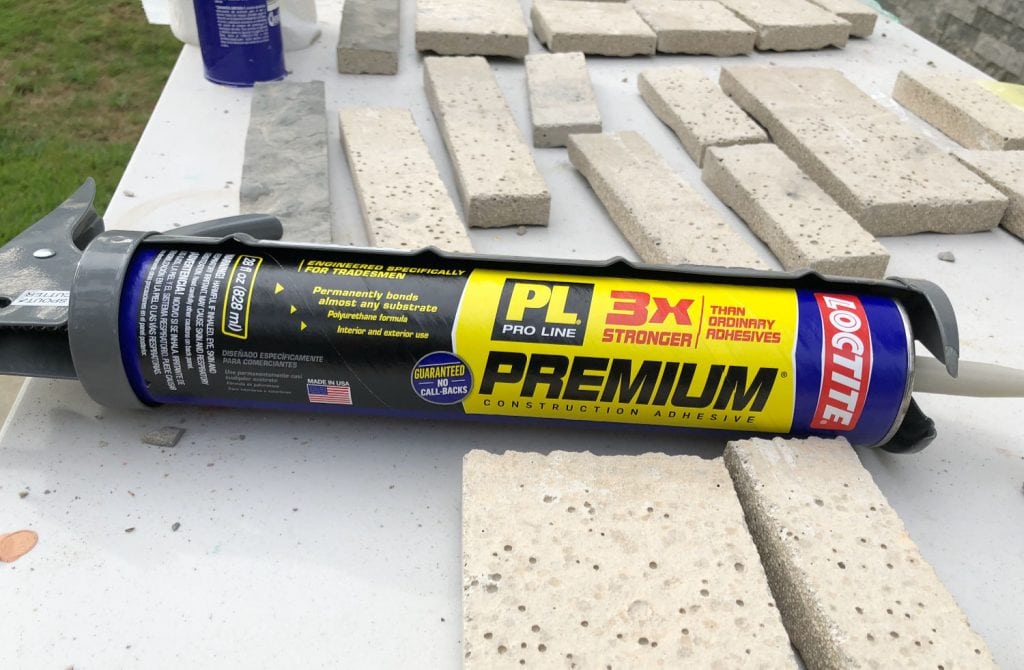
- The Locktite is to be used for outside application of the AirStone, if you’re adding it inside your home, you can use the AirStone interior adhesive.
-
- The adhesive recommends that you support the stone for 24 hours, we left the 2” x 4” in place until the glue dried.
-
- After using the Loctite adhesive and stone along the length of the block foundation, we let this dry. After it dried we continued to work down. Cutting each stone for the bottom row as needed with the saws.
-

-
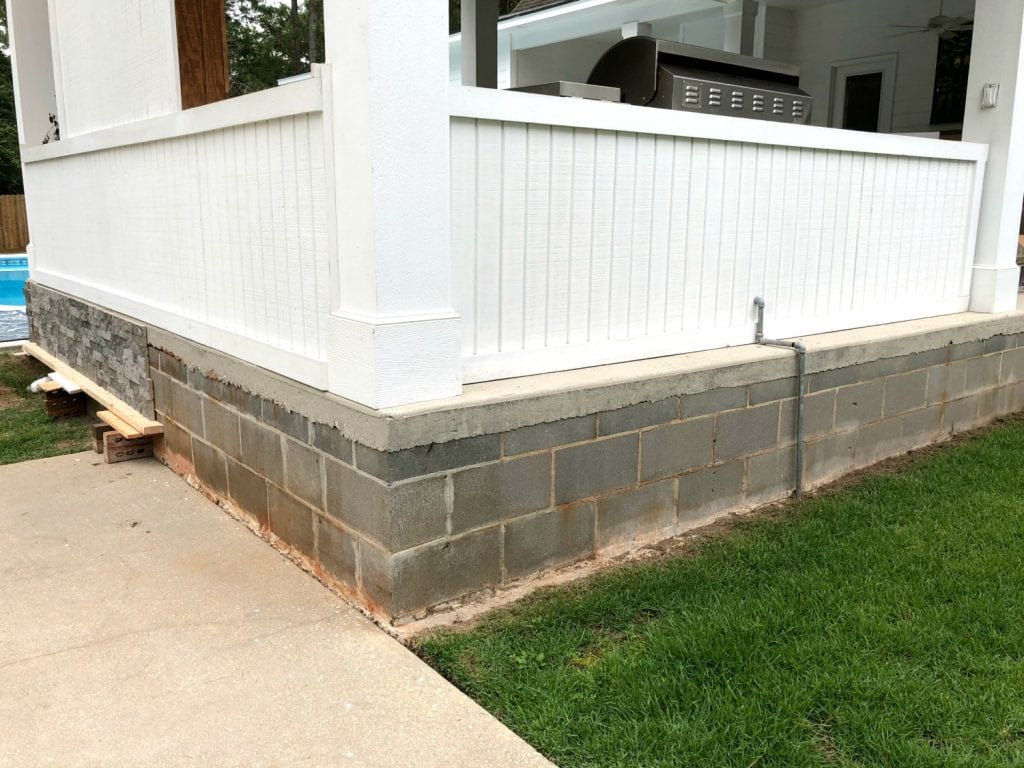
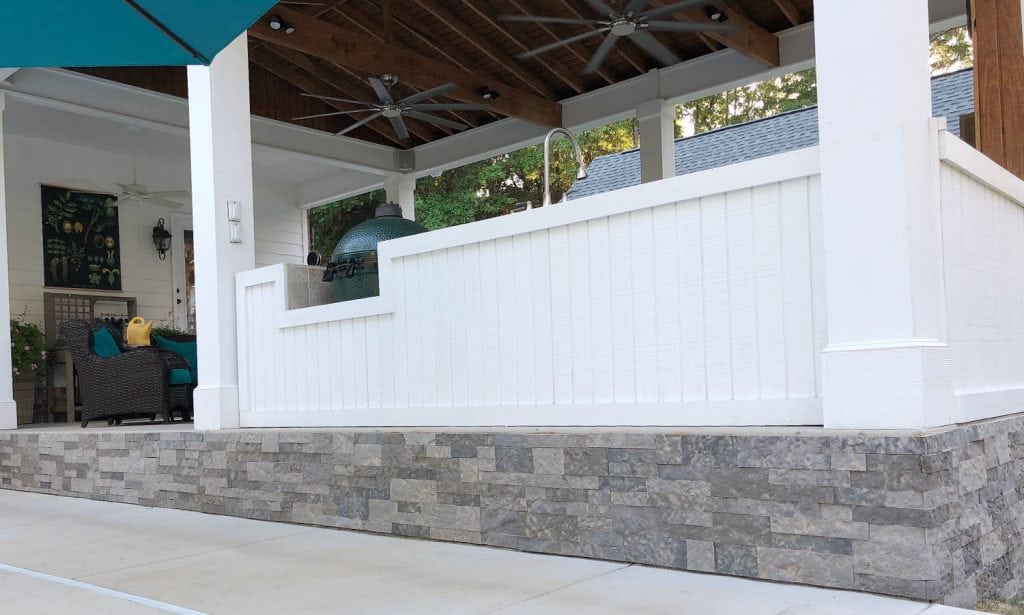
- We added the stone around this gas line, it’s not as noticeable now. I’m going to paint the top part white. I wish it would disappear. Ha, I love using the gas grill and I can live with this little eyesore.
-
- As the ground level changed, we lessened the row of stones to follow the natural slop of the foundation.
AirStone is 75% lighter than stone, easy to install and requires no grouting! Having Barry help me made the application go faster. We ended up using around 16 boxes of stone for this project, that’s about 128 square feet and let me tell you, that’s a lot of feet! 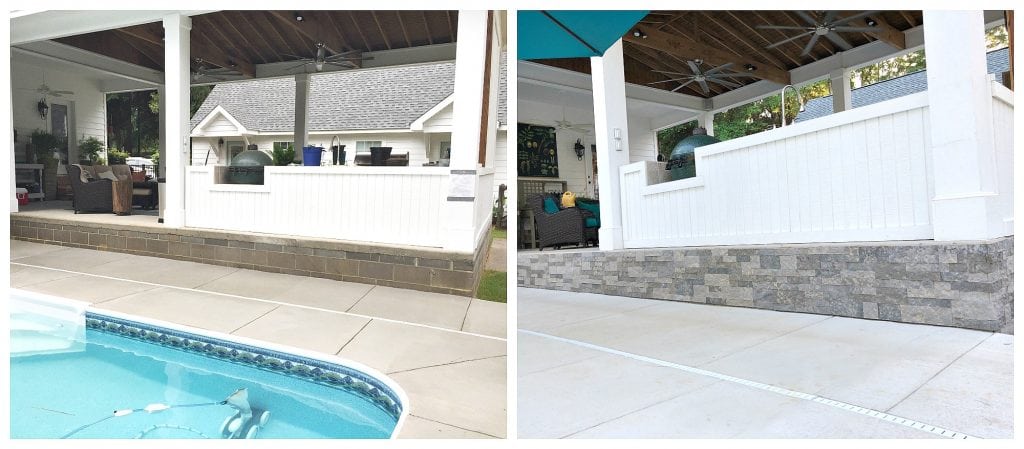
 AirStone can be used inside and outside your home. I am very happy with the way my porch foundation looks, let me know if you try it! Check out their site, see what colors are available. They have videos and ideas for application around the house: AirStone.
9 Comments
ArchiveThis looks fabulous! Totally changes the whole feel of the space.
Thanks so much Eliesa, it looks finished now and we love it!
Hi Debbie, Oh my the before and afters are amazing! What a transformation. Seriously, what a transformation. I would love to add Airstone to the front face of our porch steps. Our neighbors used real stone and it looks great. We have used a similar product for a fireplace refinish. I absolutely love the finished look (and the video with your cute accent).
How long did this project take you guys? Happy almost 4th of July from Colorado! Laura
debbie it looks so amazing...even though the before is pretty awesome too! I have never heard of this product but can see a few places around Duke Manor Farm that it would work.
Debbie, WOW, I love it!!!! Ya'll did a Beautiful Job!!!!
Thanks Libby, we are loving the way it looks!
It looks fantastic!! So much better now! XO
Debbie you did an amazing job! I am impressed that you and Barry did it together. Many couples, Bennie and I included, sure struggle with projects that are labors of love. Maybe too many chiefs! Enjoy because it is beautiful. (Watch out! You might have people wanting to hire you to do theirs!)
Hey, Debbie, this project turned out great! Love it and it will help us when we do the same thing on an ugly wall. Can't wait to transform it!