October 21, 2026 by Debbie Westbrooks
How to Use Puff Additive for Fabric
Live Videos · Crafts · DIY
I tried puff additive for fabric with permanent ink, and watching the gingerbread designs rise right off the fabric was so much fun. The finished texture reminds me of a cozy sweater or a little embroidered cookie, and it gives a simple shirt design a completely different look.
Mixing Permanent Ink With Puff Additive
This was the second part of my project, so the permanent ink and puff additive were already on the fabric when I started. I mixed the two in equal amounts, using a one to one ratio for the sections that I wanted to puff.
I let everything dry for twenty four hours before adding heat. That drying time matters because the directions for both the twenty four hour wait and the later washing time are printed on the puff additive.
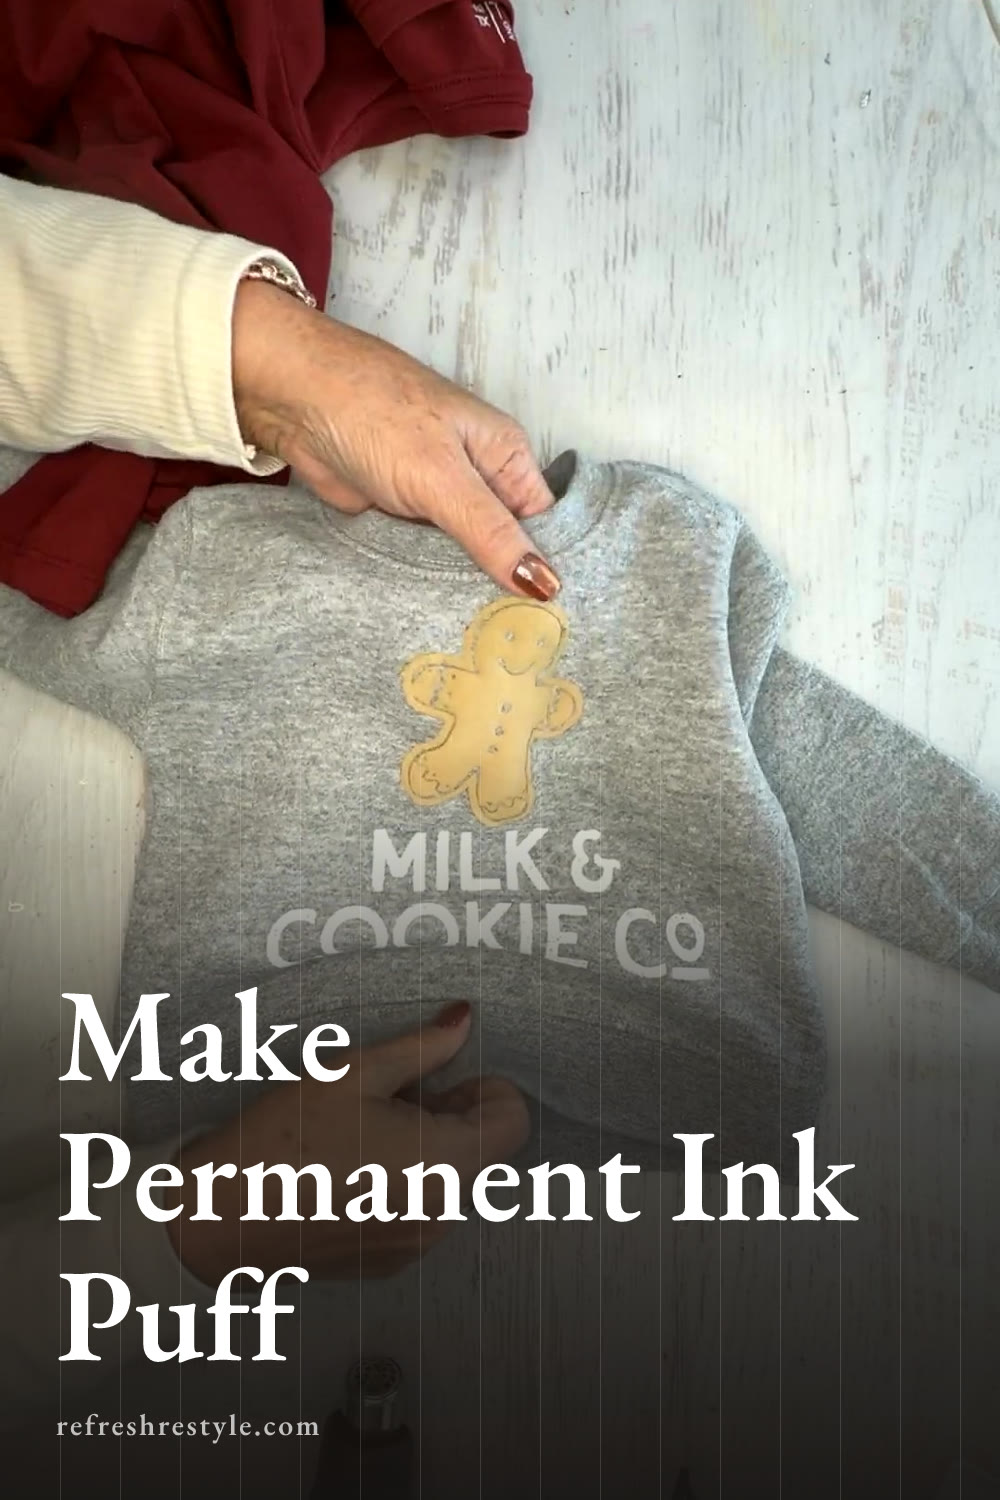
For the sweatshirt, I used the puff mixture on the gingerbread design and on the lettering. On my T shirt, I used regular white permanent ink for the writing and saved the puff mixture for the gingerbread man. That made it easy to see and feel the difference between the two finishes.
Activating the Puff Additive With Heat
I used a heat tool with two settings and started on the lower one. This tool gets much hotter than a dryer, so I was careful while I worked and kept in mind that I could feel the heat through the thinner T shirt fabric.
Heating the Gingerbread Design
I started with the gingerbread design on the sweatshirt. As soon as I moved the heat over it, I could see the mixture puffing up. It happened almost instantly.
The change was especially easy to see beside an area that was still flat. The regular ink looked like it had melted into the fabric, while the puff mixture sat higher and had a soft, raised appearance. It reminded me of embroidery at first, and then I decided it looked even more like sweater material.
After the gingerbread man puffed, I moved on to the letters. I kept the heat tool on its low setting and worked across the design so I could watch each section rise. One small spot needed a little more heat, so I went back over that area until the texture matched the rest.
Testing the Technique on Two Fabrics
I tried the same idea on a small sweatshirt and a T shirt. The sweatshirt was made from 55 percent cotton and 45 percent polyester. The T shirt was 100 percent cotton and came from Walmart, but it was simply something I already had in my closet.
The puff effect worked on both fabrics. The gingerbread design rose on the sweatshirt, and I could see it puffing on the cotton T shirt as soon as I added heat. The thinner T shirt allowed more heat to come through the fabric, so I handled the heat tool carefully.
You can use an ordinary T shirt for a project like this. My cotton shirt was nothing special, and the puffed gingerbread still had that cute raised texture when I finished.
Comparing Flat Ink and Puffed Ink
The T shirt gave me a clear comparison because I used white permanent ink for the lettering and the puff mixture only on the gingerbread man. The writing stayed smooth and flat against the shirt, while the gingerbread man became raised and textured.
I love using both finishes together because the puffed section stands out without needing every part of the design to have the same texture. You can see the difference, but you can feel it even more. The flat ink feels like part of the fabric, and the gingerbread has a soft, dimensional surface.
That texture is what makes this technique so cute for a gingerbread design. Once it puffs, the little character looks a bit like a cookie made from sweater material.
Drying and Washing the Finished Shirts
The puff additive includes instructions for the drying and washing times. I let the ink mixture dry for twenty four hours before using the heat tool, and I give the finished project seventy two hours before washing it.
The directions also say to avoid drying these projects in the dryer. I have put similar pieces in the dryer before, but that was my own choice and something to do at your own risk. Following the instructions on the puff additive is the best way to care for the finished design.
What I Learned From This Puff Additive Project
The lower setting on my heat tool worked well, and the puff effect appeared very quickly on both the sweatshirt and the cotton T shirt. Being able to compare the treated sections with the flat permanent ink made the transformation easy to see.
I also learned that the fabric blend did not keep either design from puffing. The sweatshirt blend and the 100 percent cotton shirt both gave me a raised result, although I could feel more heat through the thinner T shirt.
I love how different this finish looks and feels. The gingerbread design was the perfect choice for trying it because the soft texture made the character look even sweeter.
Chalk Couture supplies
Browse Chalk Couture Chalkology Ink, or shop my full store here.
I am an independent Chalk Couture designer, so I earn a commission on these links. See my disclosure for more.