
DIY Pizza - Bread Board
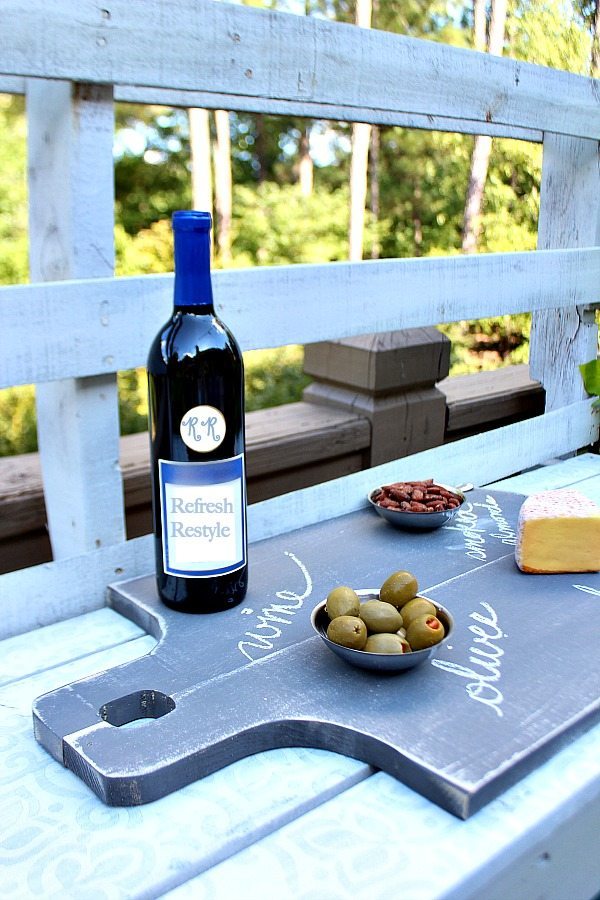 You know how it is when you can’t get something off your mind. Well that’s how I’ve felt for a while about these large cutting, pizza, bread boards! It seems like I see them everywhere. So when this months power tool challenge rolled around I decided to make some. Be sure to check out all the power tool projects at the bottom of the post! I had a 1” x 8” board just begging to become a pizza board or as I’m using them as a serving piece. I painted mine, these are purely decorative. Don’t put food directly on them.
 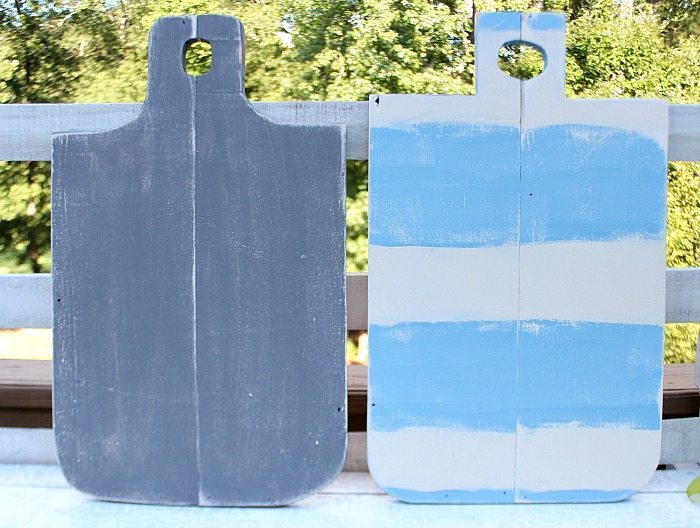 Here’s my inspiration:
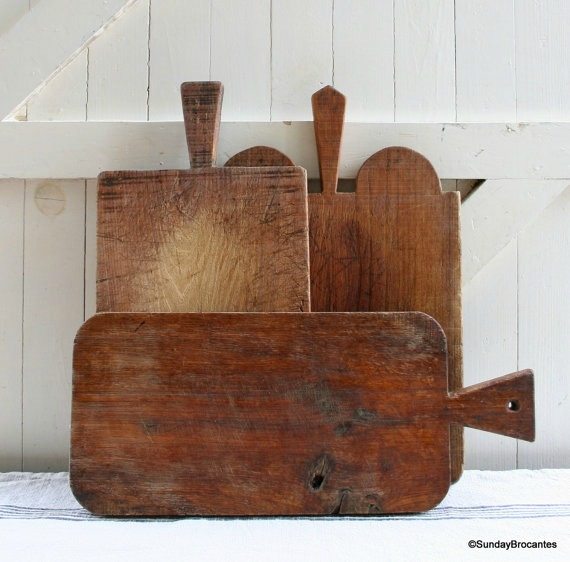
Photo Source
I love the real deal! Aren’t these gorgeous. I saw these on ETSY and of course they’ve sold. Just added - find some awesome wood (to make some like these) on my shopping list! 
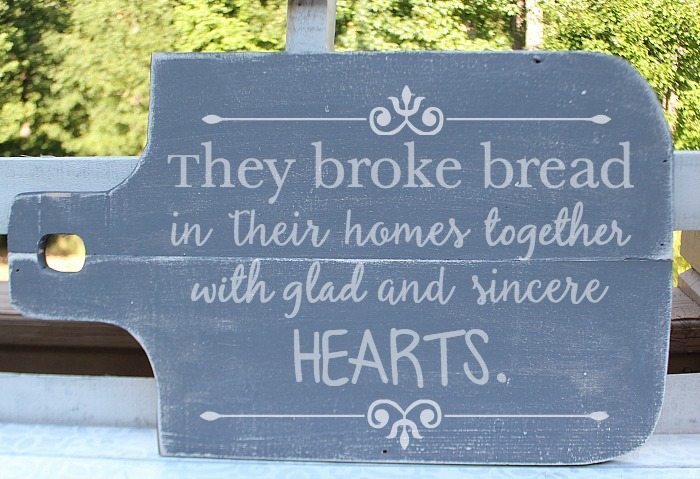 You could put a quote on them. Write something with chalk, use a silhouette, or make your own sign.
- 8’ - 1” x 8” common board
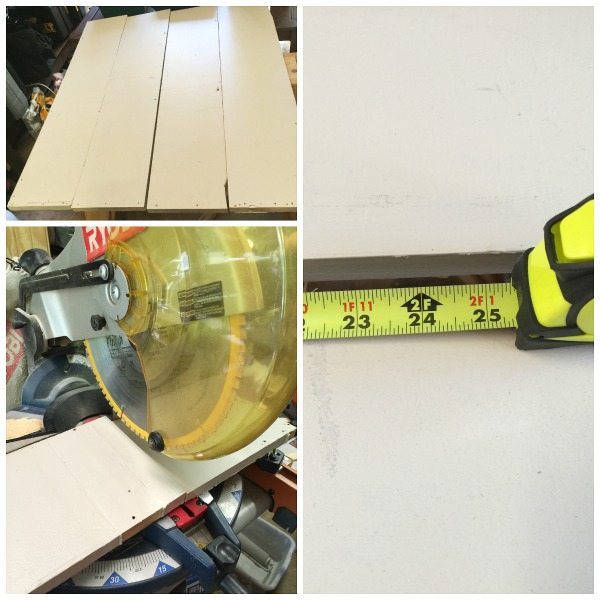
- saw - I used my miter saw
- Jig saw - I used my Rockwell Bladerunner
- Kreg jig for pocket holes
- 1” 1/4” Kreg Screws
- pencil and round object for drawing curves
- drill
- sander
- sand paper
- dowel
- paint - Waverly Elephant or any Chalk type paint
Overview:
- Measure and cut the 8’ board in to 4 - 24” pieces. Attach 2 boards with 4 pocket holes, equally spaced. Make sure that 2 of the pocket holes are near the edges. Trace a round object near the edge of your board to create the rounded edges and the paddle handle. Draw a circle in the handle for hanging. Use your drill to create a hole for inserting your Bladerunner/jig saw blade. Guide the jig saw or Bladerunner saw around your board to make the rounded cuts.
 Steps:
- Cut the board in to 4 pieces at 24” each. I used scrap wood, but you can buy 1 each 8’ long 1” x 8” board for this project.
(Photo from previous project.)
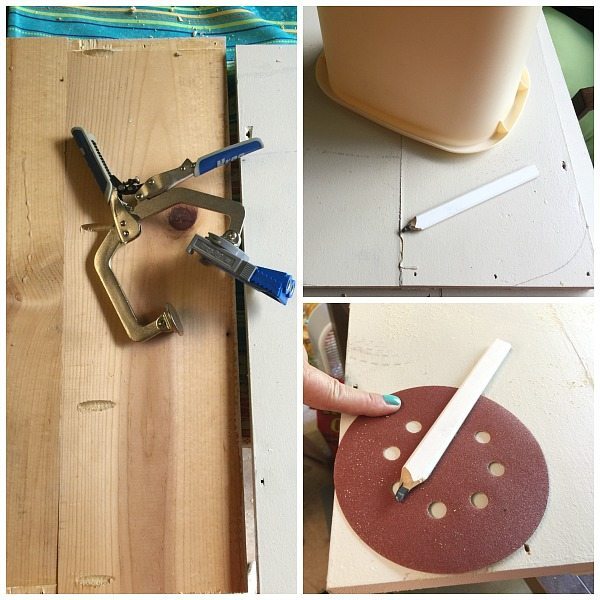
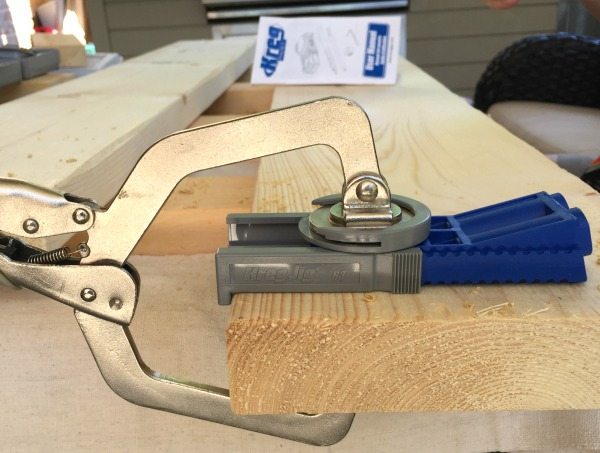
- Using the Kreg Jig - create pocket holes on the back of the boards, I did 4. Two spaced in the center and one on each end. I didn’t glue my boards but you can. Just add wood glue along the edge and use 1” 1/4” Kreg screws in each pocket hole to attach two of the boards. Repeat for your other 2 - 24” boards. Now you have two large boards ready to create rounded edges.
- Use a round piece of sand paper and the top edge of a trash can. Use anything you like to create your rounded edge shapes. Align your template and use a pencil to trace.
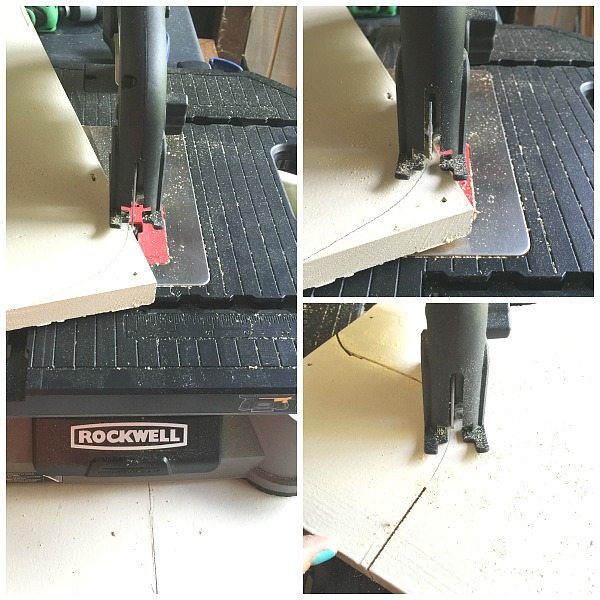
- Cut around your pencil marks to create the rounded edges and handle at the top. I used my Rockwell Bladerunner table saw. It’s light, compact and it’s easy to handle. You could use a jig saw.
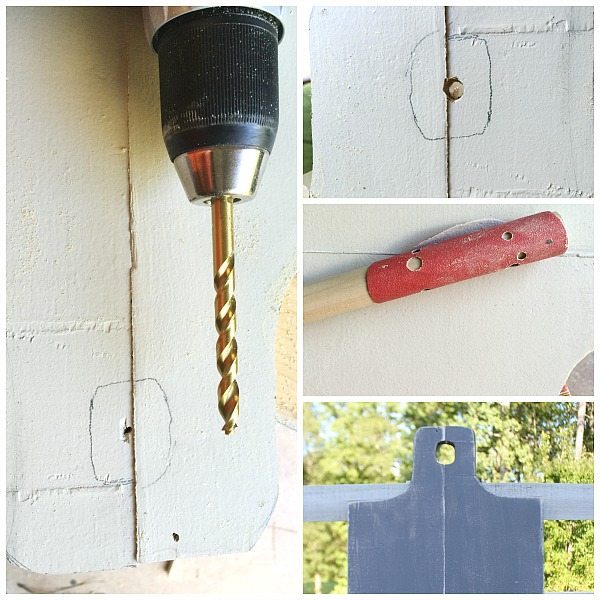
- For the handle of the bread board, I hand drew a circle or something that resembled a circle ;) Use a very large drill bit to make a pilot hole. Lift the guard of your Bladerunner, place the drilled hole over the blade and cut around your pencil line. You can also use a jig saw for this.
- Improvise: For sanding, I wrapped a piece of sand paper around a dowel. This works great for rounded areas.
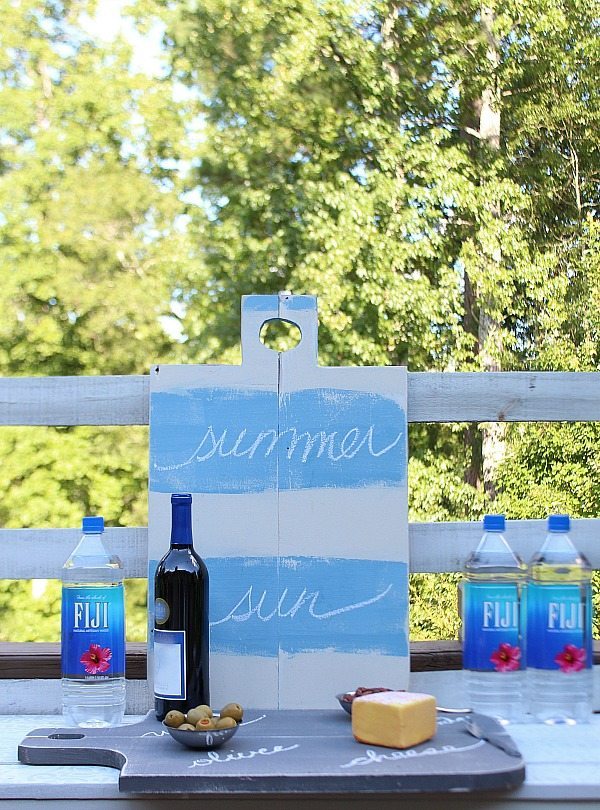
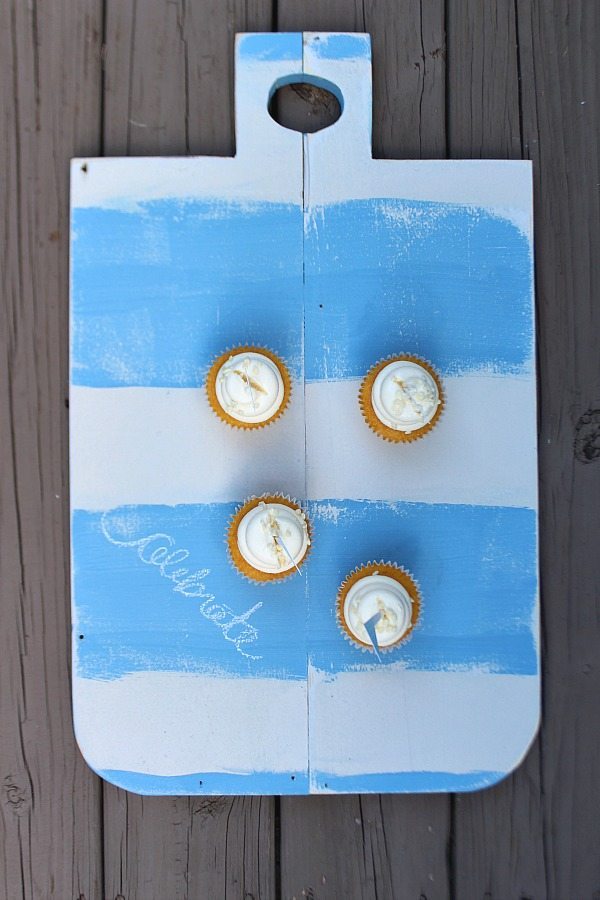
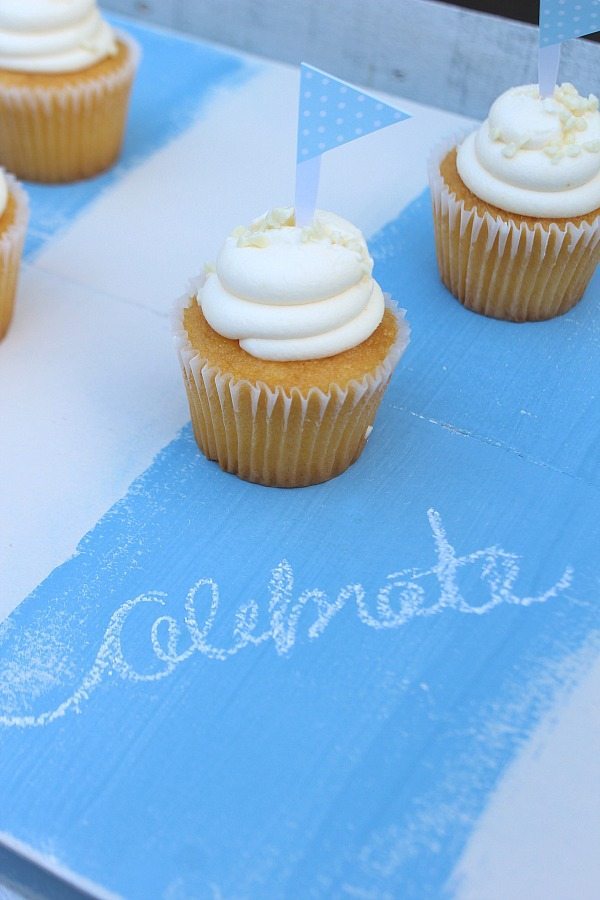
 Hang them on the wall, serve with them, use as a backdrop… so many options!
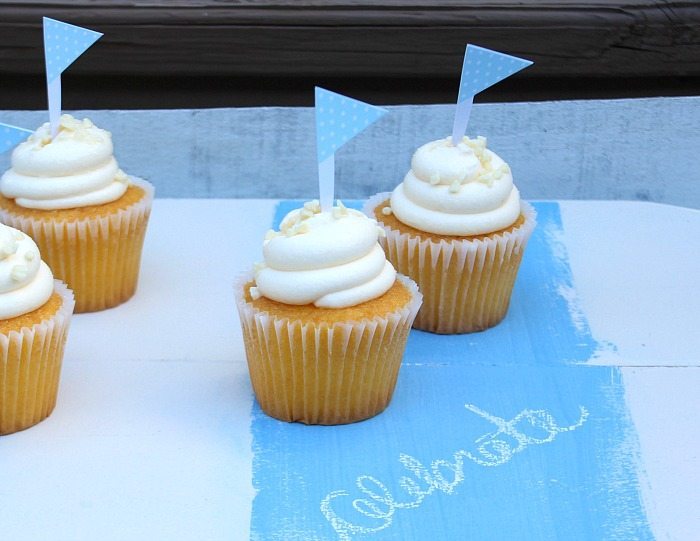
Now go celebrate because you just made a pizza bread board!
Click to visit the power tool challenge projects: Scroll Saw Wooden Basket by Kim Six Fix Easy DIY Picture Frames by Domestically Speaking DIY Wood Letter Jewelry Hanger by Designs By Studio C Circle Back Kids Chair Plans by Her Tool Belt Easy Wood Pumpkin Cutout by H2OBungalow DIY Pizza Bread Board by Refresh Restyle Small Step Stool by My Repurposed Life DIY Glue Gun Holder by Virginia Sweet Pea DIY Wooden Movie Projector by Thrift Diving 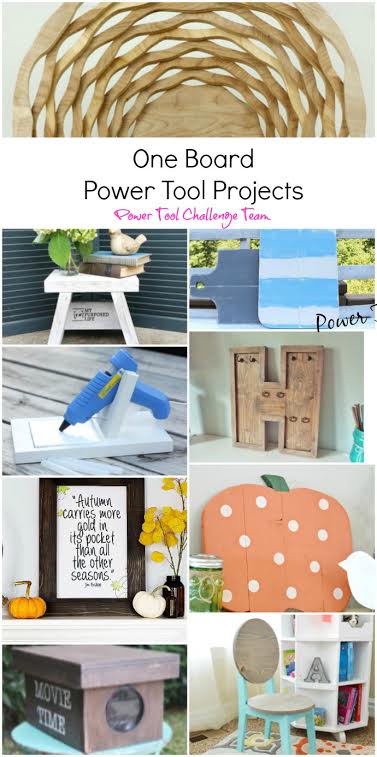
19 Comments
ArchiveYou rock! These are so cute and useful too. We are always looking for more creative ways to easily serve snacks when friends come over. Loving the chalkboard idea, it looks so bistro!
Love your power tool challenge each month Wendi! It stirs my creativity!
Debbie,
I love your pizza bread boards, they are sooo cute!
Thanks for the tip about wrapping sand paper around a dowel. That's a great idea!
pinned!
gail
Thanks Gail!! Another tip is frozen cupcakes ;)
Love these especially the one with the blue stripes...so cute!
Thanks Tammy, I think that ones my favorite too!
I have been wanting one of these and have been to cheap to spend the money and too lazy to make one! You just motivated me to make one! Yours turned out great!
Yes, so glad you're going to make you one! I'm with you, I am cheap too!
I've been searching thrift stores for one - might just make one instead... turned out so cute!
Yes, make you one!
Absolutely love it, Debbie!!! I want to make some antique looking bread boards! Need to get out the jig!
Yes get your jig out! I am looking for a piece of wood to make an antique looking one too!
What "fresh, fun ideas." Thaks for sharing.
Thanks so much Rhonda!
I love that you saw an inspiration picture and then you didn't hesitate to make your own version. This is such a great way to serve snacks in an attractive manner.
Thanks Paula, I really want to find a beautiful piece of wood and make one like the photo instead of scrap wood. I guess I can look at it as practice until I find it!
This turned out so fab! Thanks for sharing your crafty inspiration on this week's Monday Funday Party!
You have inspired me Deb with your fabulous DIY Pizza Bread Boards. I have been on the hunt for months and when I do finally come across them they are way too much $$. Never thought to make my own! Pinned to share and bookmark - thanks!
This would make a great gift! I love the chalk board paint idea so that snack can be placed on the board and labeled!