Shutter Shelf DIY Project
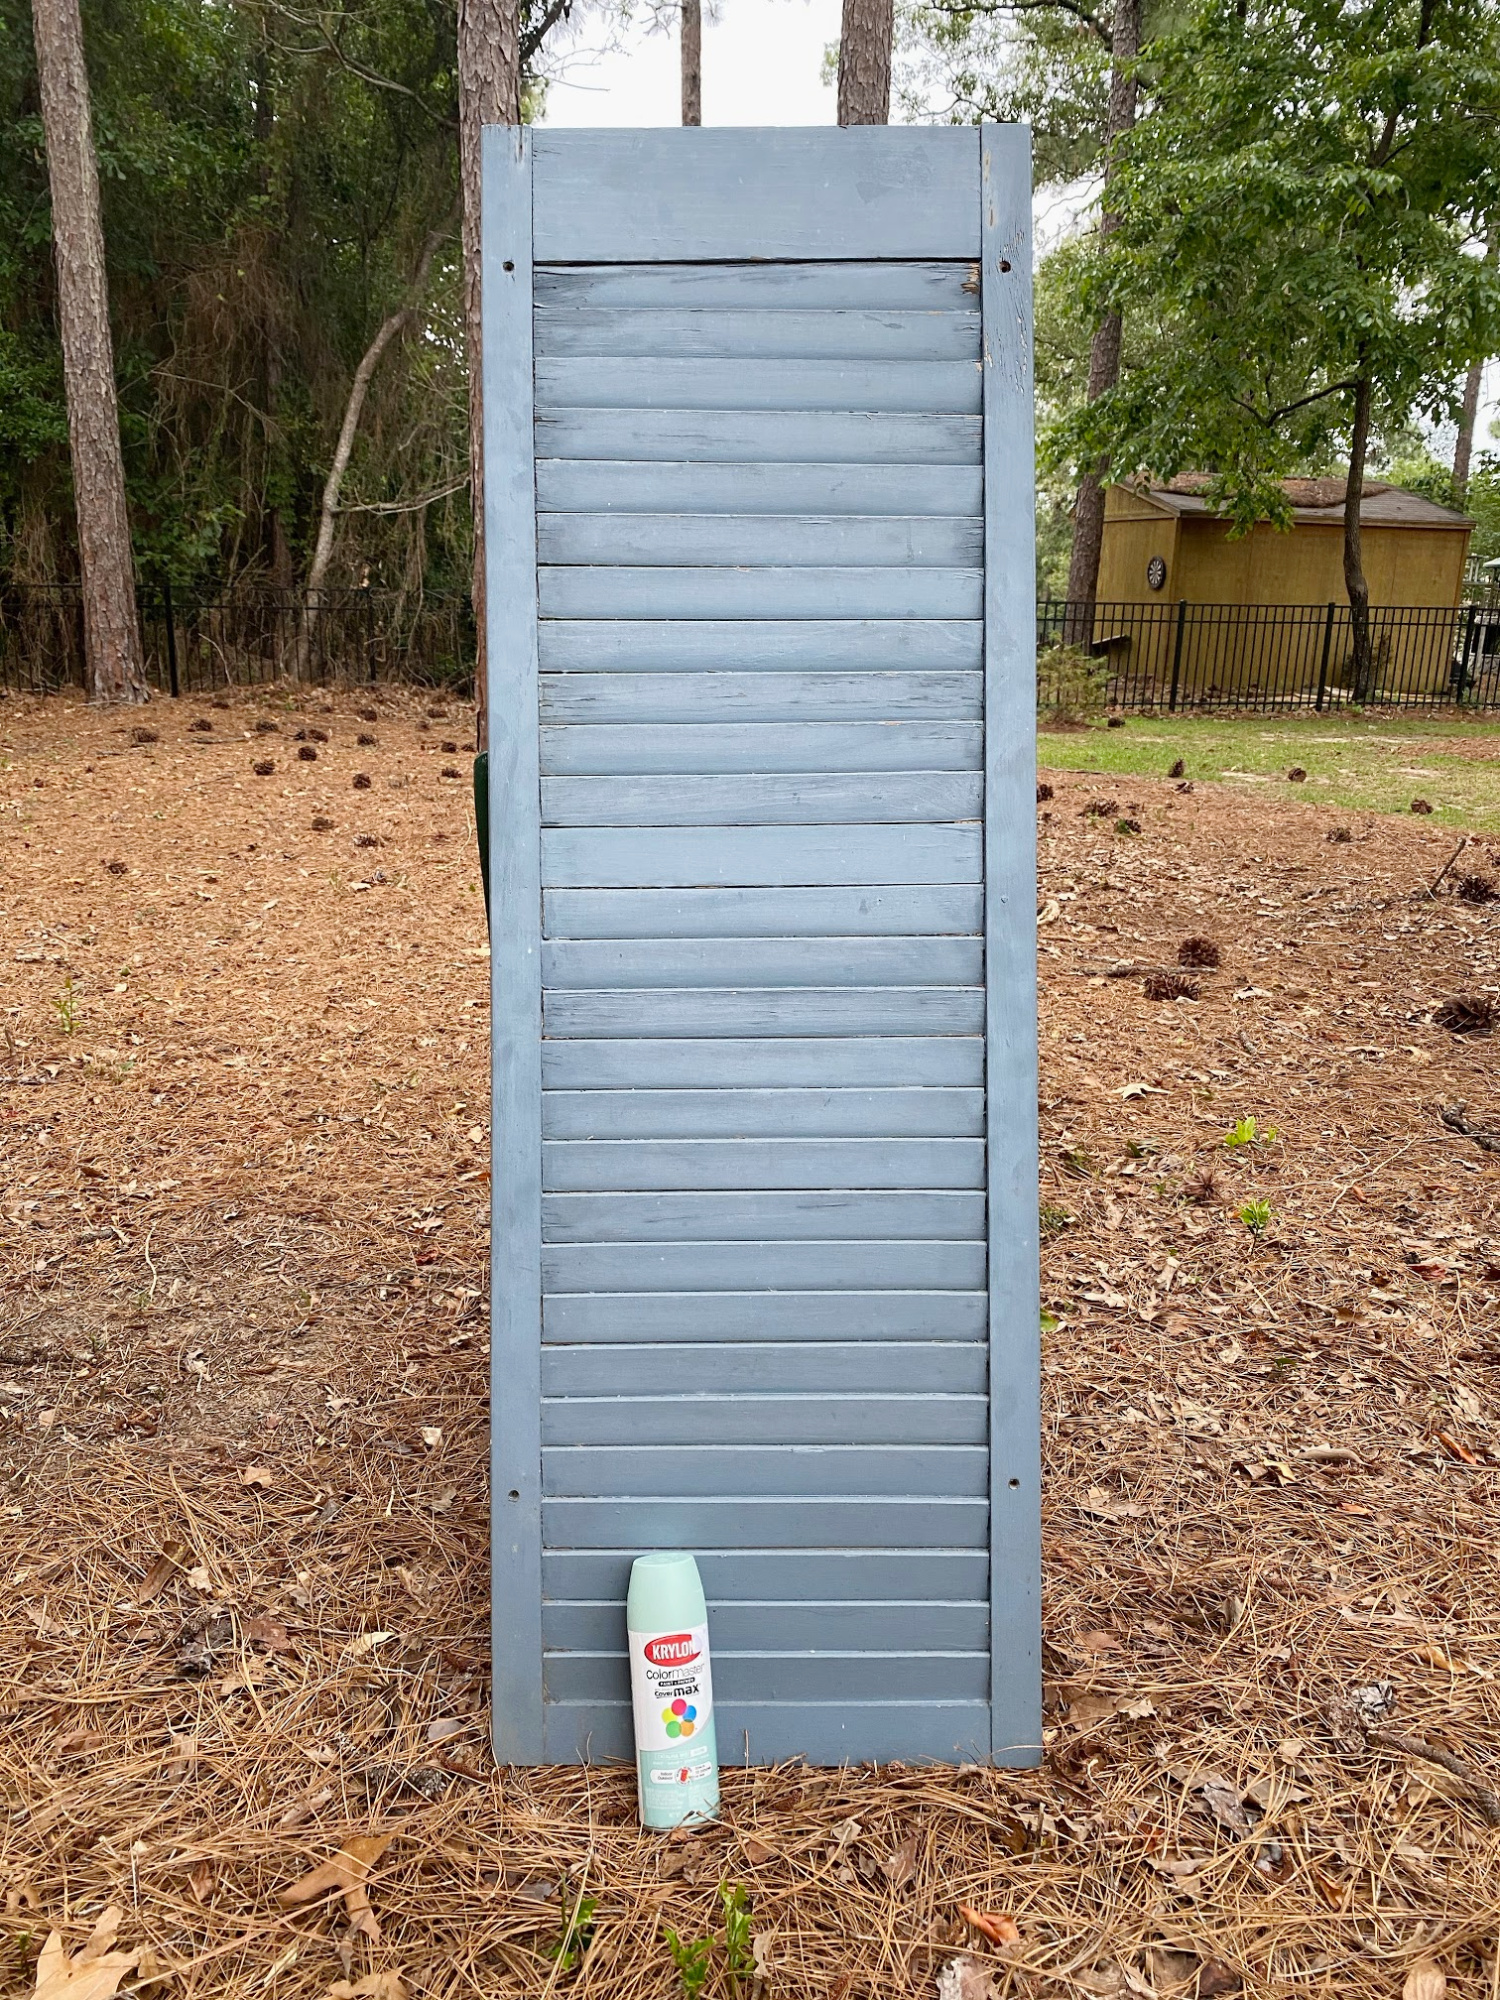
Hey y’all, today I’m sharing this Shutter Shelf DIY project that was a ton of fun! I scooped this shutter up as soon as I saw it! The only thing that would have made it better is if there were two of them!
Supplies for Shutter Shelf DIY
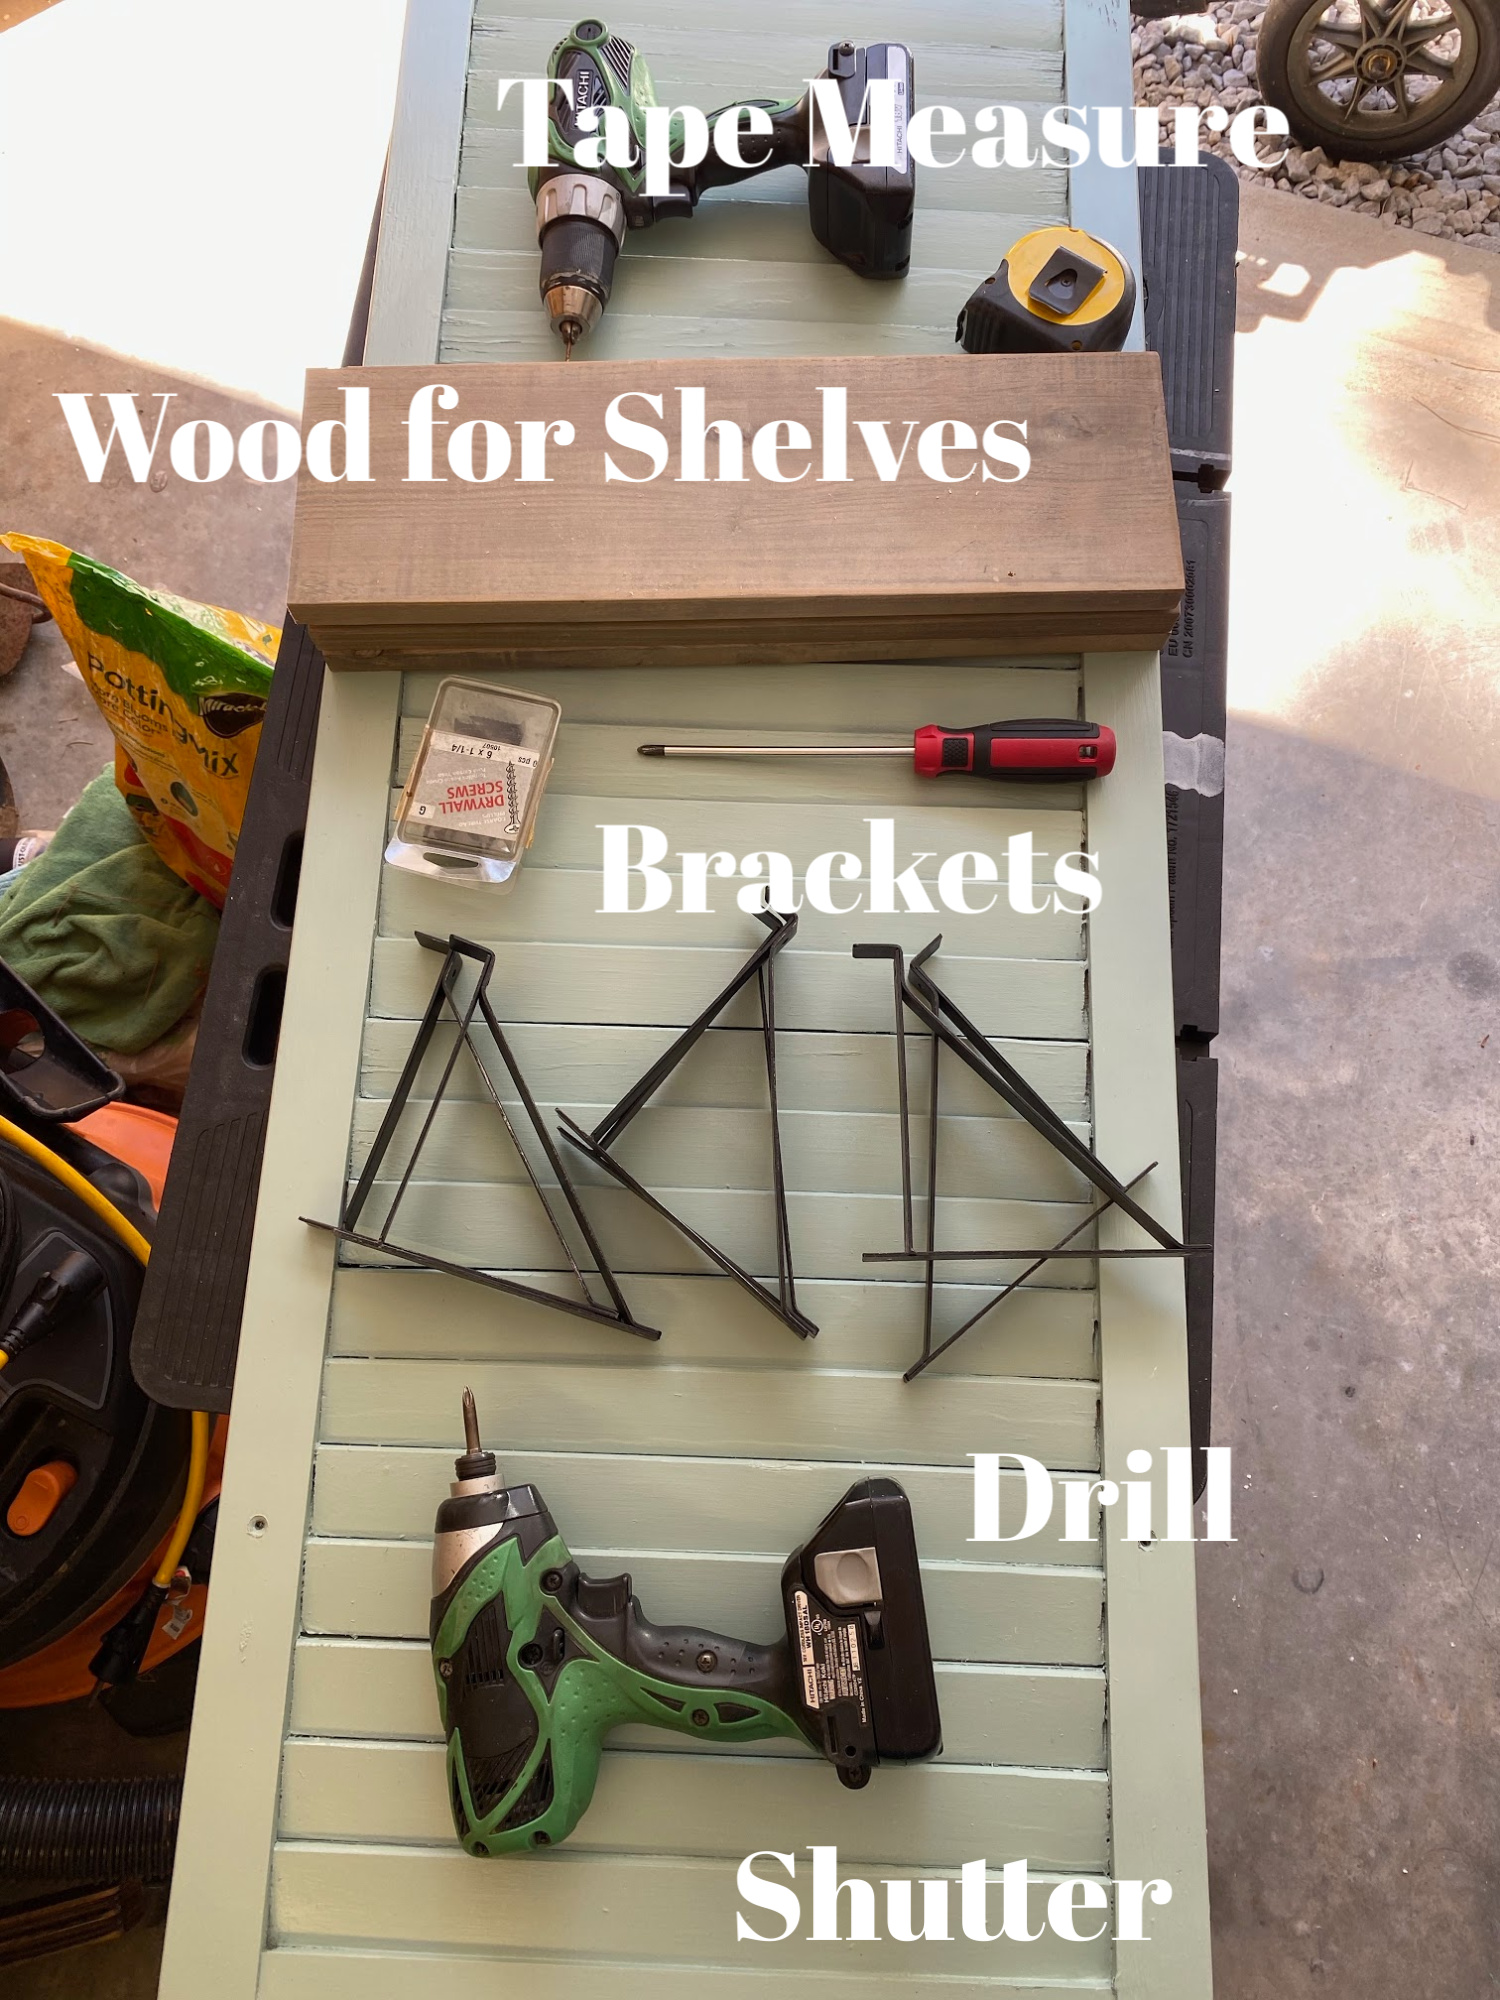
Before you begin making your DIY shutter shelf, you’ll need to gather all the necessary materials and tools. You’ll need a wooden shutter, a saw, sandpaper, wood glue, screws, a drill, a level, some brackets, and a shelf board. You may also want to gather some paint or stain if you plan on finishing your shelf. Make sure to measure your wall space and choose a shutter that fits the dimensions you need. Once you have all your materials and tools, you’re ready to start building your shutter shelf!
Supplies List
- Tape Measure
- Brackets
- Wood that fits the brackets
- Screws (Measure the depth of the shutter and bracket.)
- Drill/Drill Bits
- Screw driver or bits for the drill
- Saw for cutting the shelf boards (I used a miter saw.)
- Paint of your choice (I used Krylon spray paint.)
- Sand paper
Instructions for Shutter Shelf DIY
Step 1: Prepare your shutter for painting.
The first step in making your DIY shutter shelf is to prepare the shutters. If your shutter is already painted or stained, you may want to sand it down to create a more rustic look. Use sandpaper to remove any rough spots or splinters on the shutter. If your shutter is not already painted or stained, you can skip this step and move on to the next one. You can just spray it with a clear sealer to protect a chippy painted shutter. The only thing I did to mine was brush off a few cobwebs and then spray pained it. Once your shutter is sanded and smooth, you’re ready to move on to the next step.
Step 2: Cut and Sand the Shelves
After preparing the shutters, it’s time to cut and sand the shelves. Measure the width of your shutter and cut a piece of wood to fit. Sand the edges of the wood to smooth them out. Repeat this step for as many shelves as you want to add to your shutter. Once you have all your shelves cut and sanded, you’re ready to move on to the next step of assembling your DIY shutter shelf.
Step 3: Assemble the Shutter Shelf
Now that you have your shutters and shelves prepared, it’s time to assemble your DIY shutter shelf. Start by laying your shutter flat on a work surface with the back facing up. Place your first shelf on top of the shutter, making sure it’s centered and level.
- Use a tape measure to mark the spot for the brackets.
- Use a drill bit, just a little smaller than the screws. Attach brackets.
Similar Shelves:
Decide where you want your brackets, use the tape measure to space the brackets. Mark the holes with a pencil and use the drill with a drill bit to create the hole for the screws.
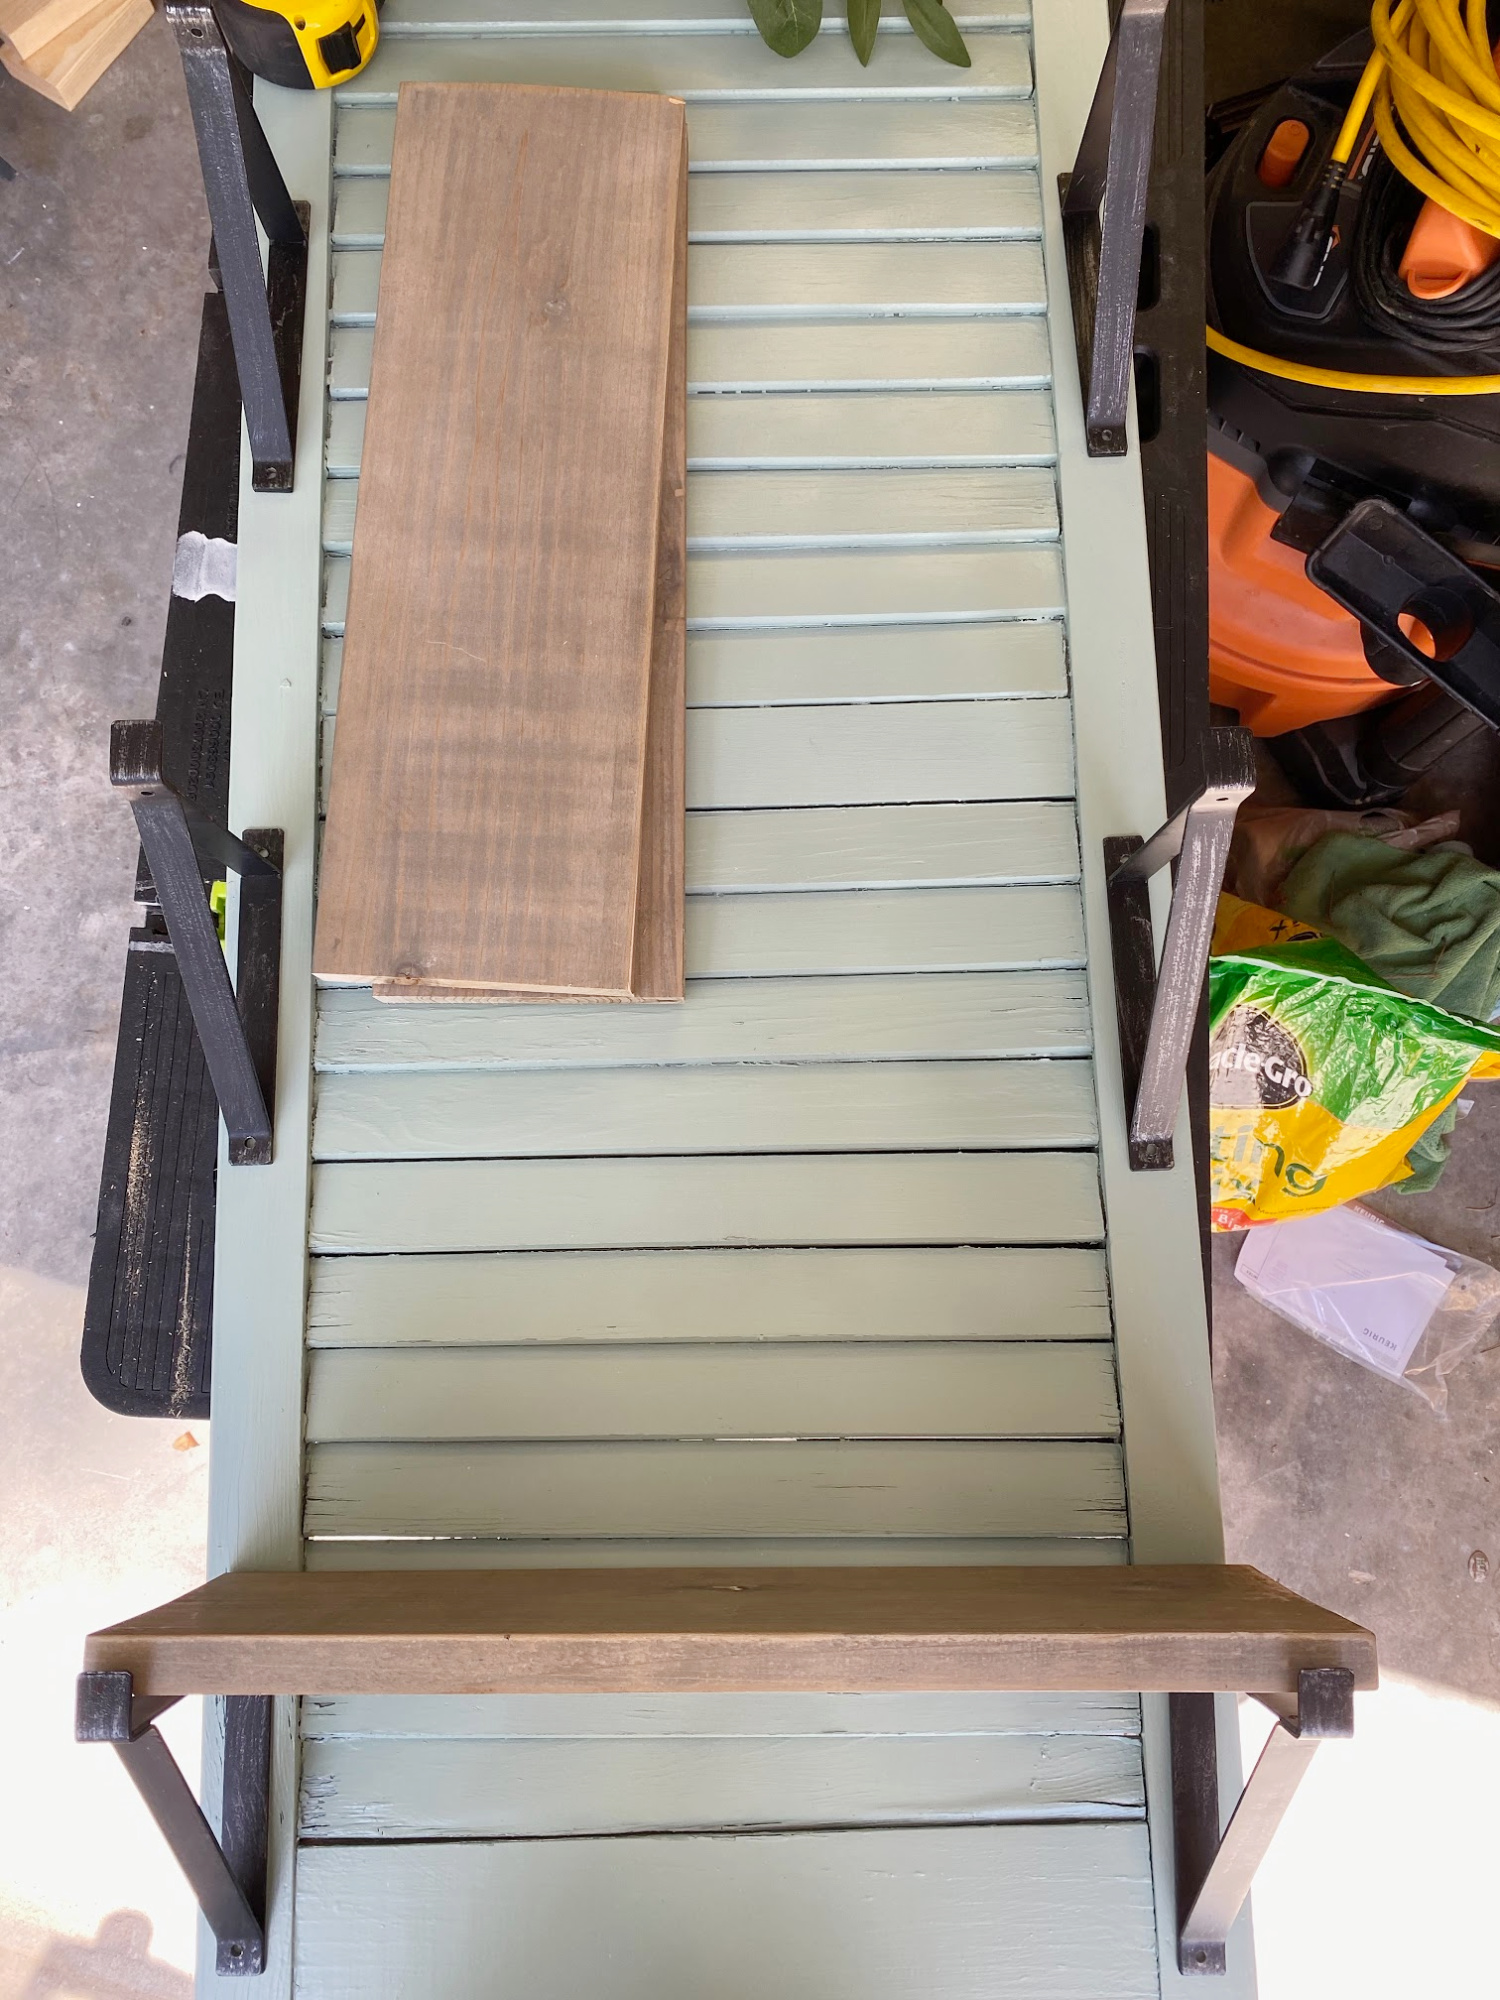
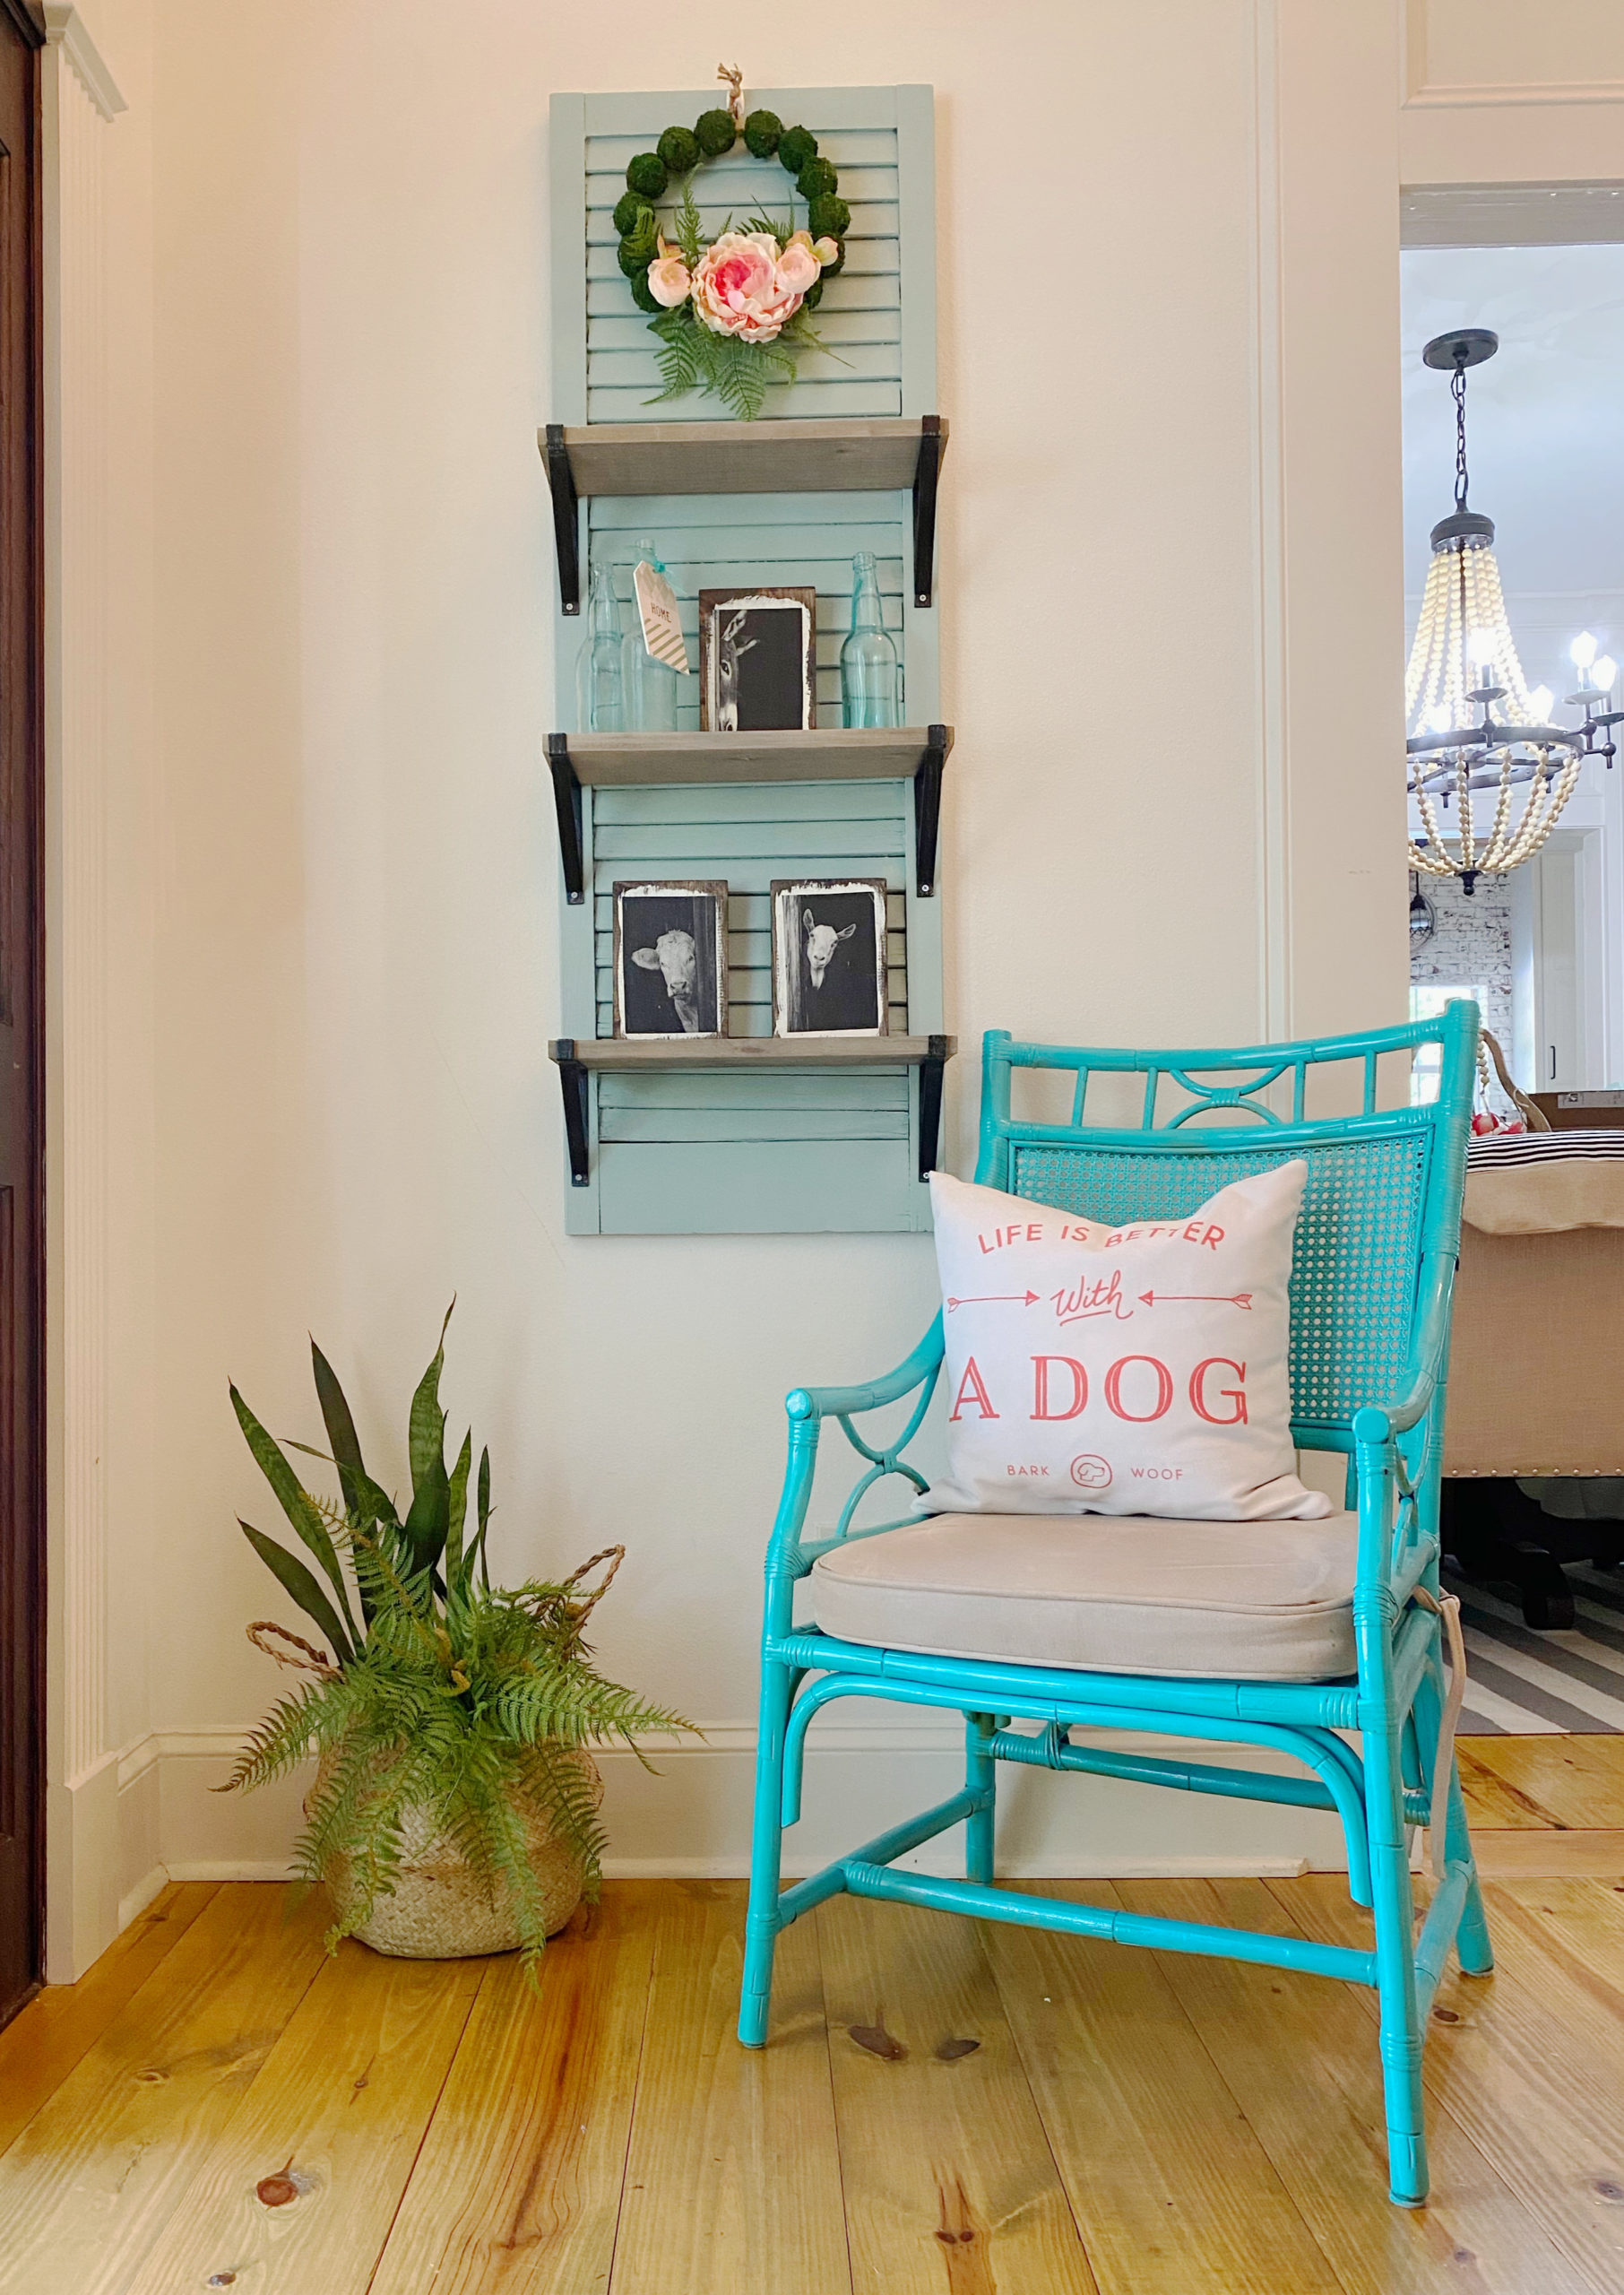
Repeat this step for each additional shelf, making sure to space them evenly. Once all shelves are attached, flip the shutter over and your DIY shutter shelf is complete! Hang it on your wall and enjoy your new rustic decor.
Step 4: Add Finishing Touches
I left room at the top of my shutter to add a wreath. This is totally optional, add shelves anywhere you’d like.
Be sure to check out all the other ideas!
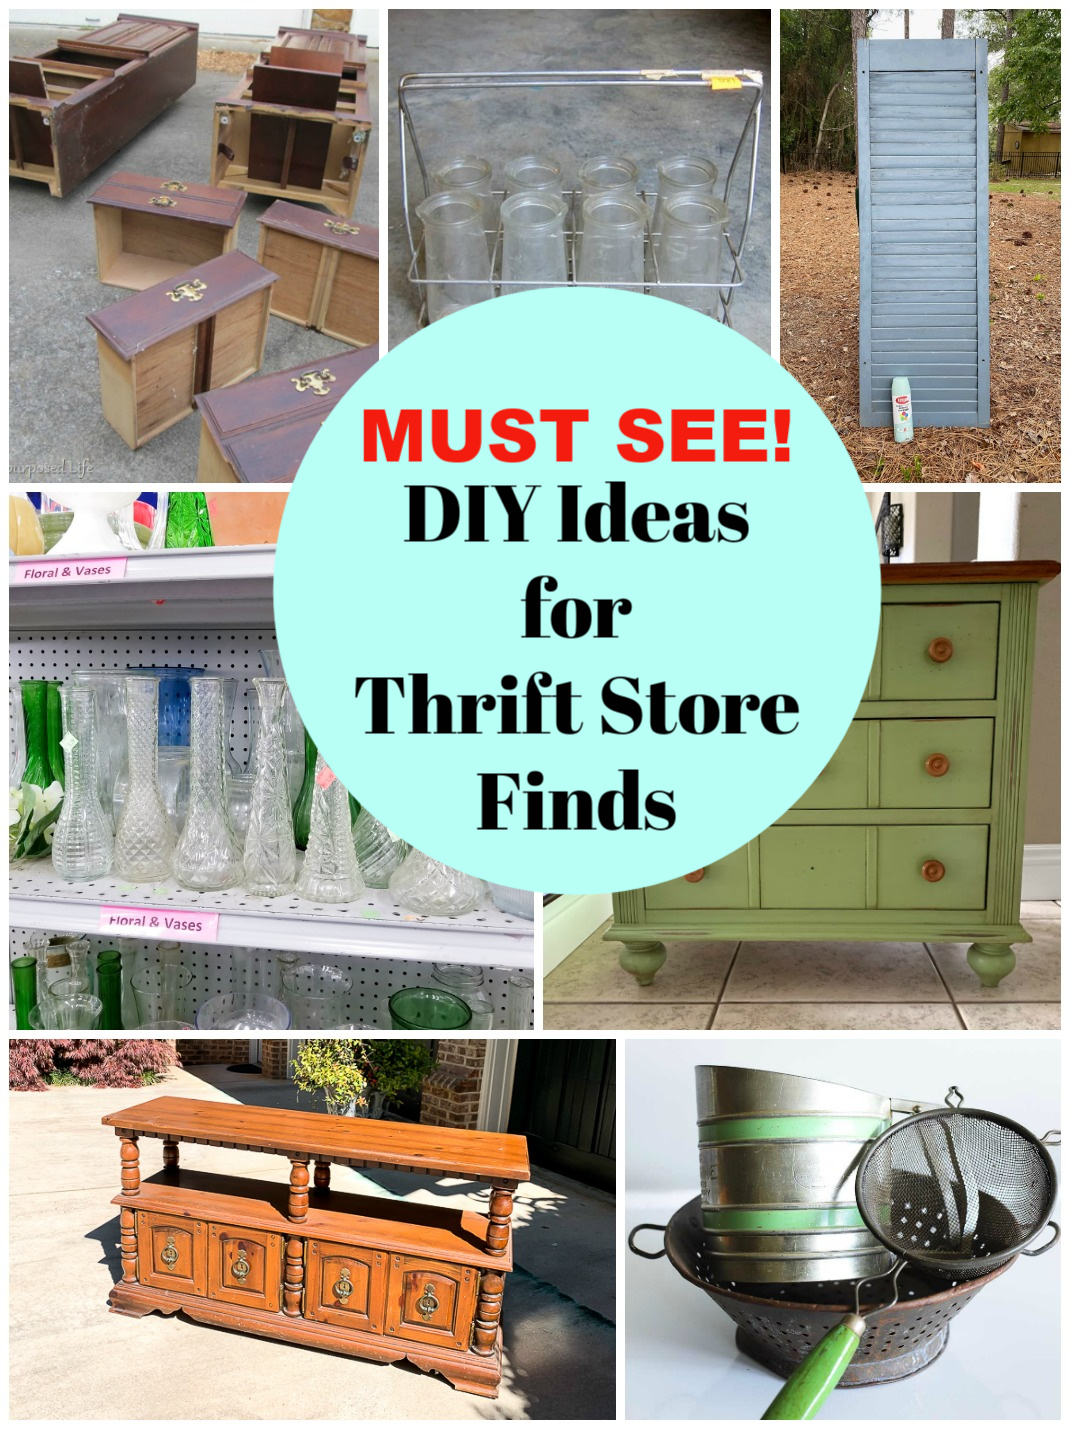
CLICK TO SEE EACH MAKEOVER”
Bookcase Makeover
Urine Specimen Bottle Display
Shutter Shelf DIY
TV Console Makeover
Nightstand Makeover
Florist Vase Makeover Inspired by Cloisonne
Repurposed Kitchen Tools As Planters
More ideas here:
6 Comments
ArchiveThat turned out very cute! Love those brackets and that wreath on top is co cute!
Debbie,
I love old shutter projects. Your shutter shelf is sooo cute and looks perfect in your home. Thanks for all your great tips.
pinned!
gail
This is so unique, I love how it turned out!!!
I love it! It's perfect as a shelf and the slats give it so much visual interest, too. Great project!
What a fabulous idea for an old shutter. You always amaze me with your creativity!
Cute! I have to try this. I just sold 3 shutters in my booth! Now have to find some more.